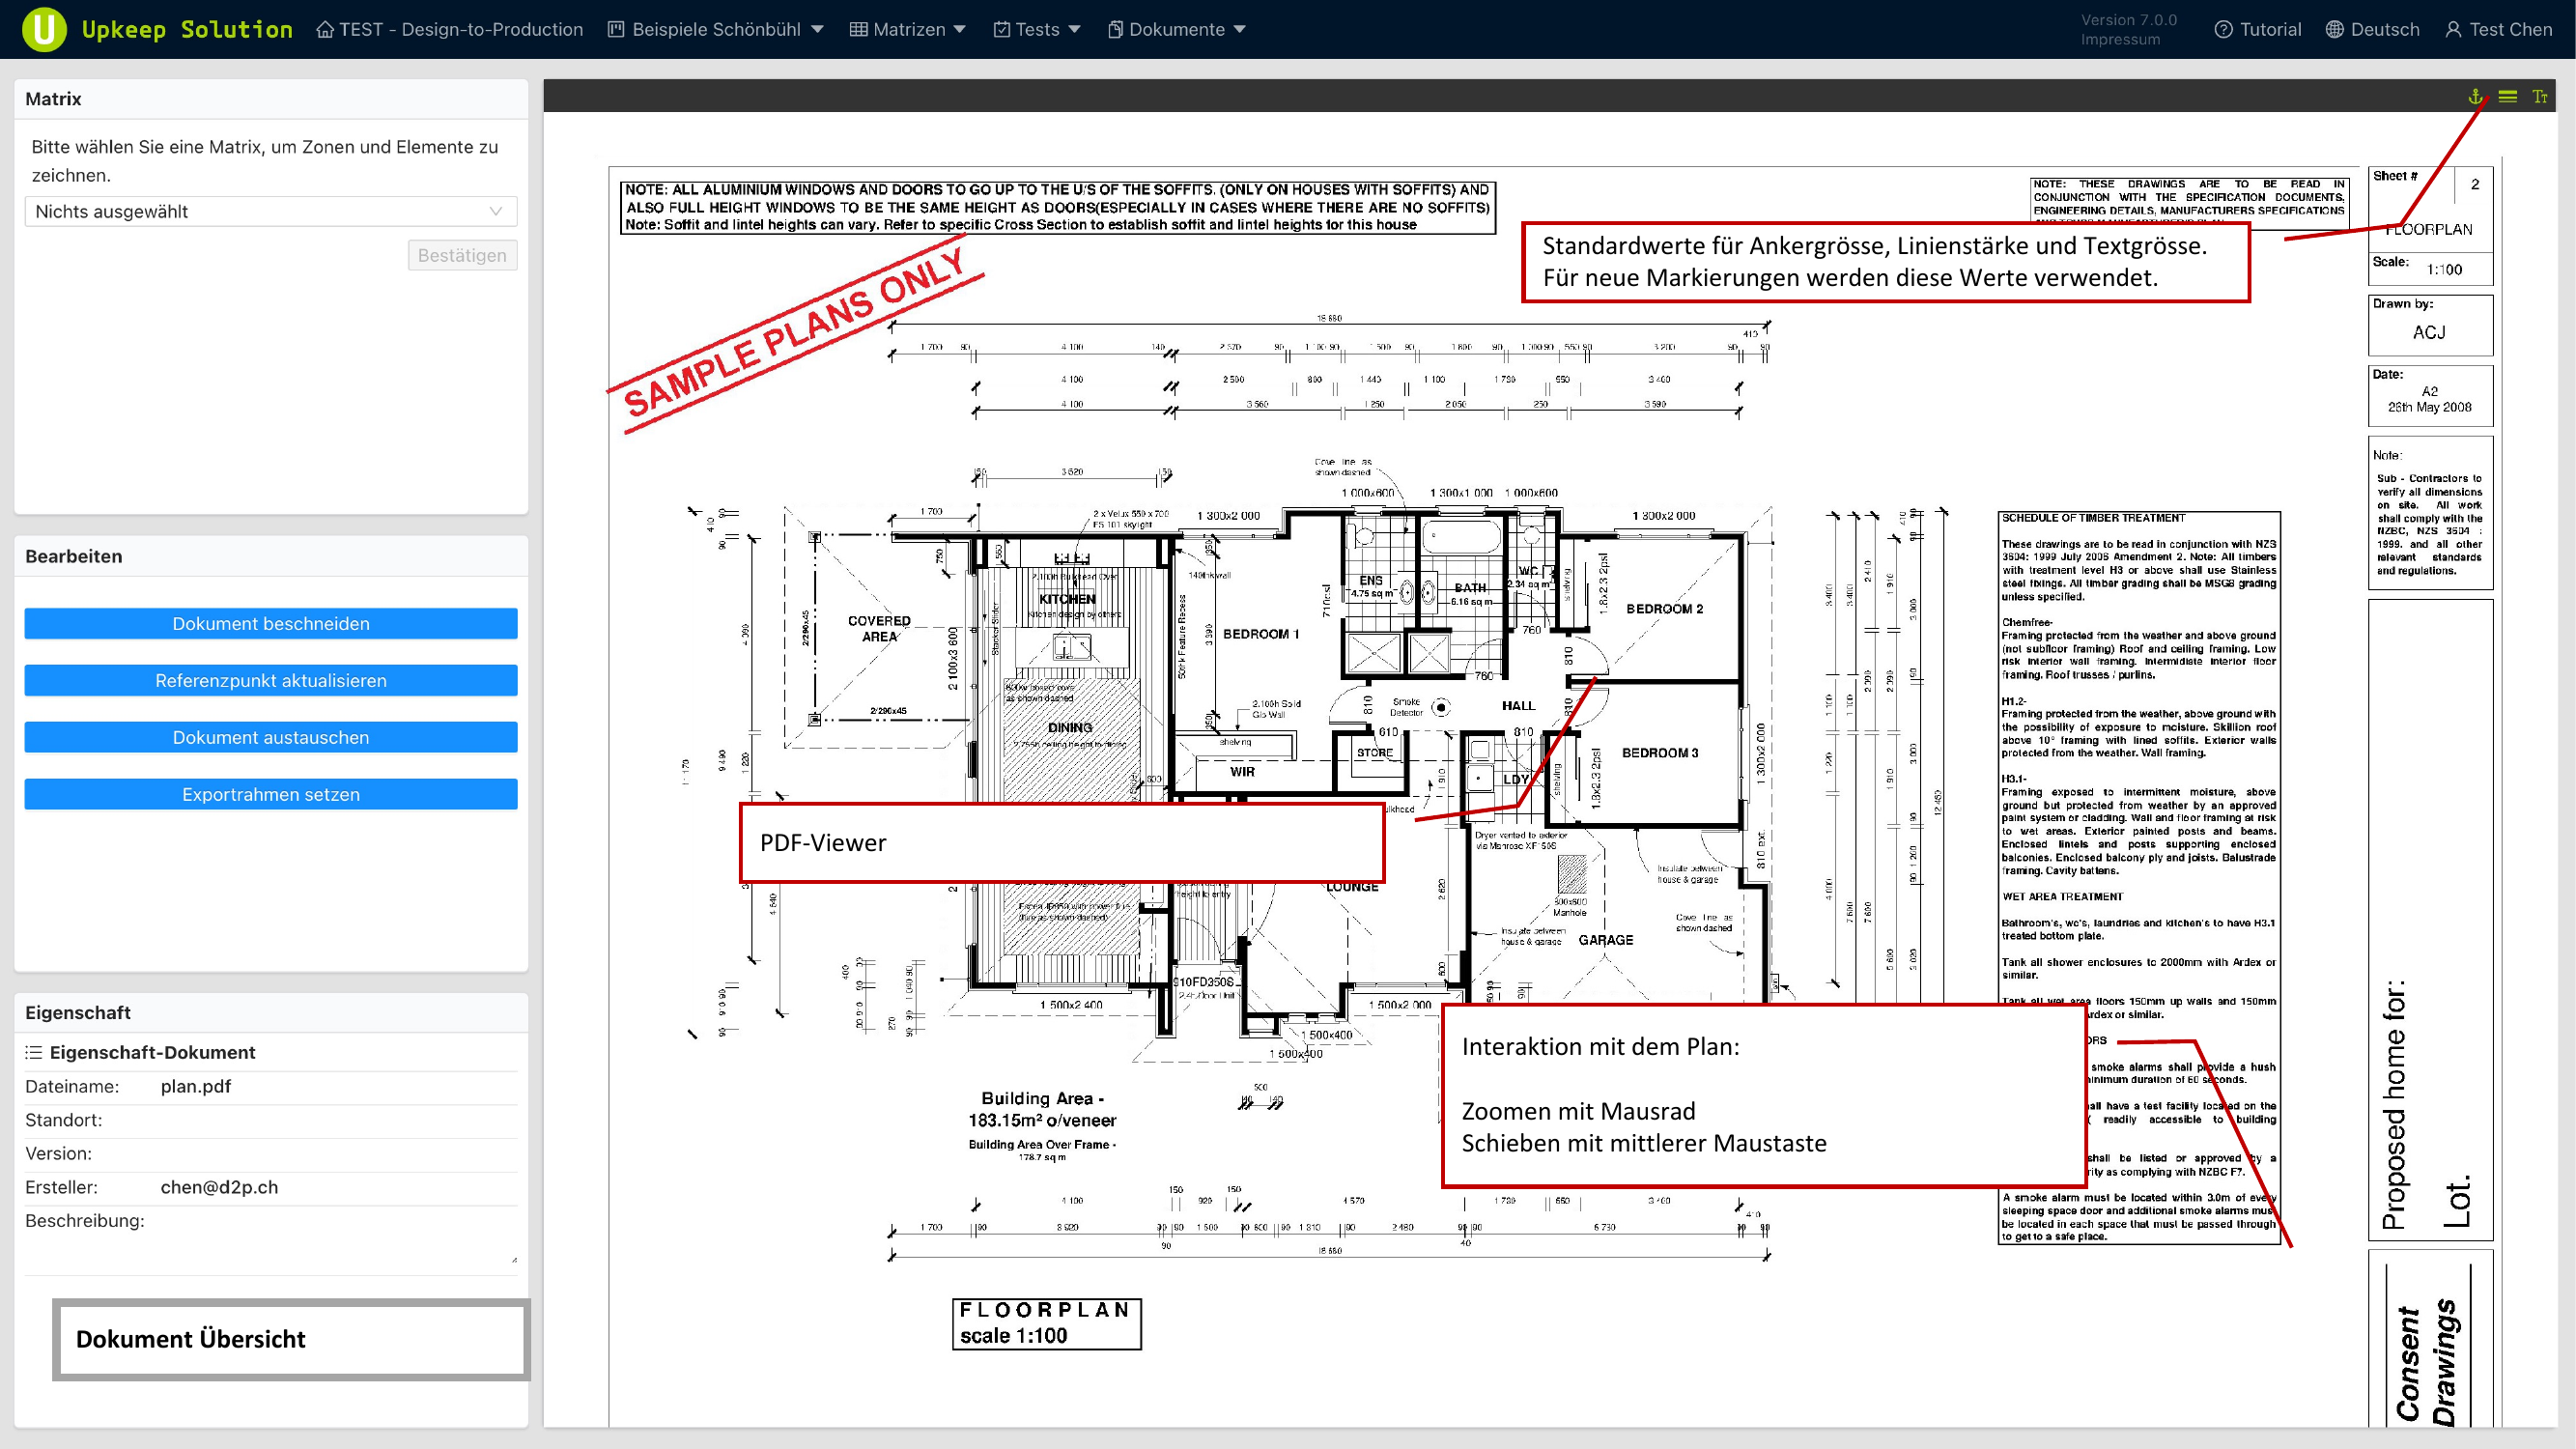
Plan Editor
The Plan-Editor is opened when you select a floor plan document. It displays the PDF as an interactive canvas on which you can place matrices, zones, and elements.
Navigating the Plan Editor
- Zoom — Scroll the mouse wheel to zoom in and out
- Pan — Hold the middle mouse button to move the plan in any direction
- Left sidebar — Contains the matrix selection, editing tools, and document properties
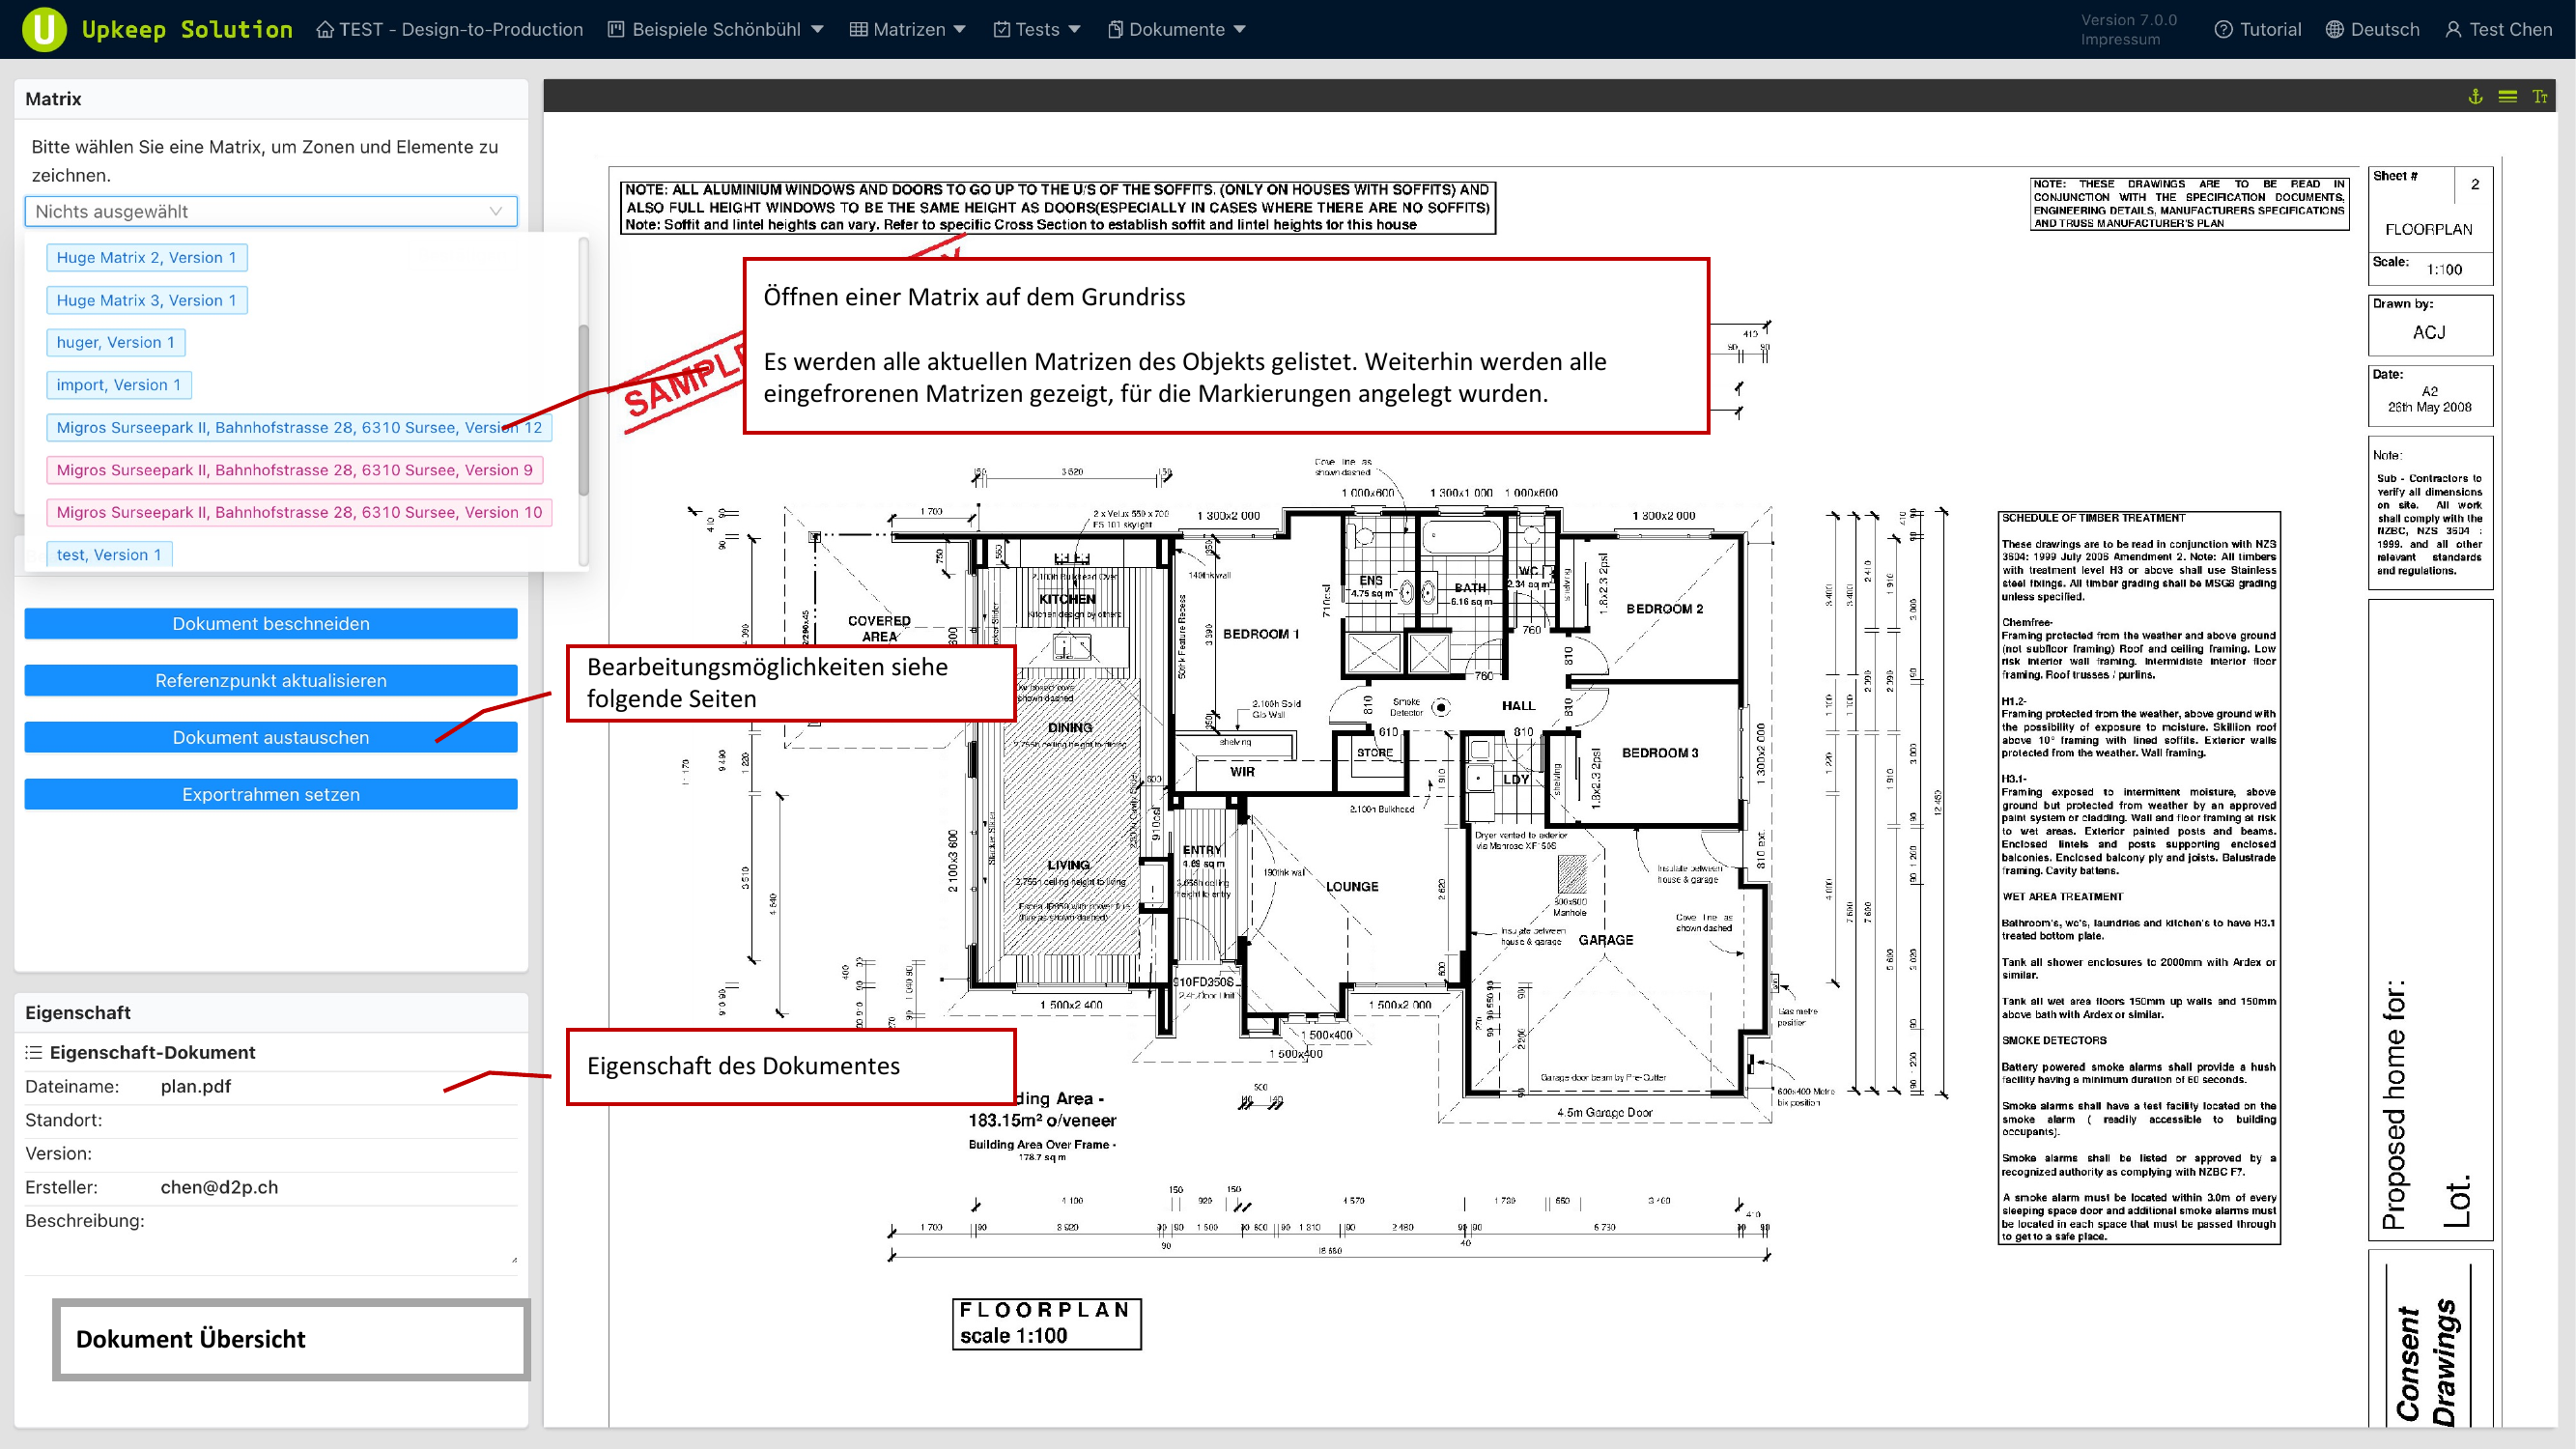
Matrix Selection
The left sidebar lists all available matrices:
- Current matrices — All active matrices for the property
- Frozen matrices — Matrices from completed inspections that already have markings on the plan
Select a matrix to display and edit its markings on the plan.
Document Cropping
The cropping function allows you to narrow the visible area of the floor plan. A movable and resizable frame defines the crop area.
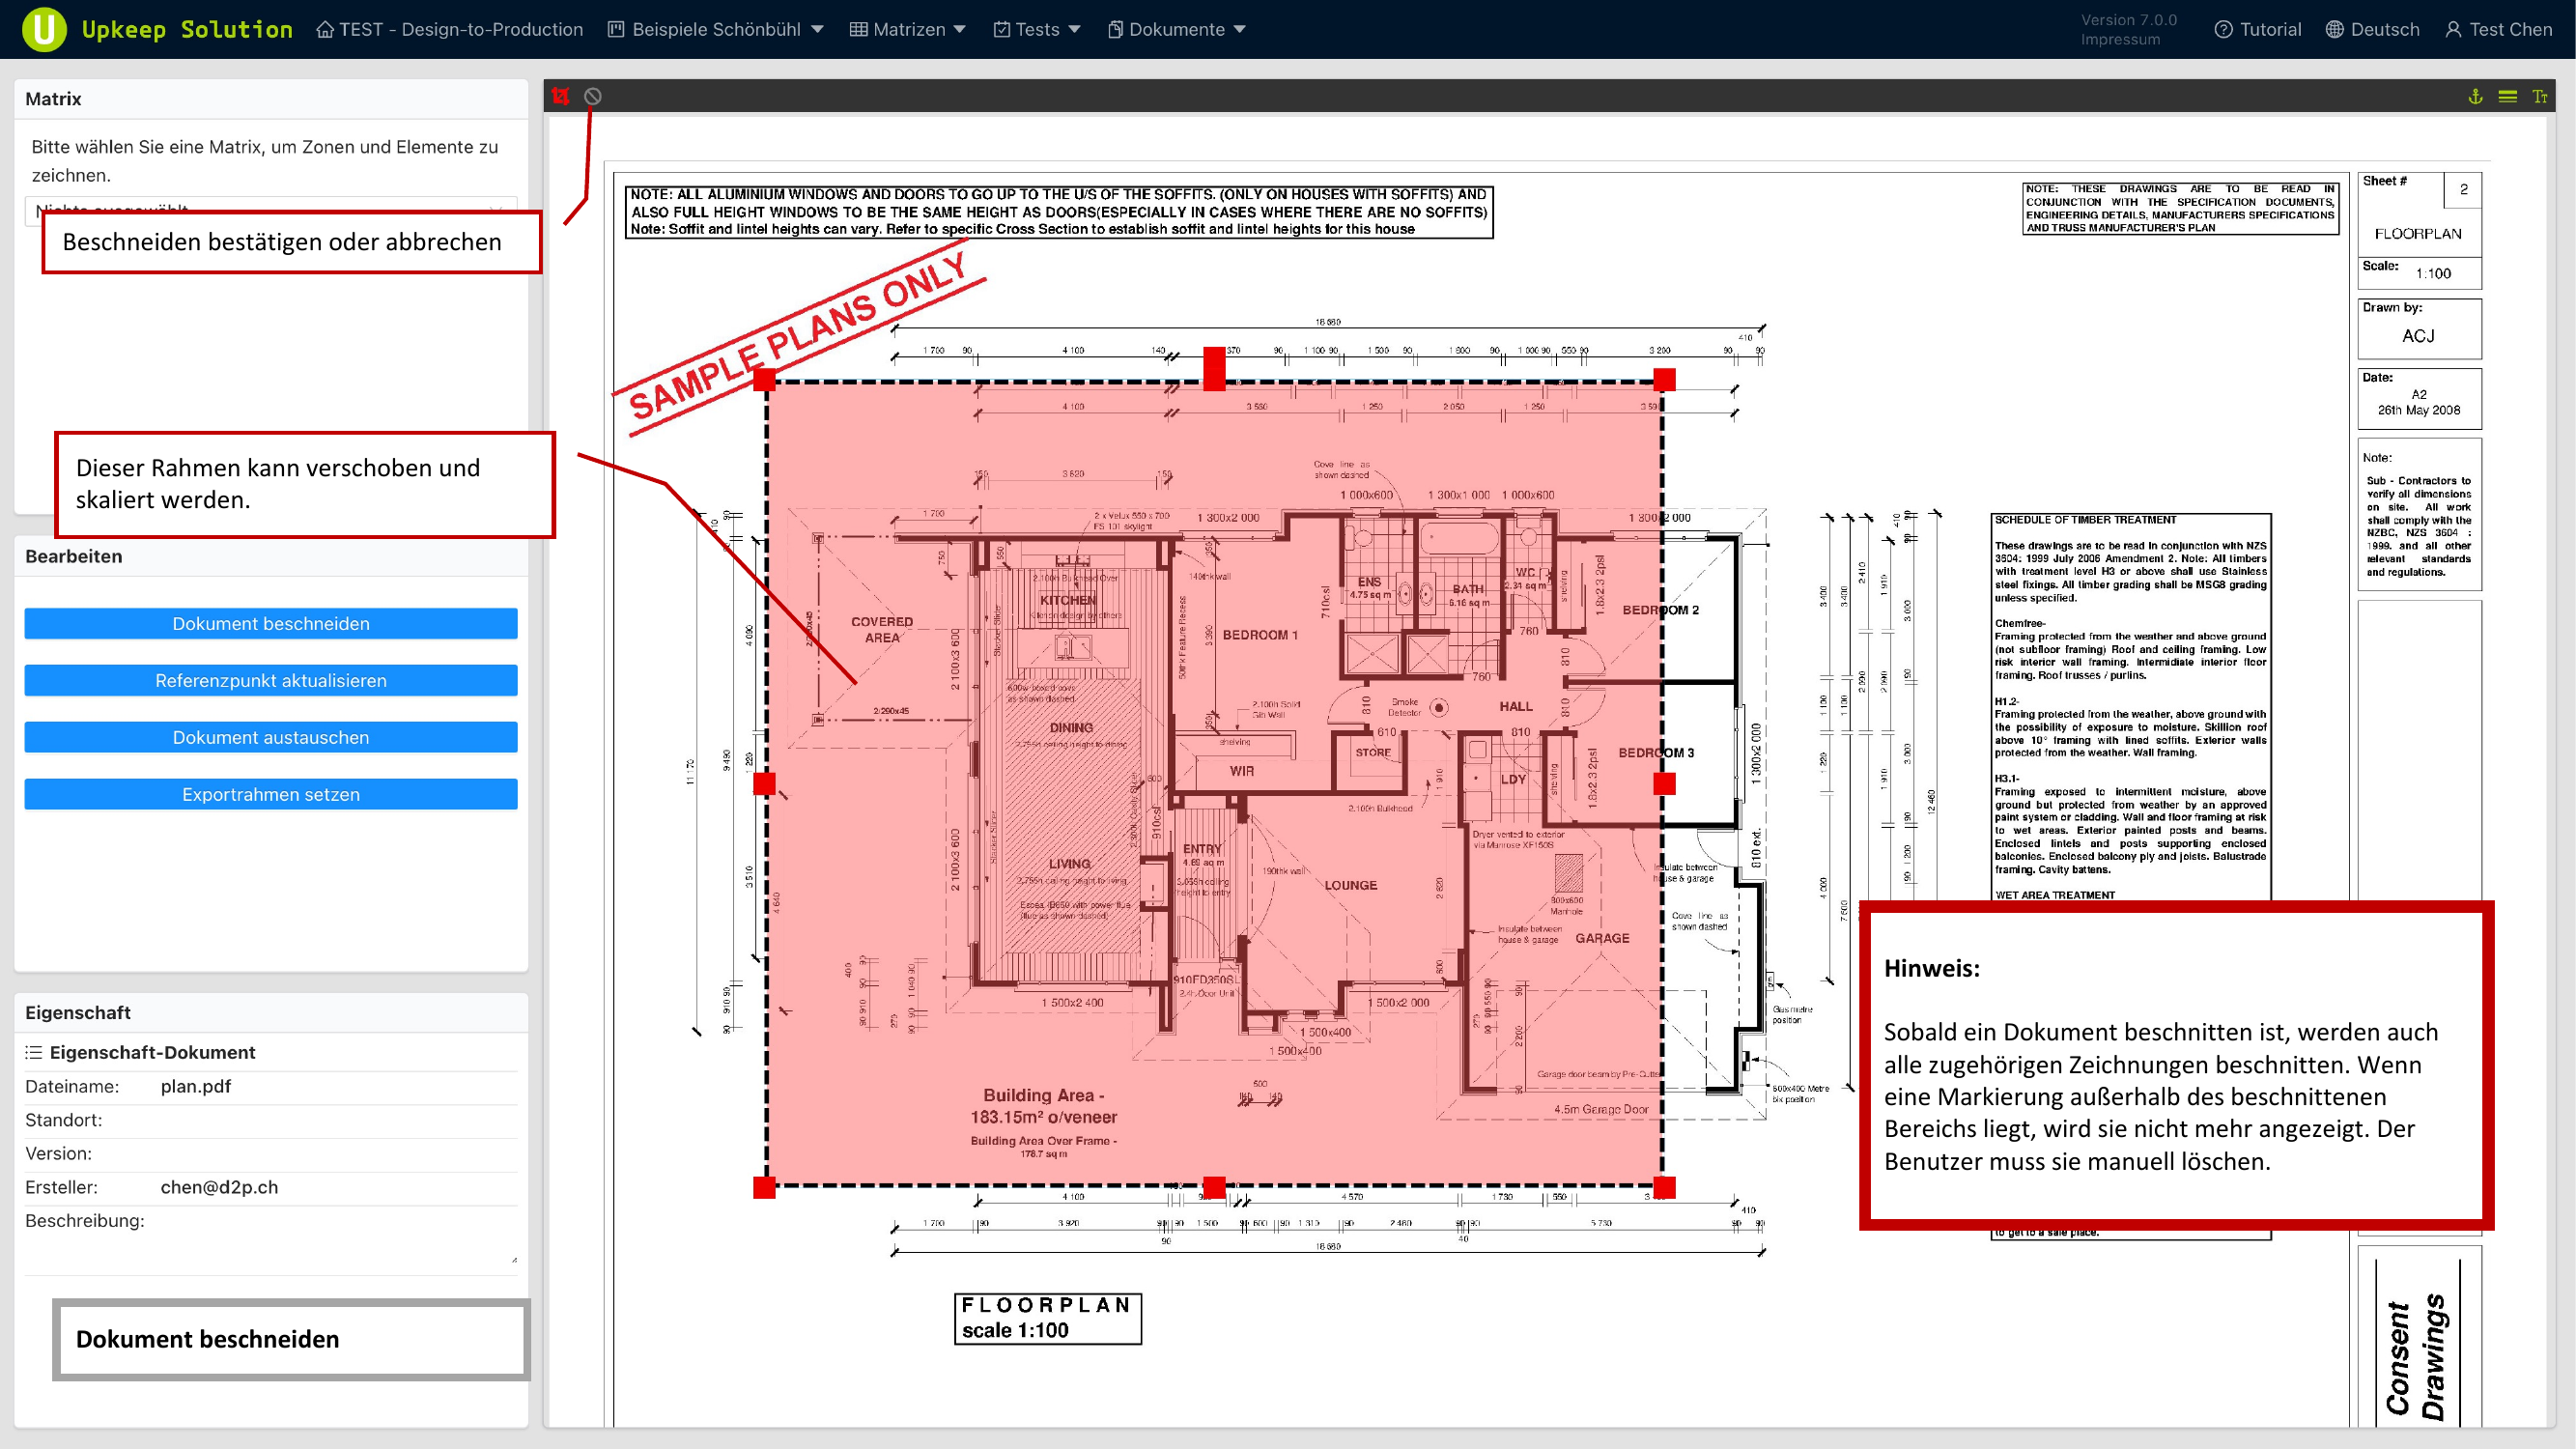
Markings that are located outside the crop area are not automatically removed. They must be manually deleted, as they will no longer be visible after cropping but will still exist.
Reference Points
Reference points are two defined positions (Point A and Point B) on the floor plan, placed at clearly identifiable locations — for example, at wall intersections or recurring building details.
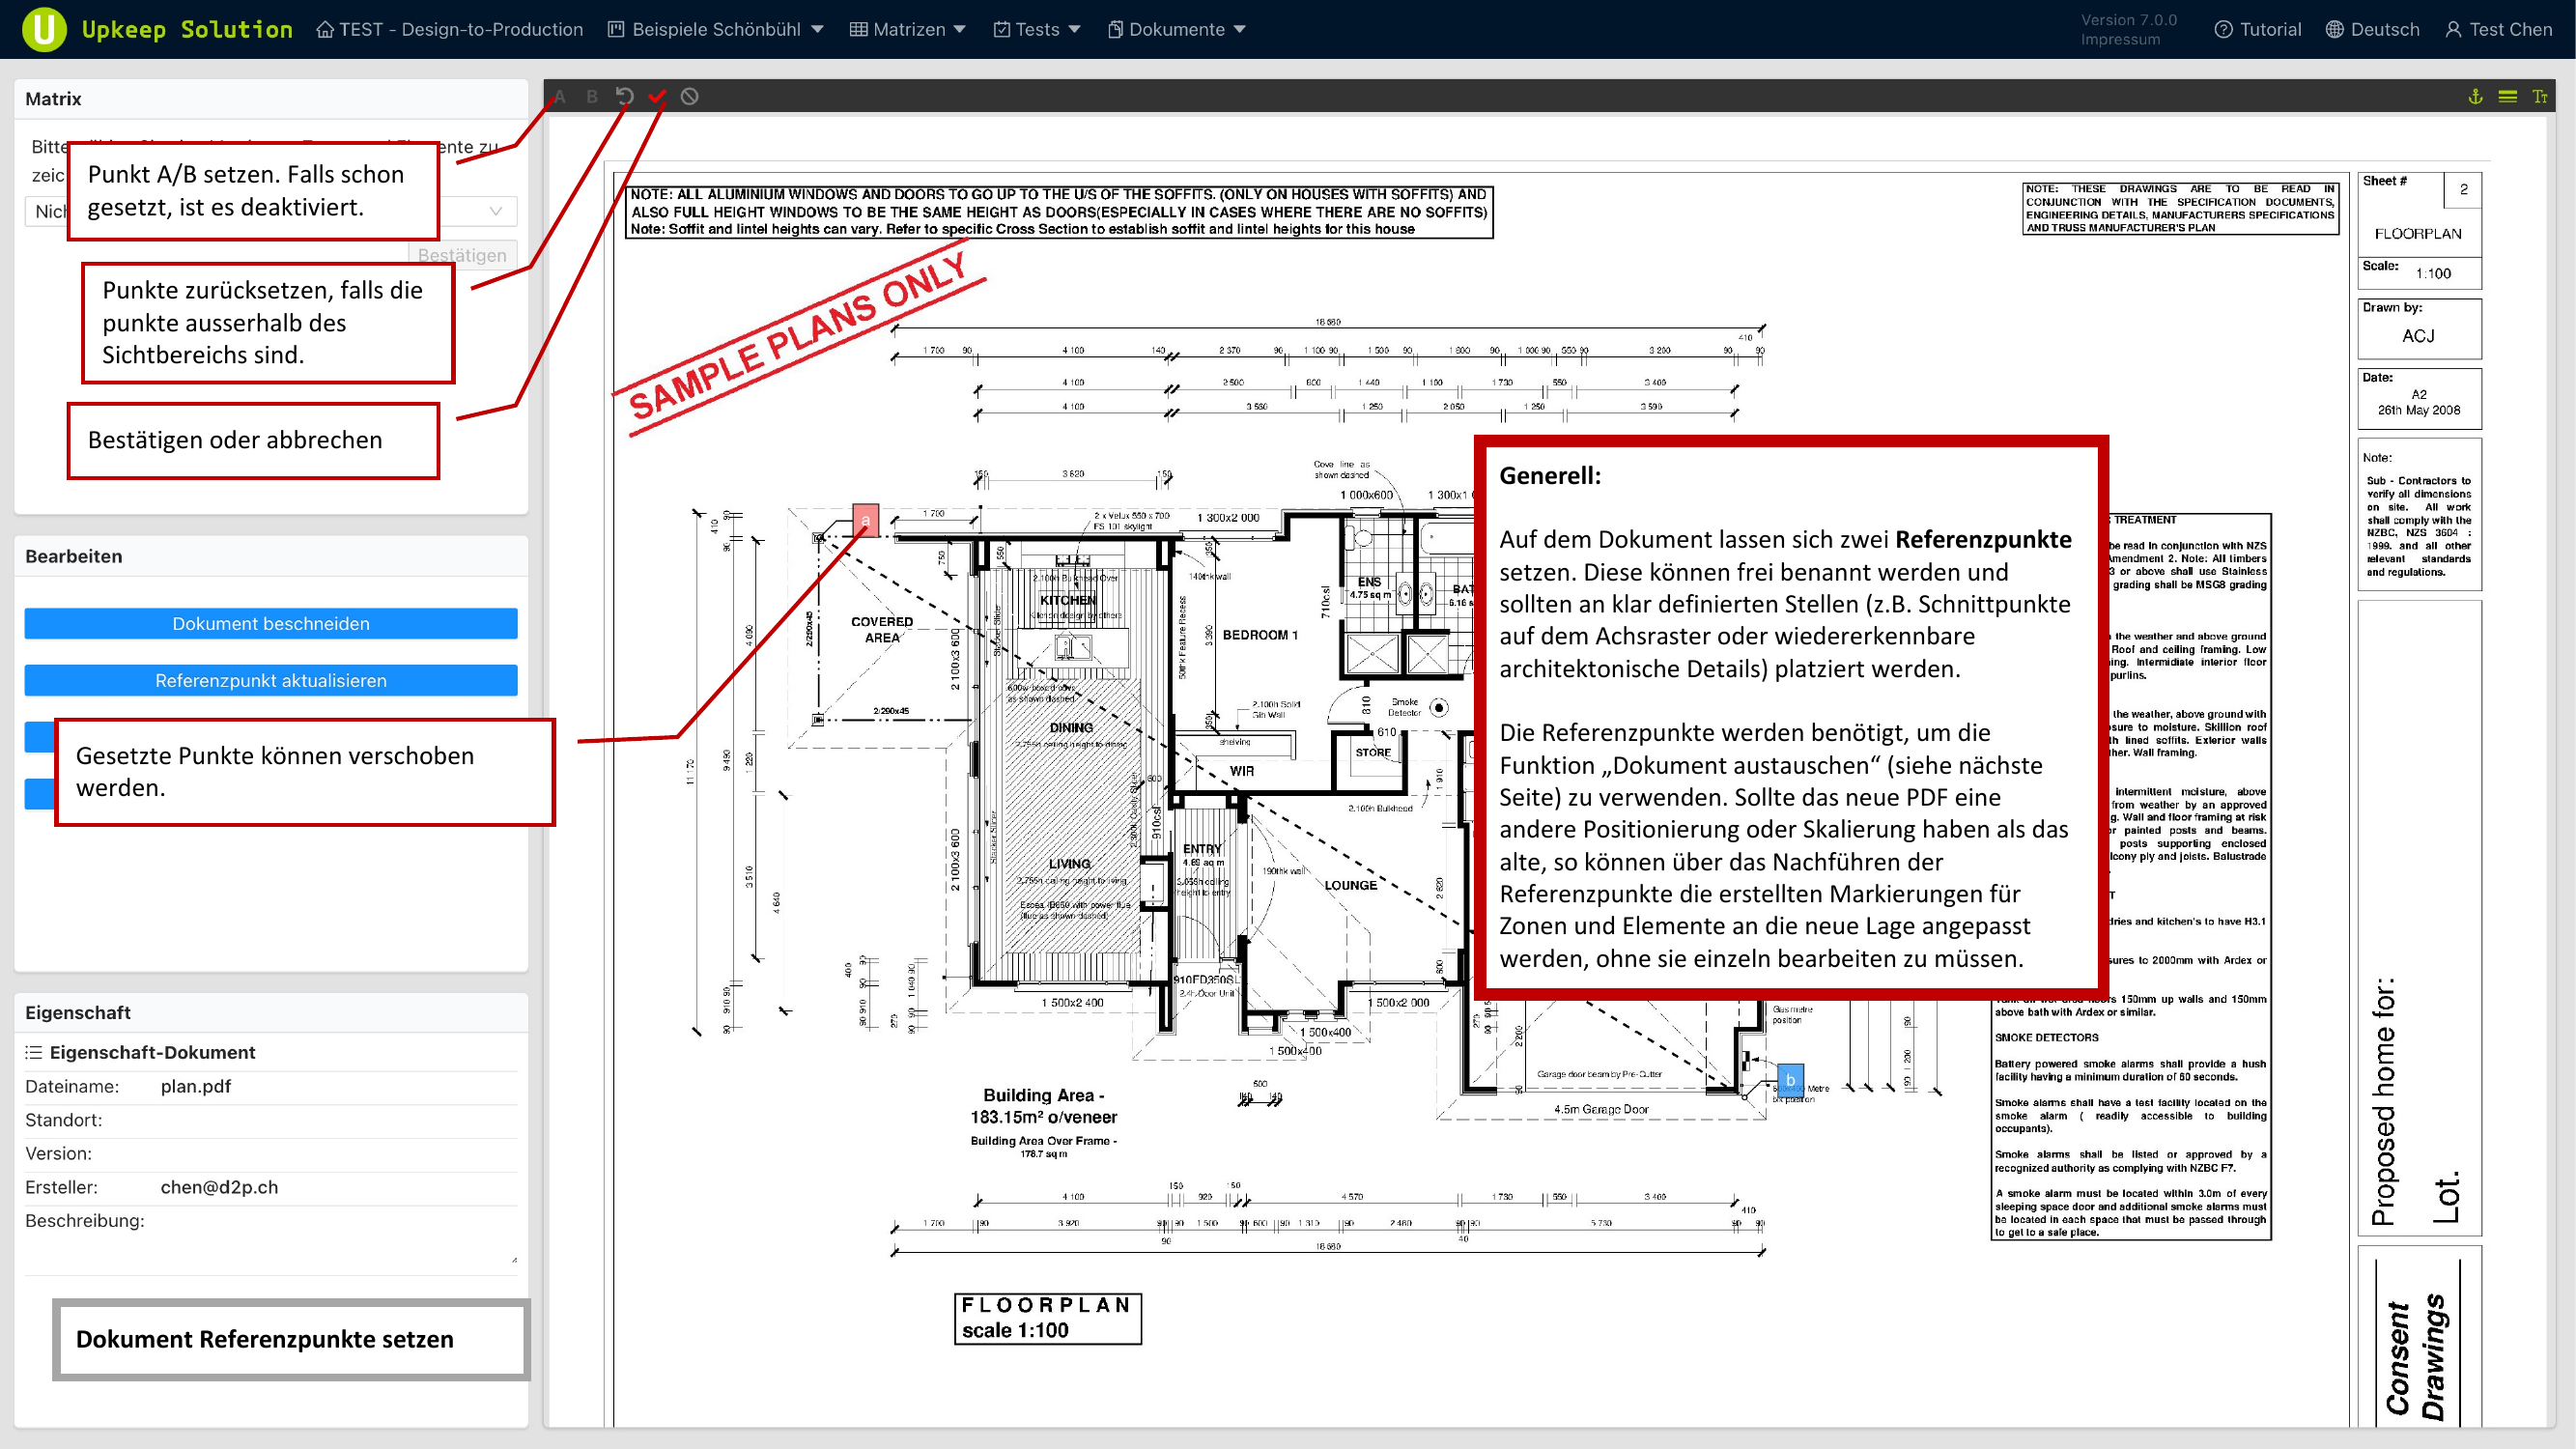
To set reference points:
- Activate reference point mode
- Place Point A at a clearly recognizable location
- Place Point B at a second clearly recognizable location
- The points can be moved after placement
Reference points are required for the document replacement function. Set the points before placing markings so that a later plan replacement is possible.
Document Replacement
With document replacement, you can upload a new version of the floor plan without losing existing markings. The system transfers the markings to the new drawing based on the reference points.
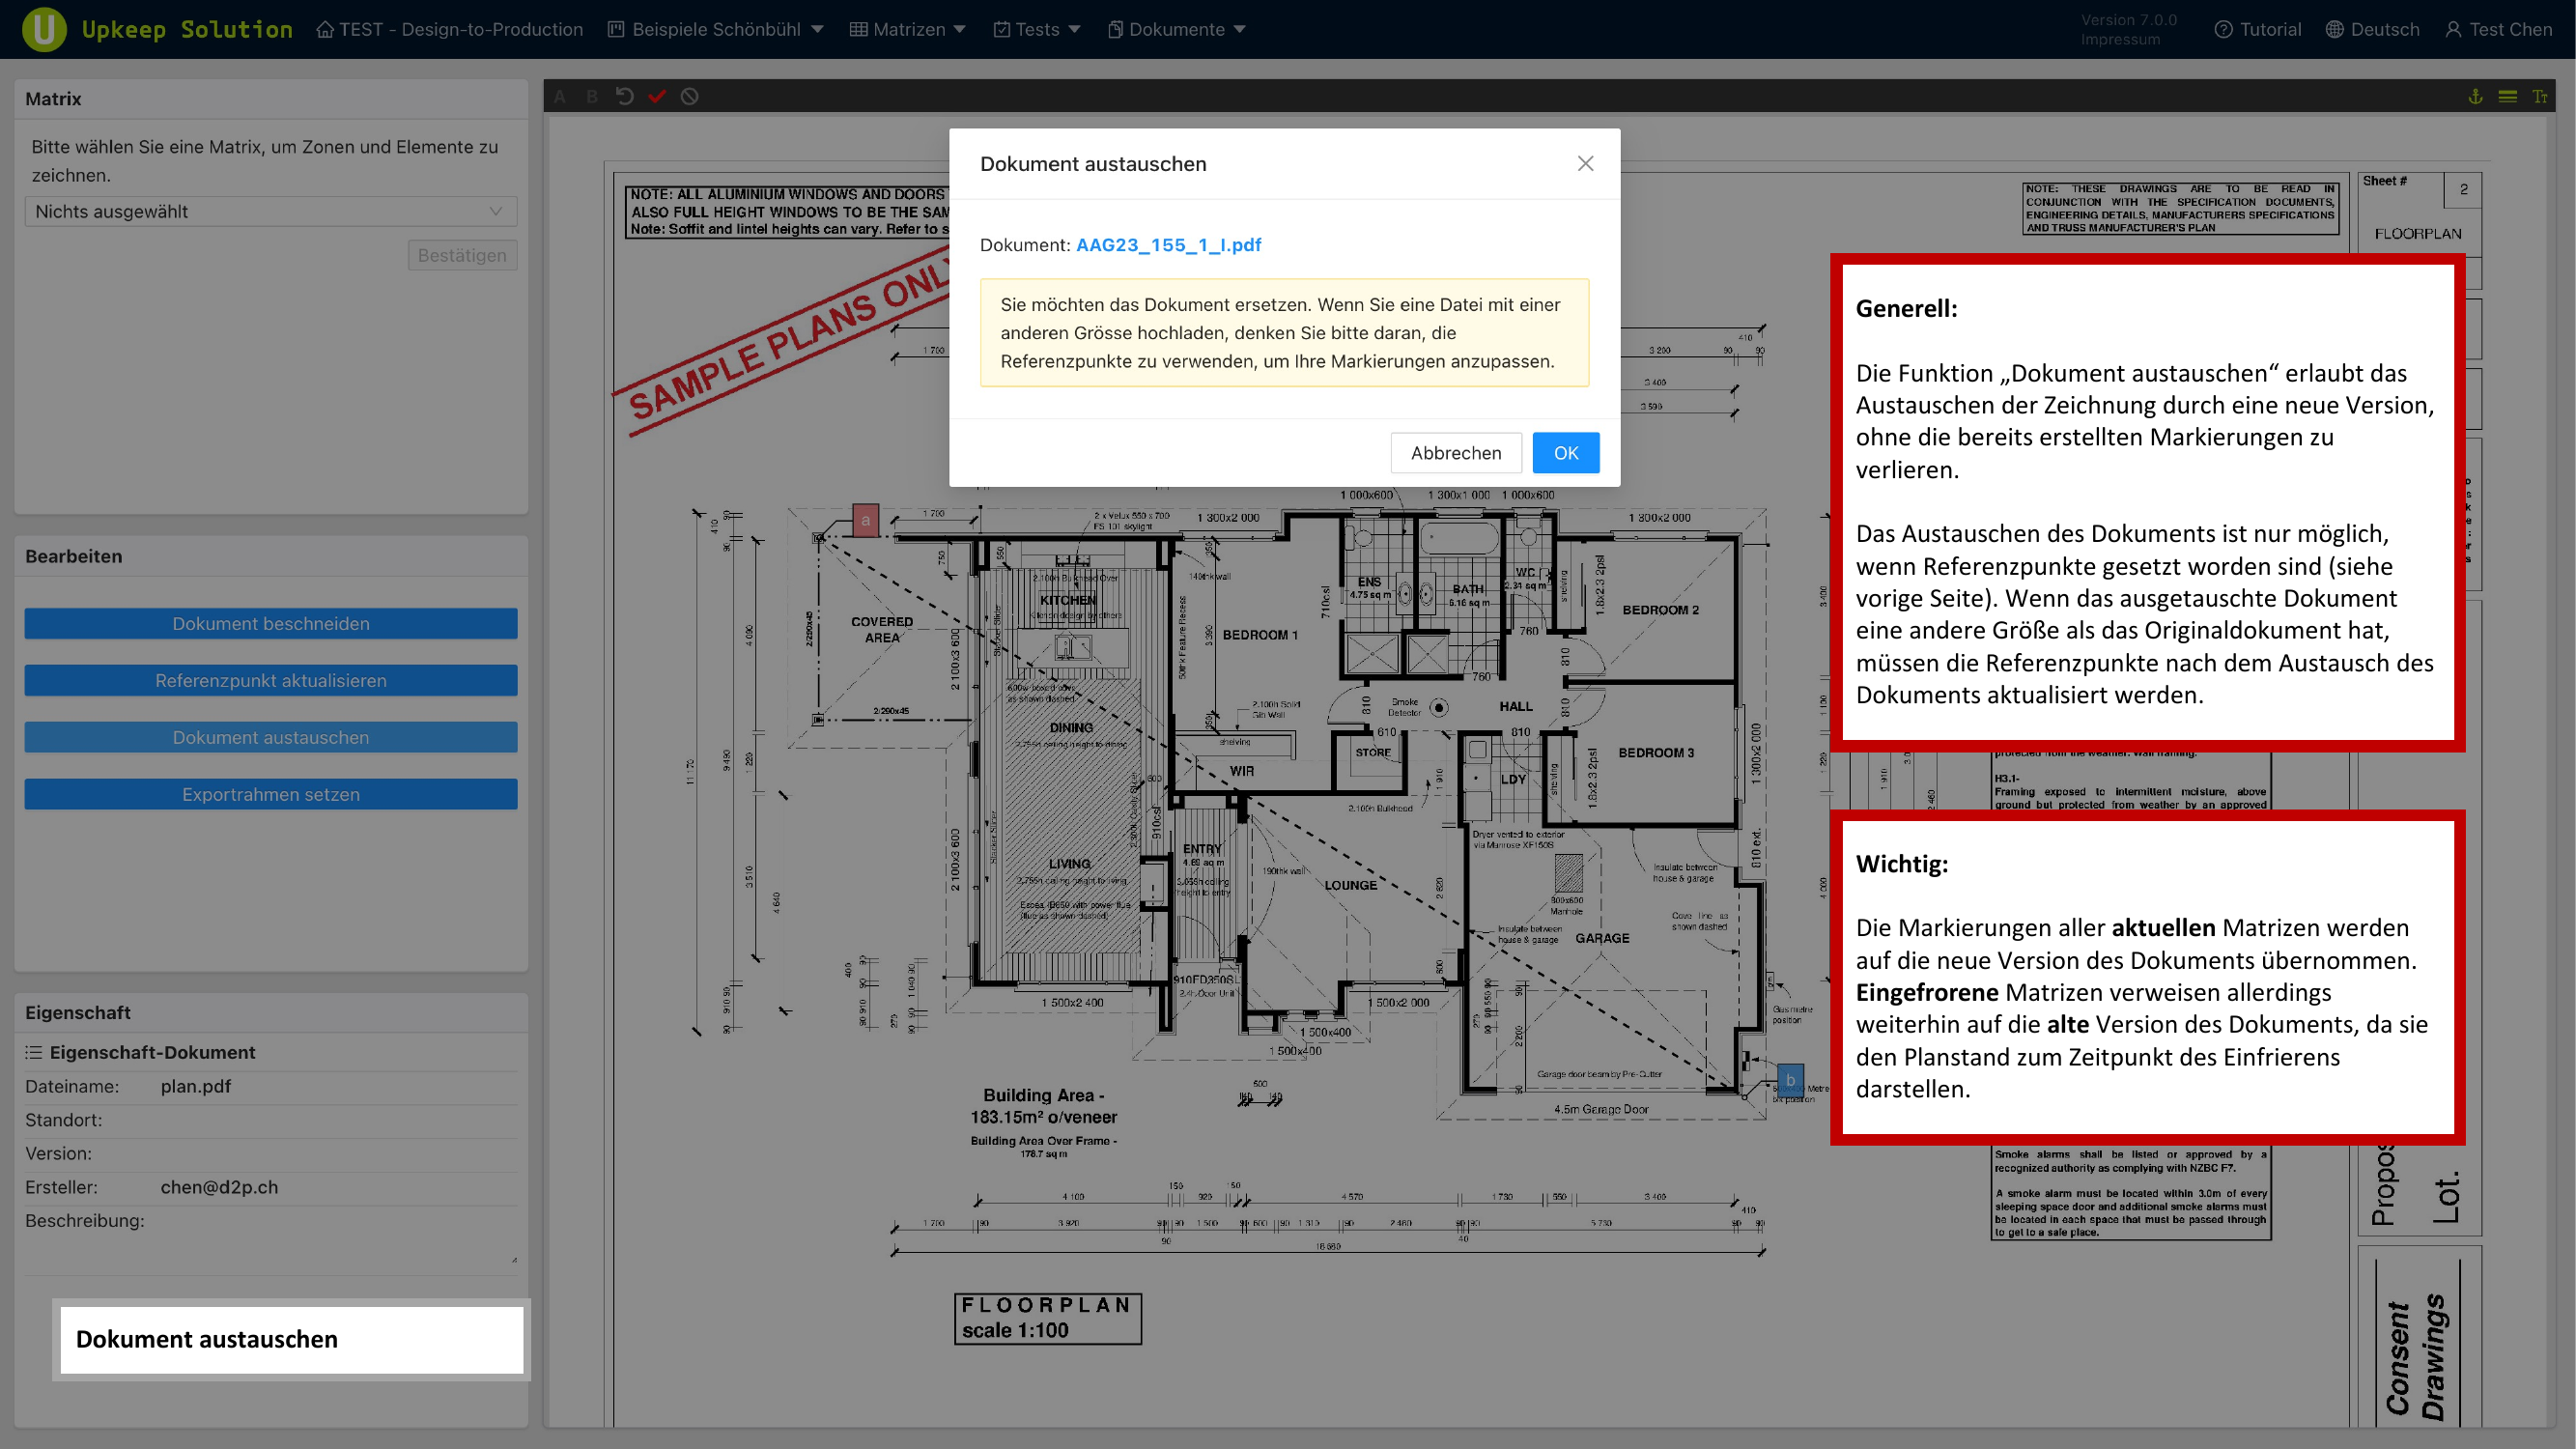
Prerequisites and behavior:
- Reference points must be set — Without reference points, replacement is not possible
- Active matrices — Their markings are automatically transferred to the new version
- Frozen matrices — Retain the old version of the floor plan
Export Frames
Export frames divide a large floor plan into smaller sections. Each frame is output as a separate PDF page during export.
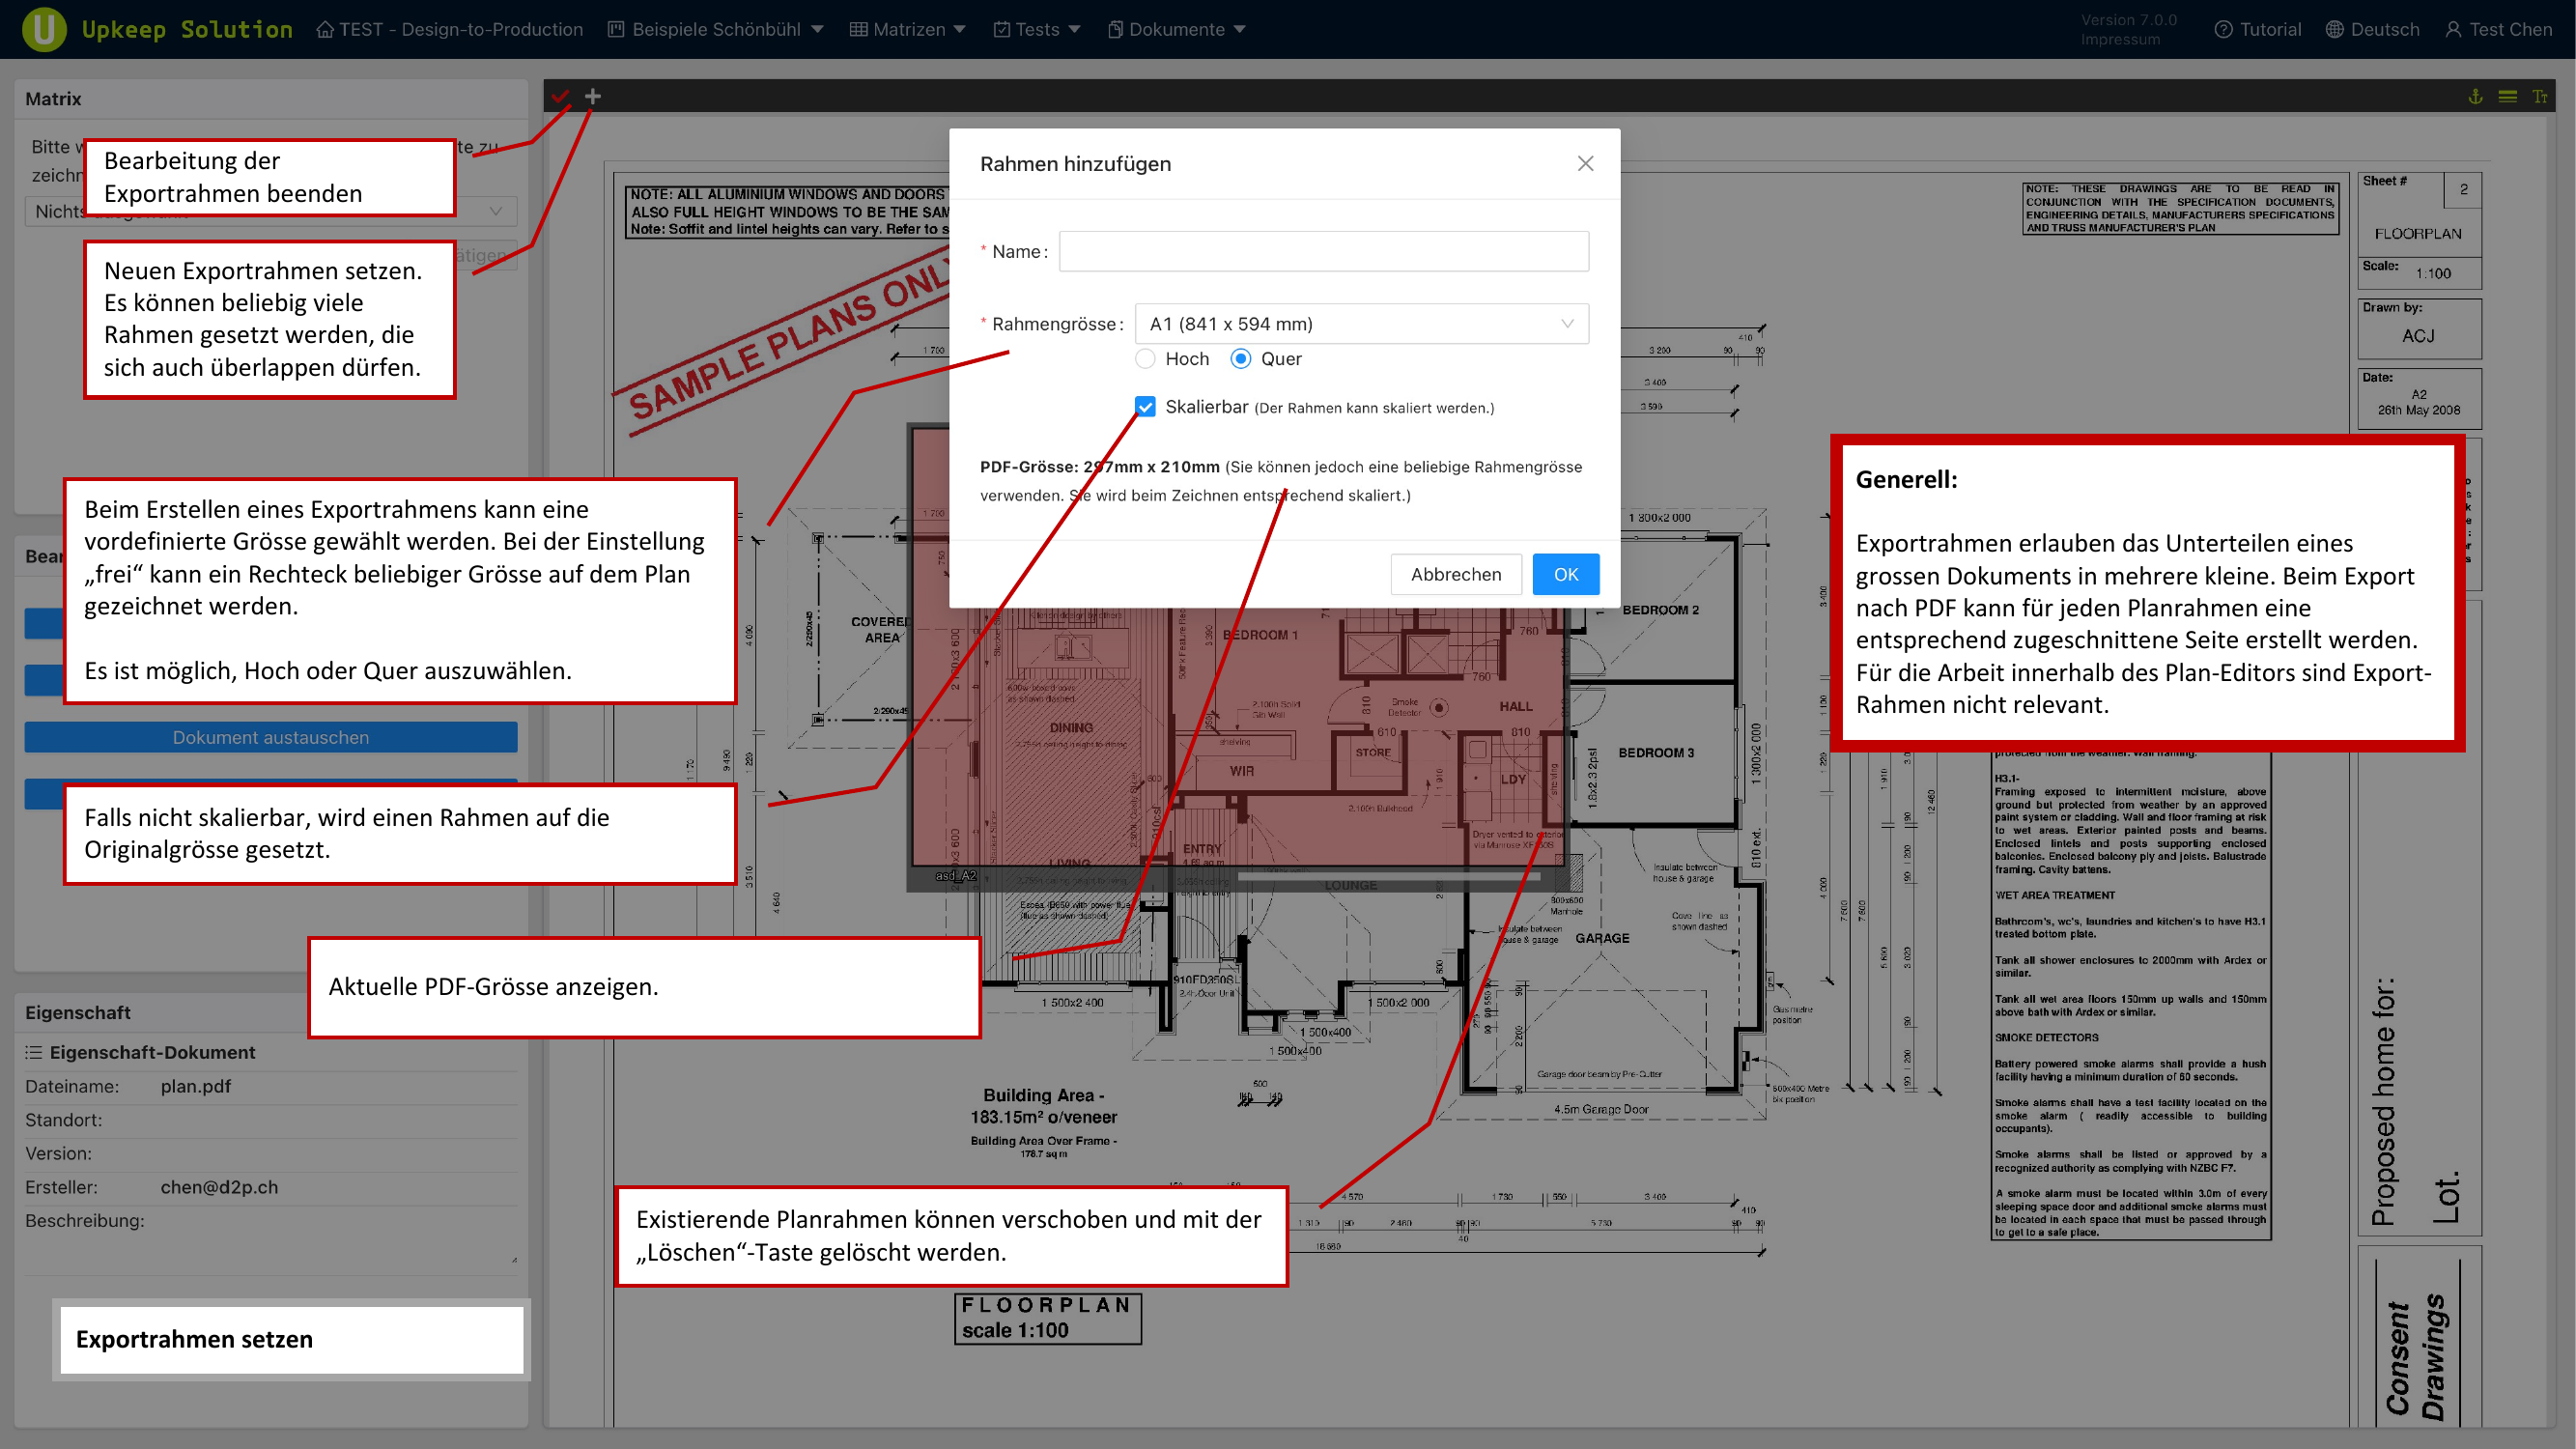
- Predefined sizes — Select a standard format such as A1 or other common paper sizes
- Custom — Draw a frame of any size directly on the plan
- Orientation — Portrait or landscape orientation can be set per frame
- Multiple frames — Any number of frames can be created; overlapping is allowed
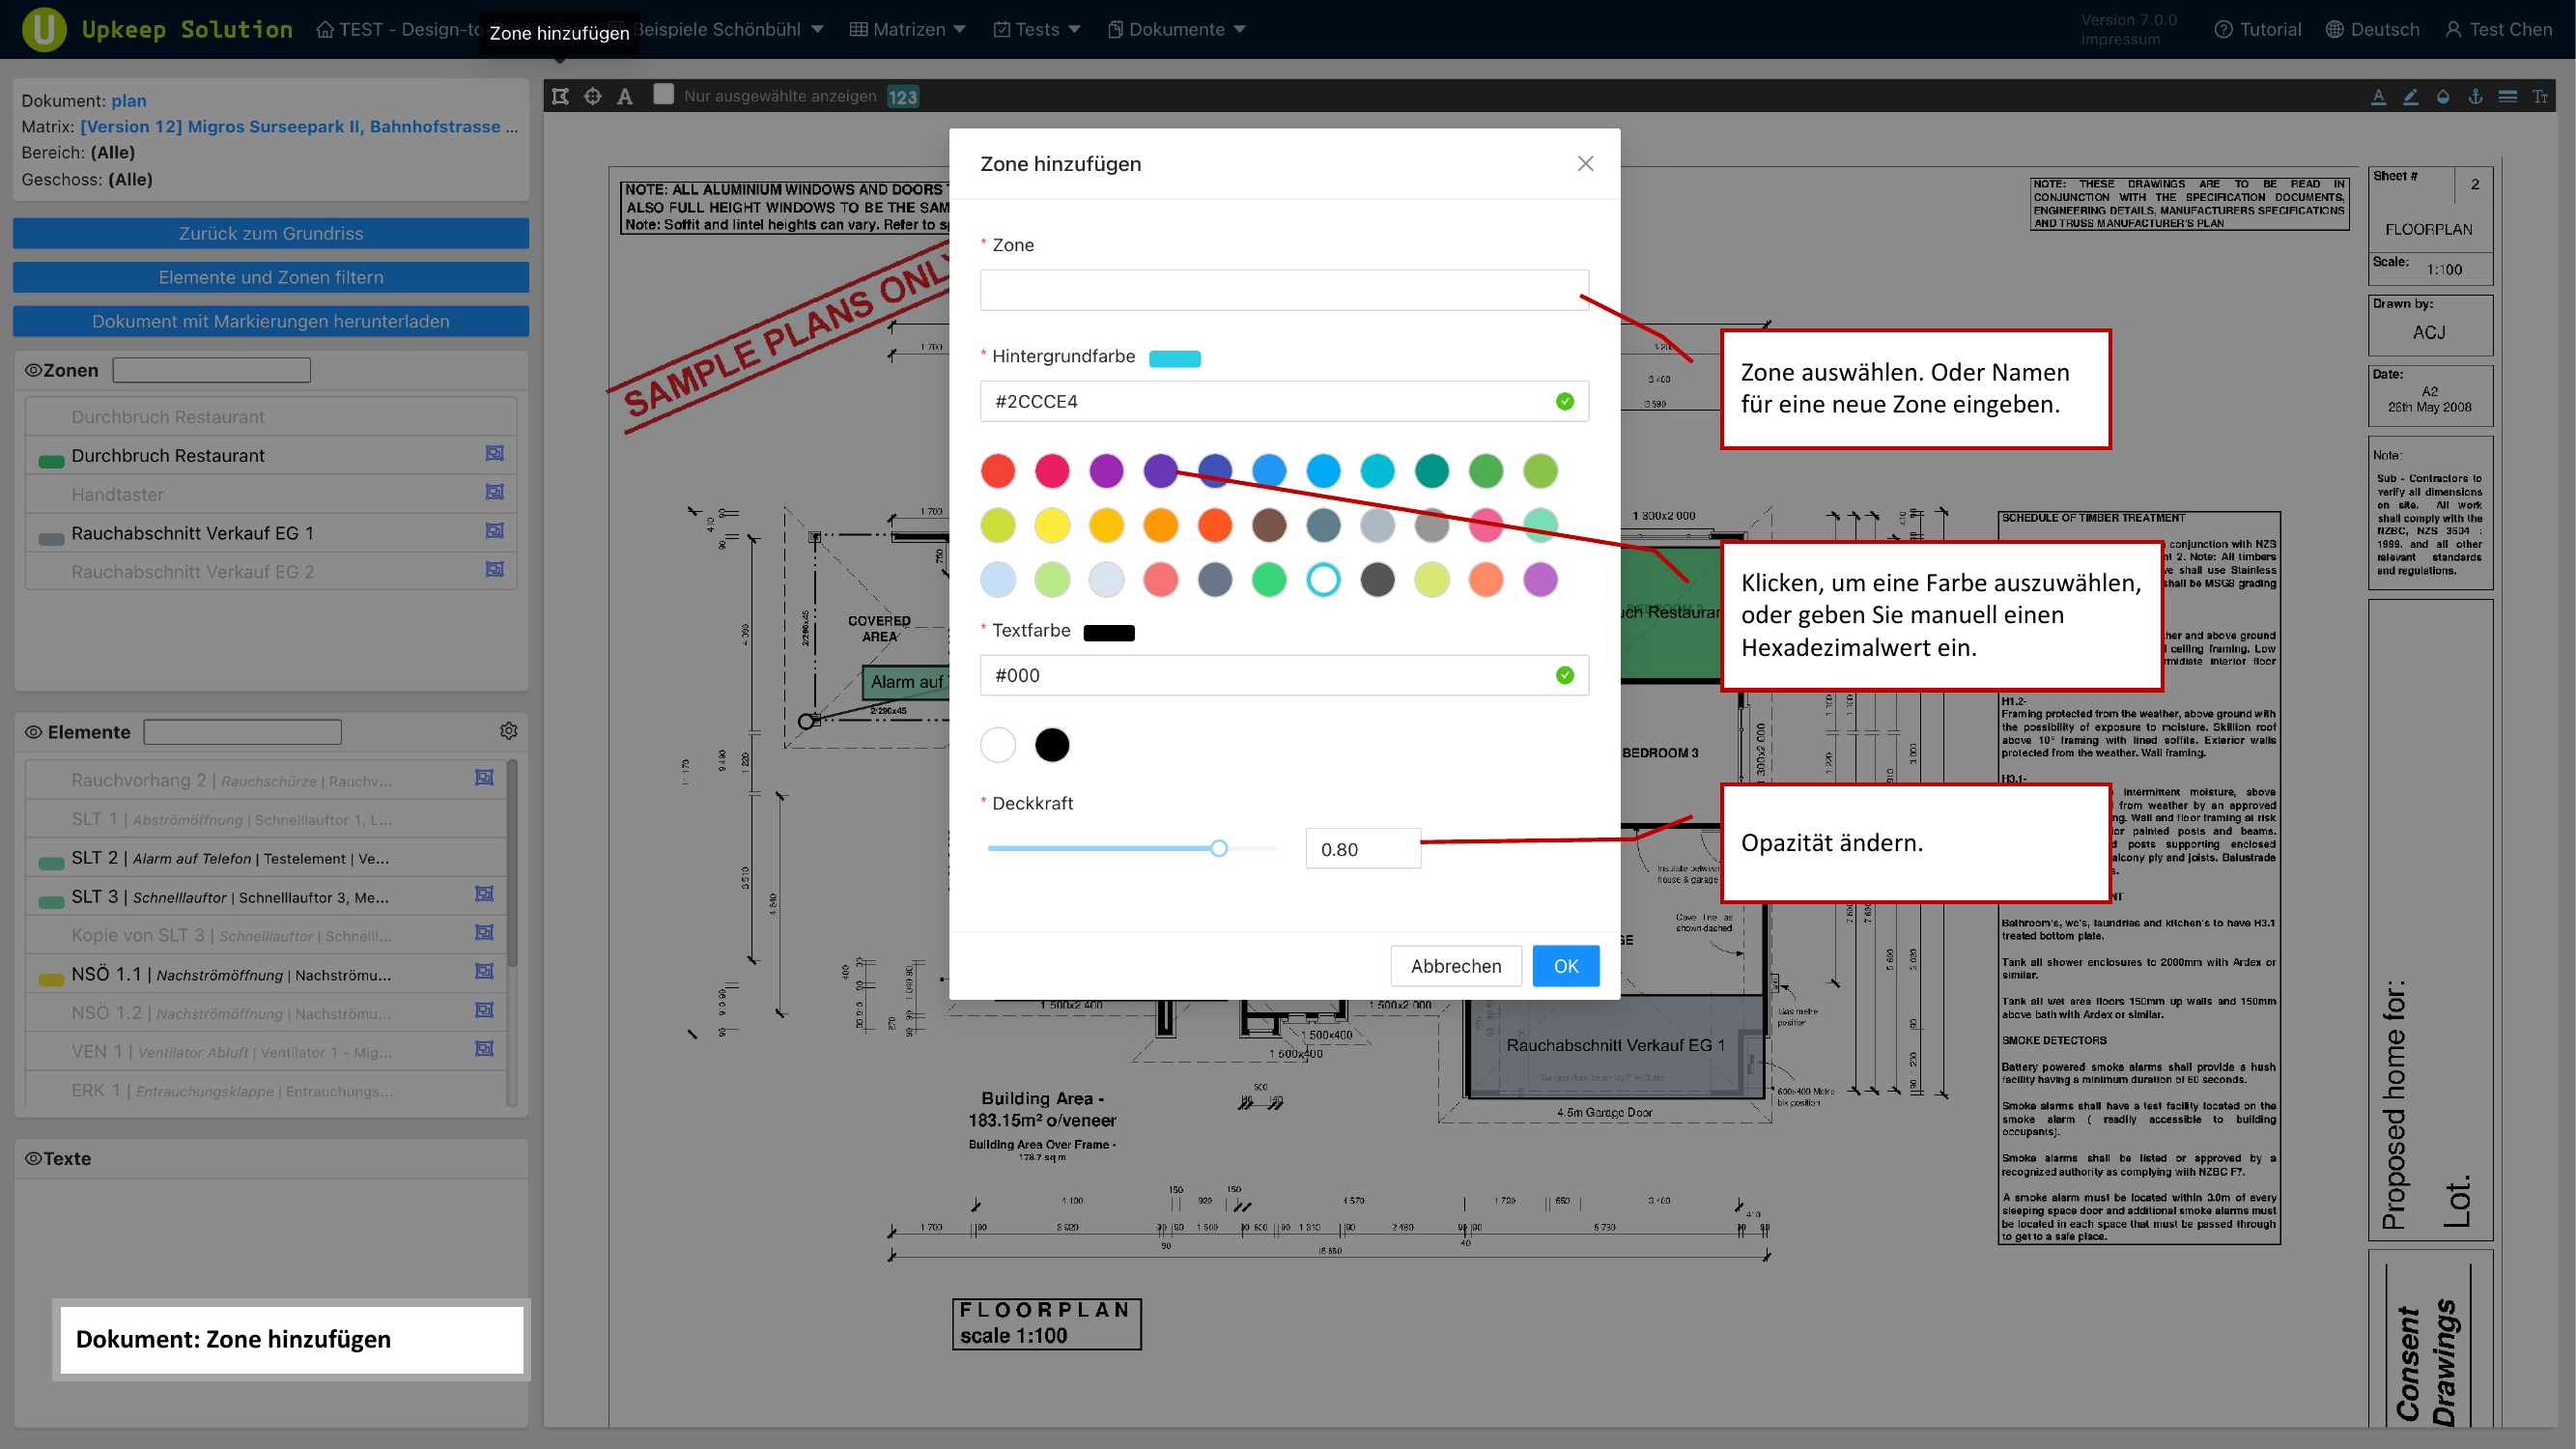
Zones
Zones are colored areas on the floor plan that identify related spaces (e.g., fire compartments, floors, or functional areas).
Adding a Zone
- Click Zone hinzufügen (Add Zone)
- Select an existing zone or create a new one with a custom name
- Set the background color using the color palette
- Choose a text color and the opacity
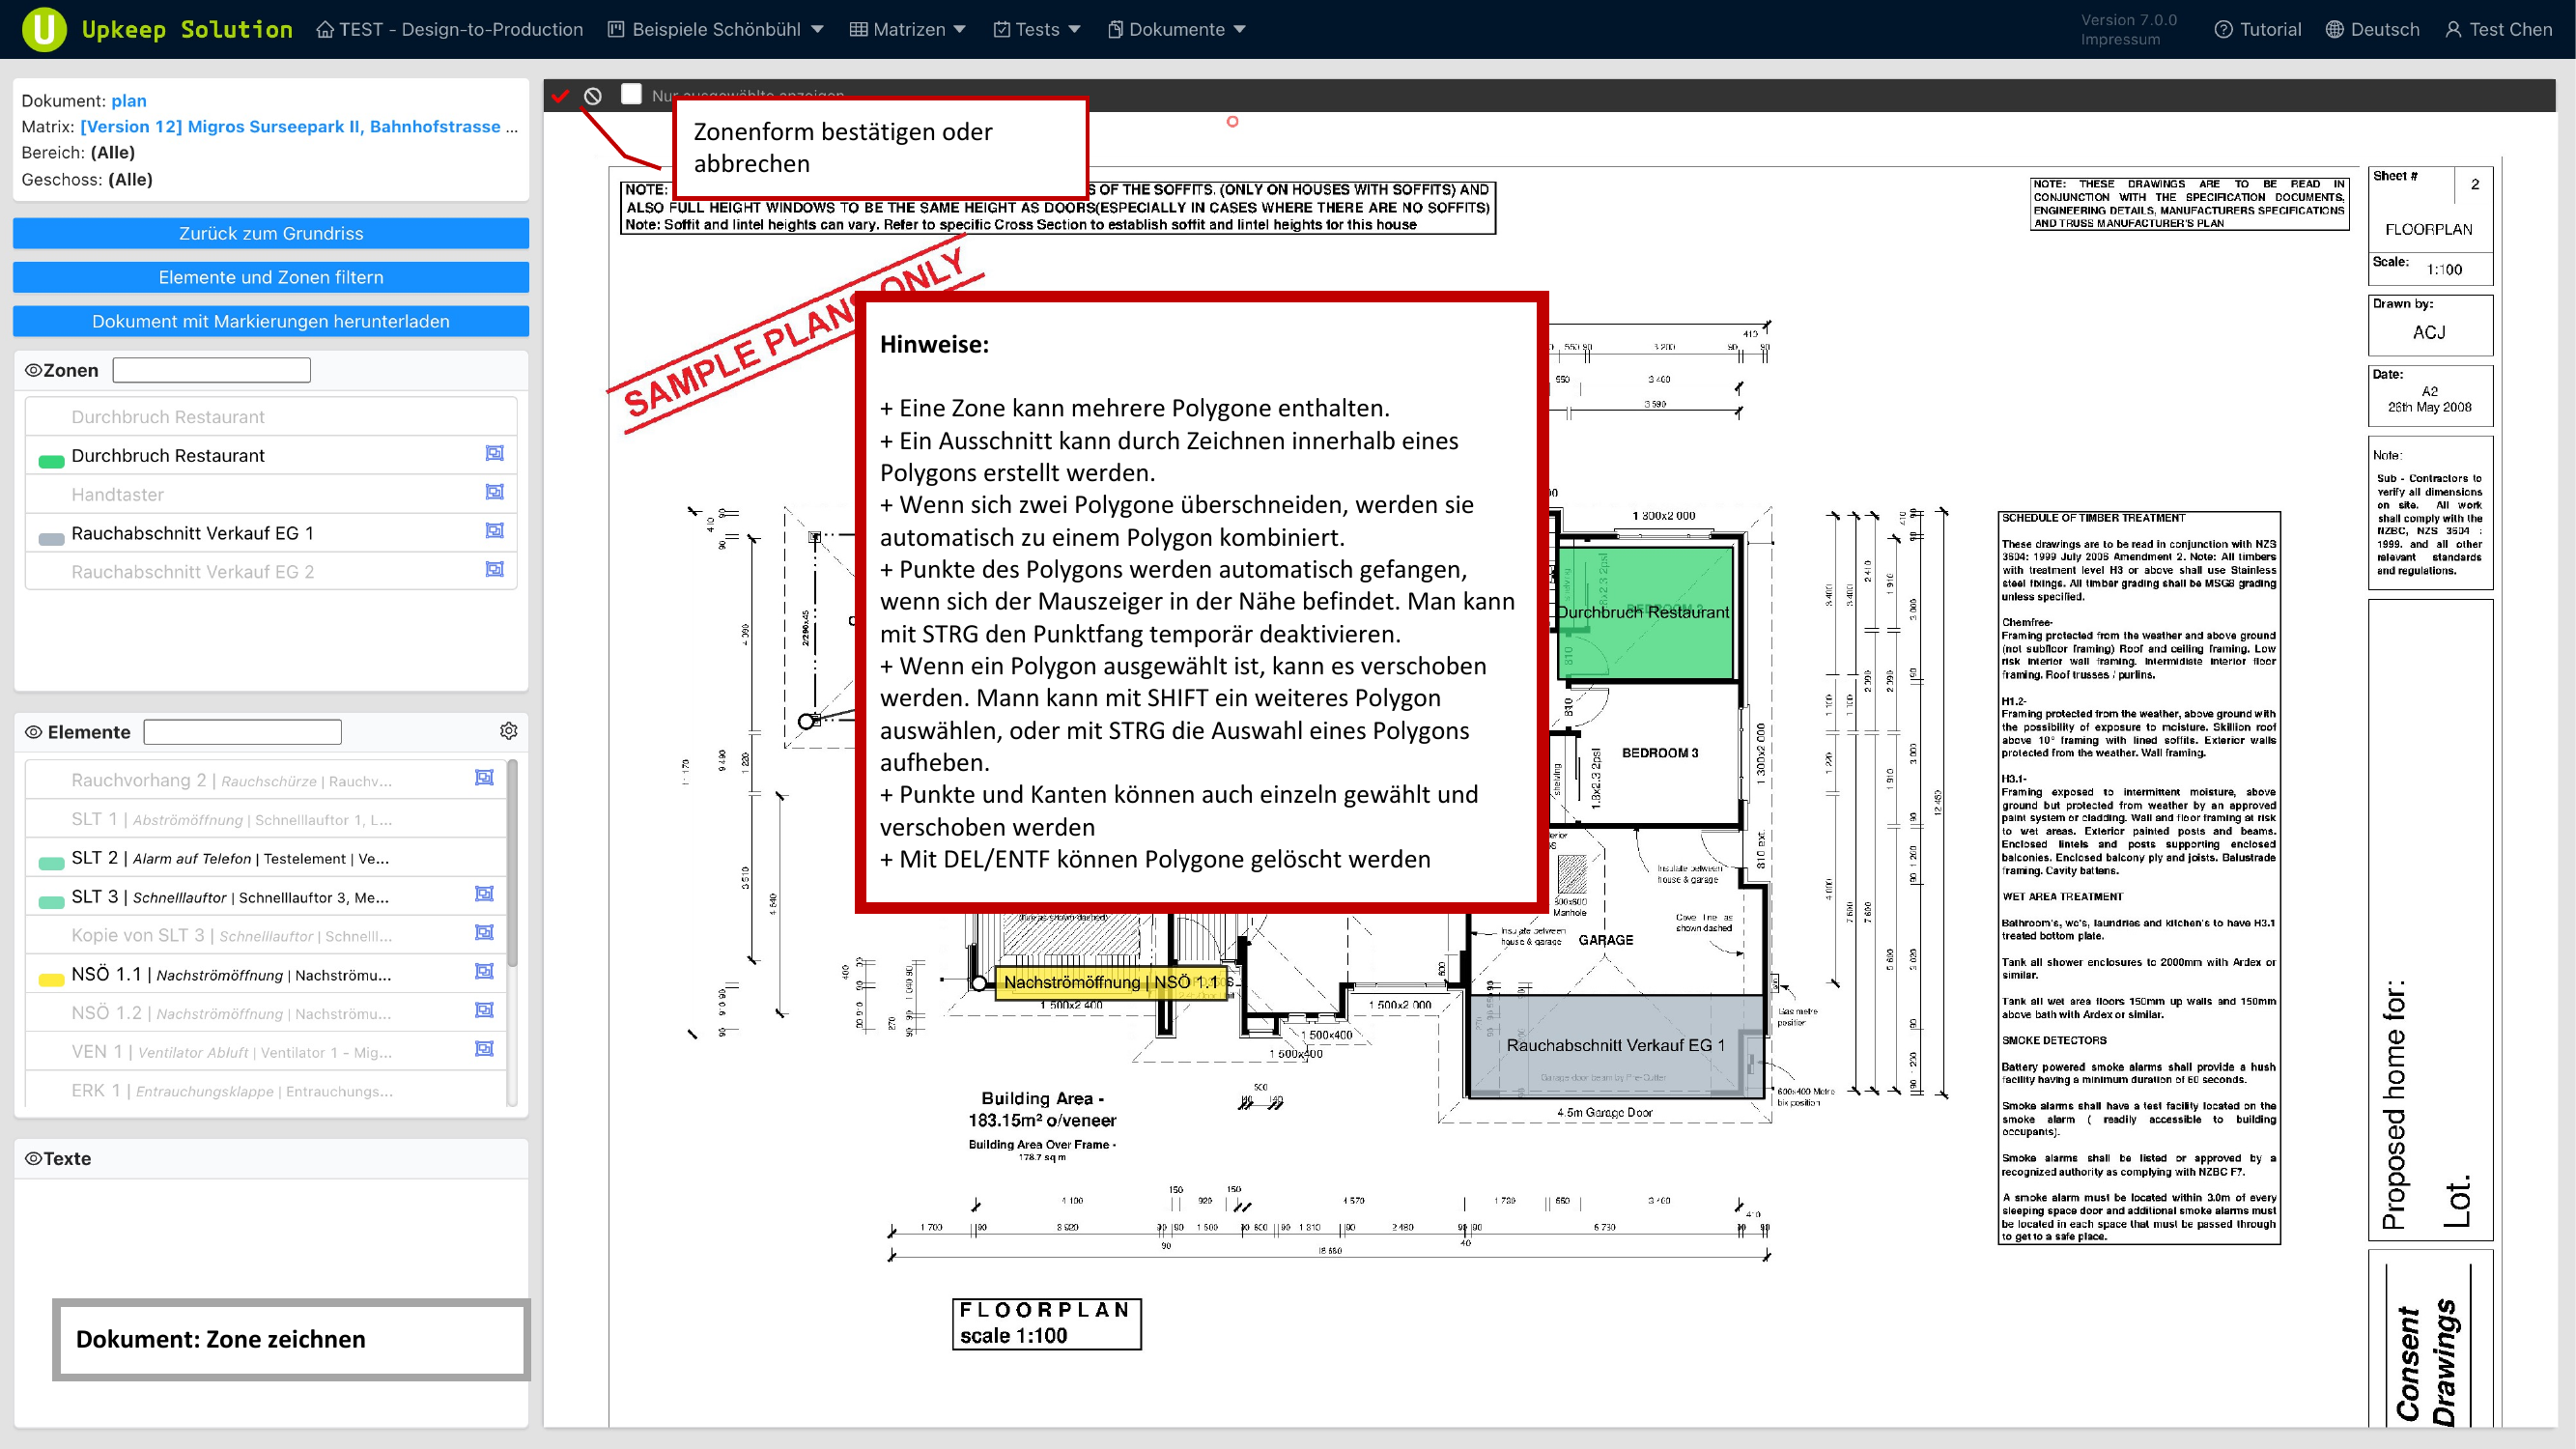
Drawing a Zone
Zones are drawn as polygons directly on the plan:
- Click on successive corner points to create the polygon
- Multiple polygons per zone are possible
- Cutouts can be defined to exclude areas within a zone
- Auto-snapping connects points with neighboring edges — hold Ctrl to disable snapping
- Overlapping polygons of the same zone are automatically merged
- To delete a polygon, select it and press Delete
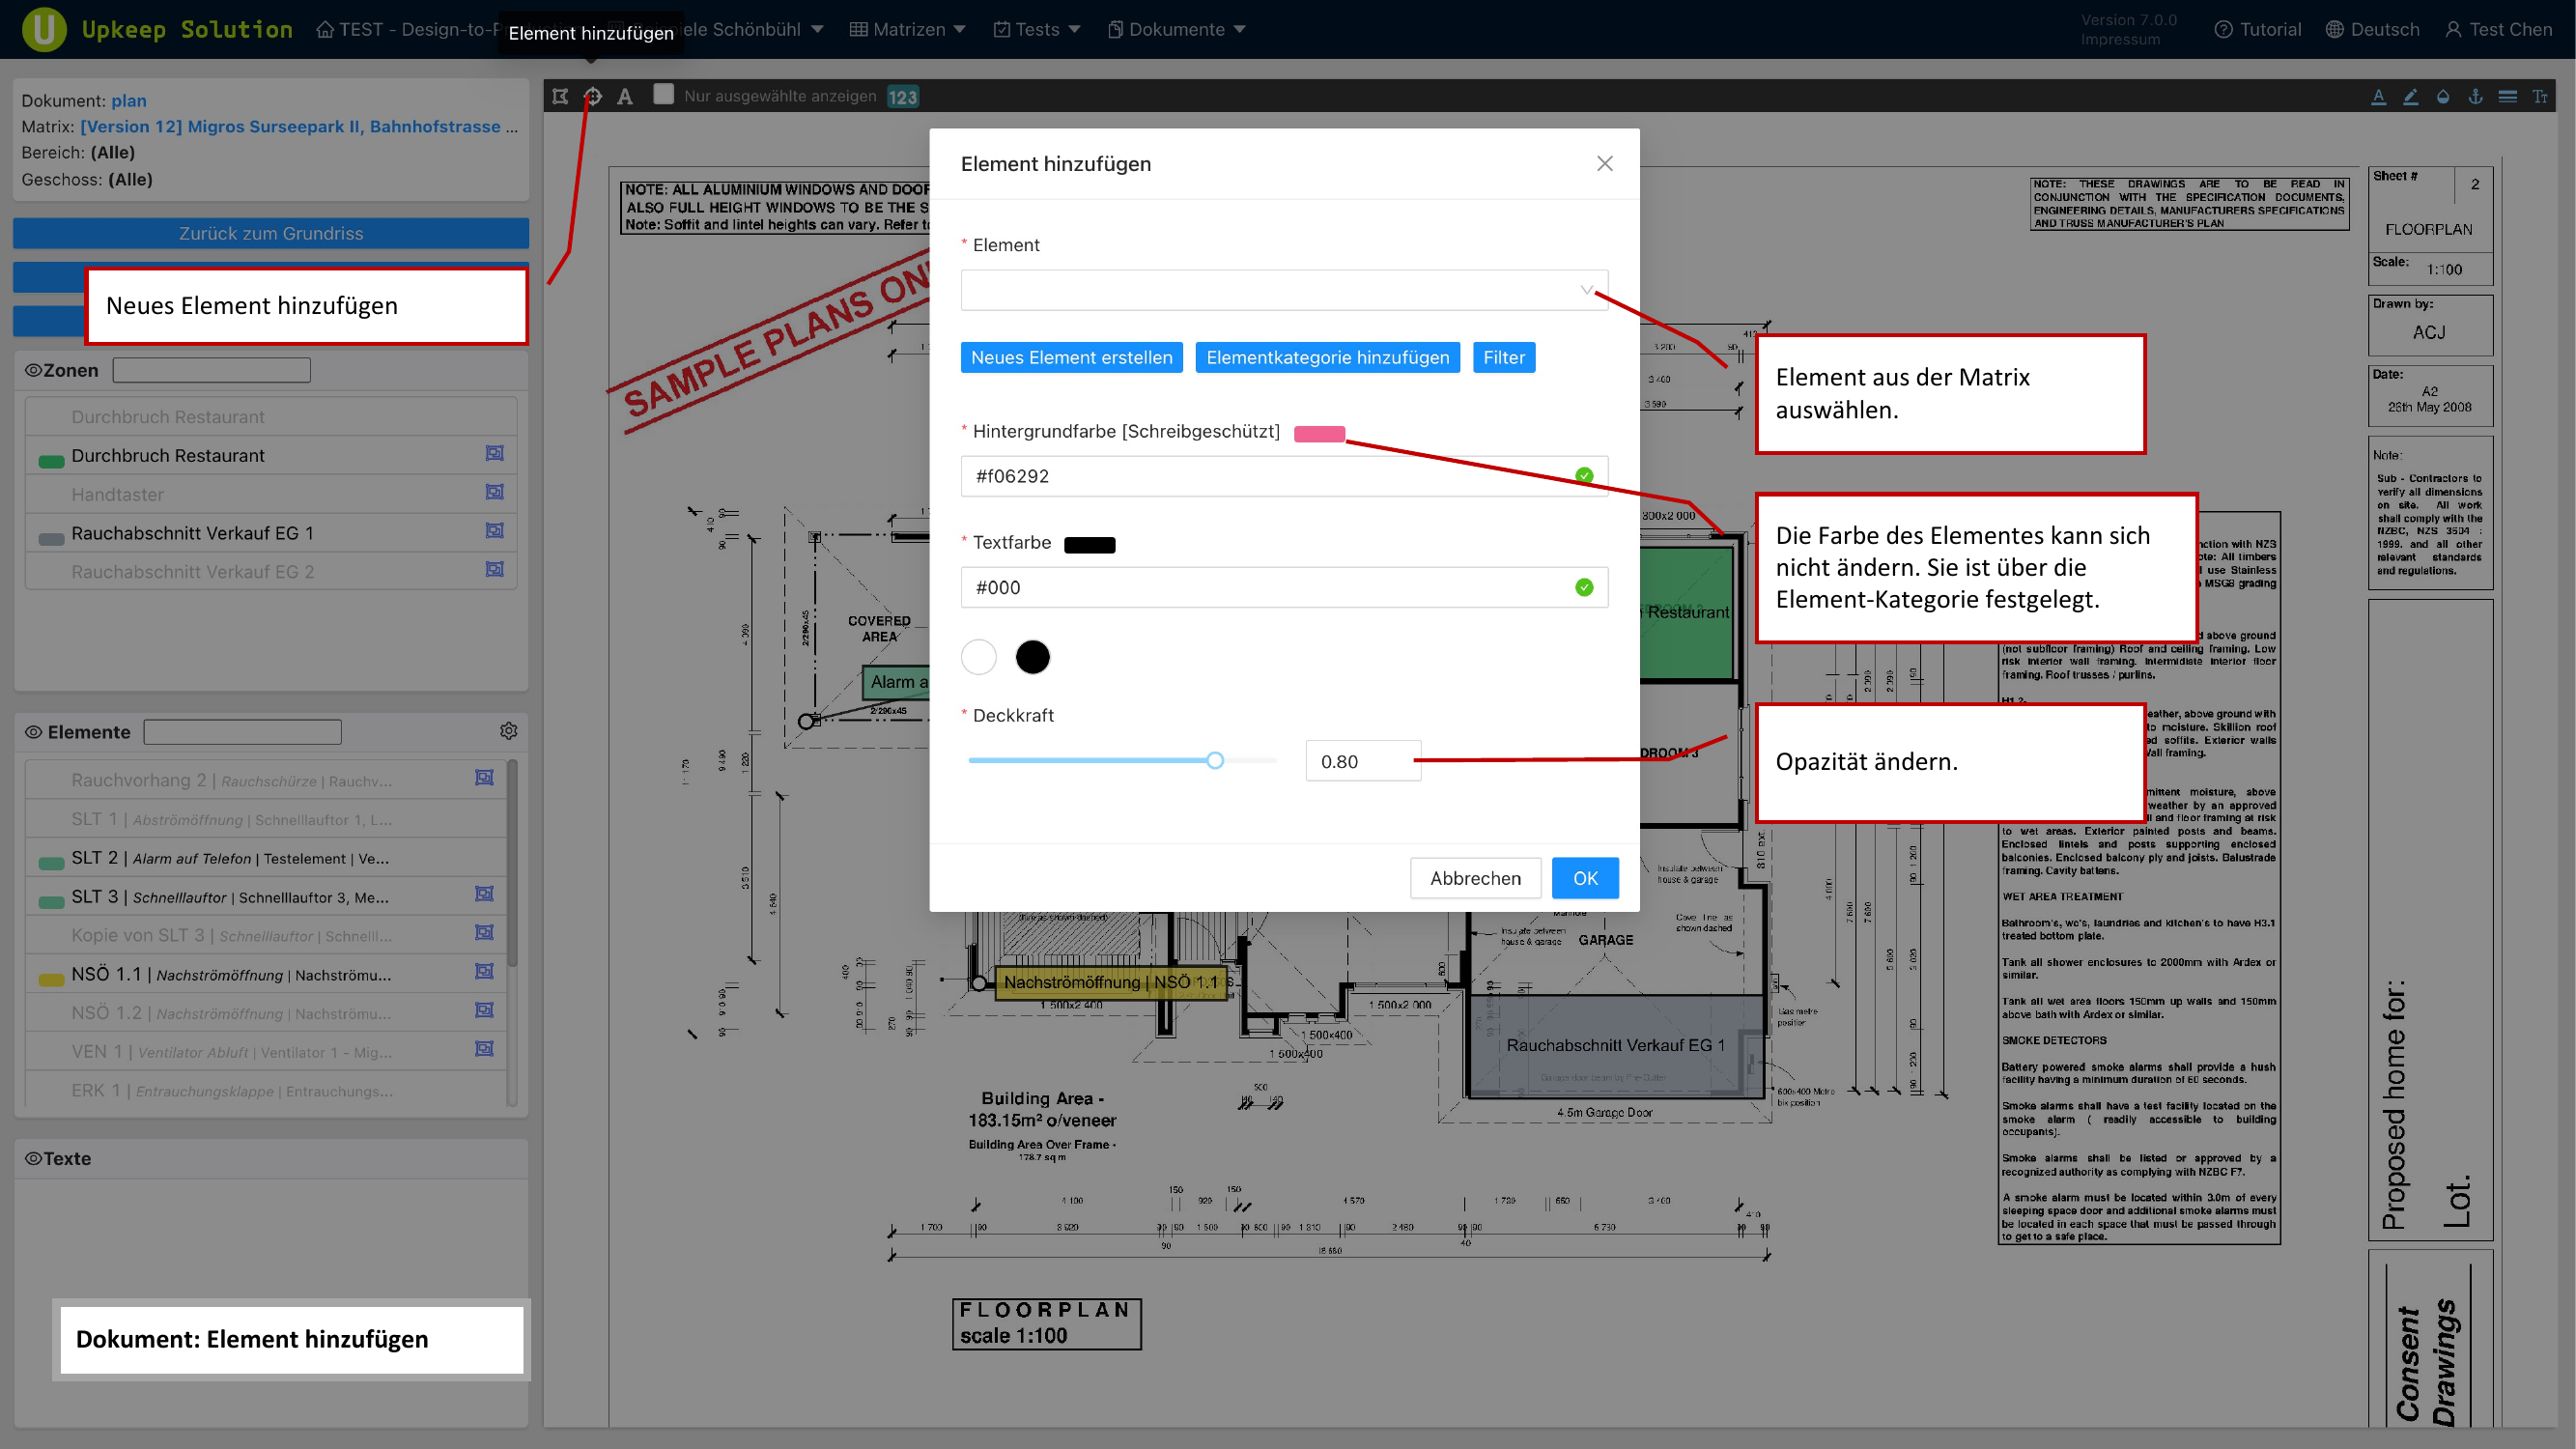
Elements
Elements from the matrix can be placed as markings on the floor plan. The color of the marking is determined by the element category and cannot be changed individually.
Placing an Element
- Click Element hinzufügen (Add Element)
- Select the desired element from the matrix
- Place the marking on the plan
Each element marking consists of:
- Anchor point — Indicates the exact position of the element on the plan
- Label — Displays the name or designation of the element
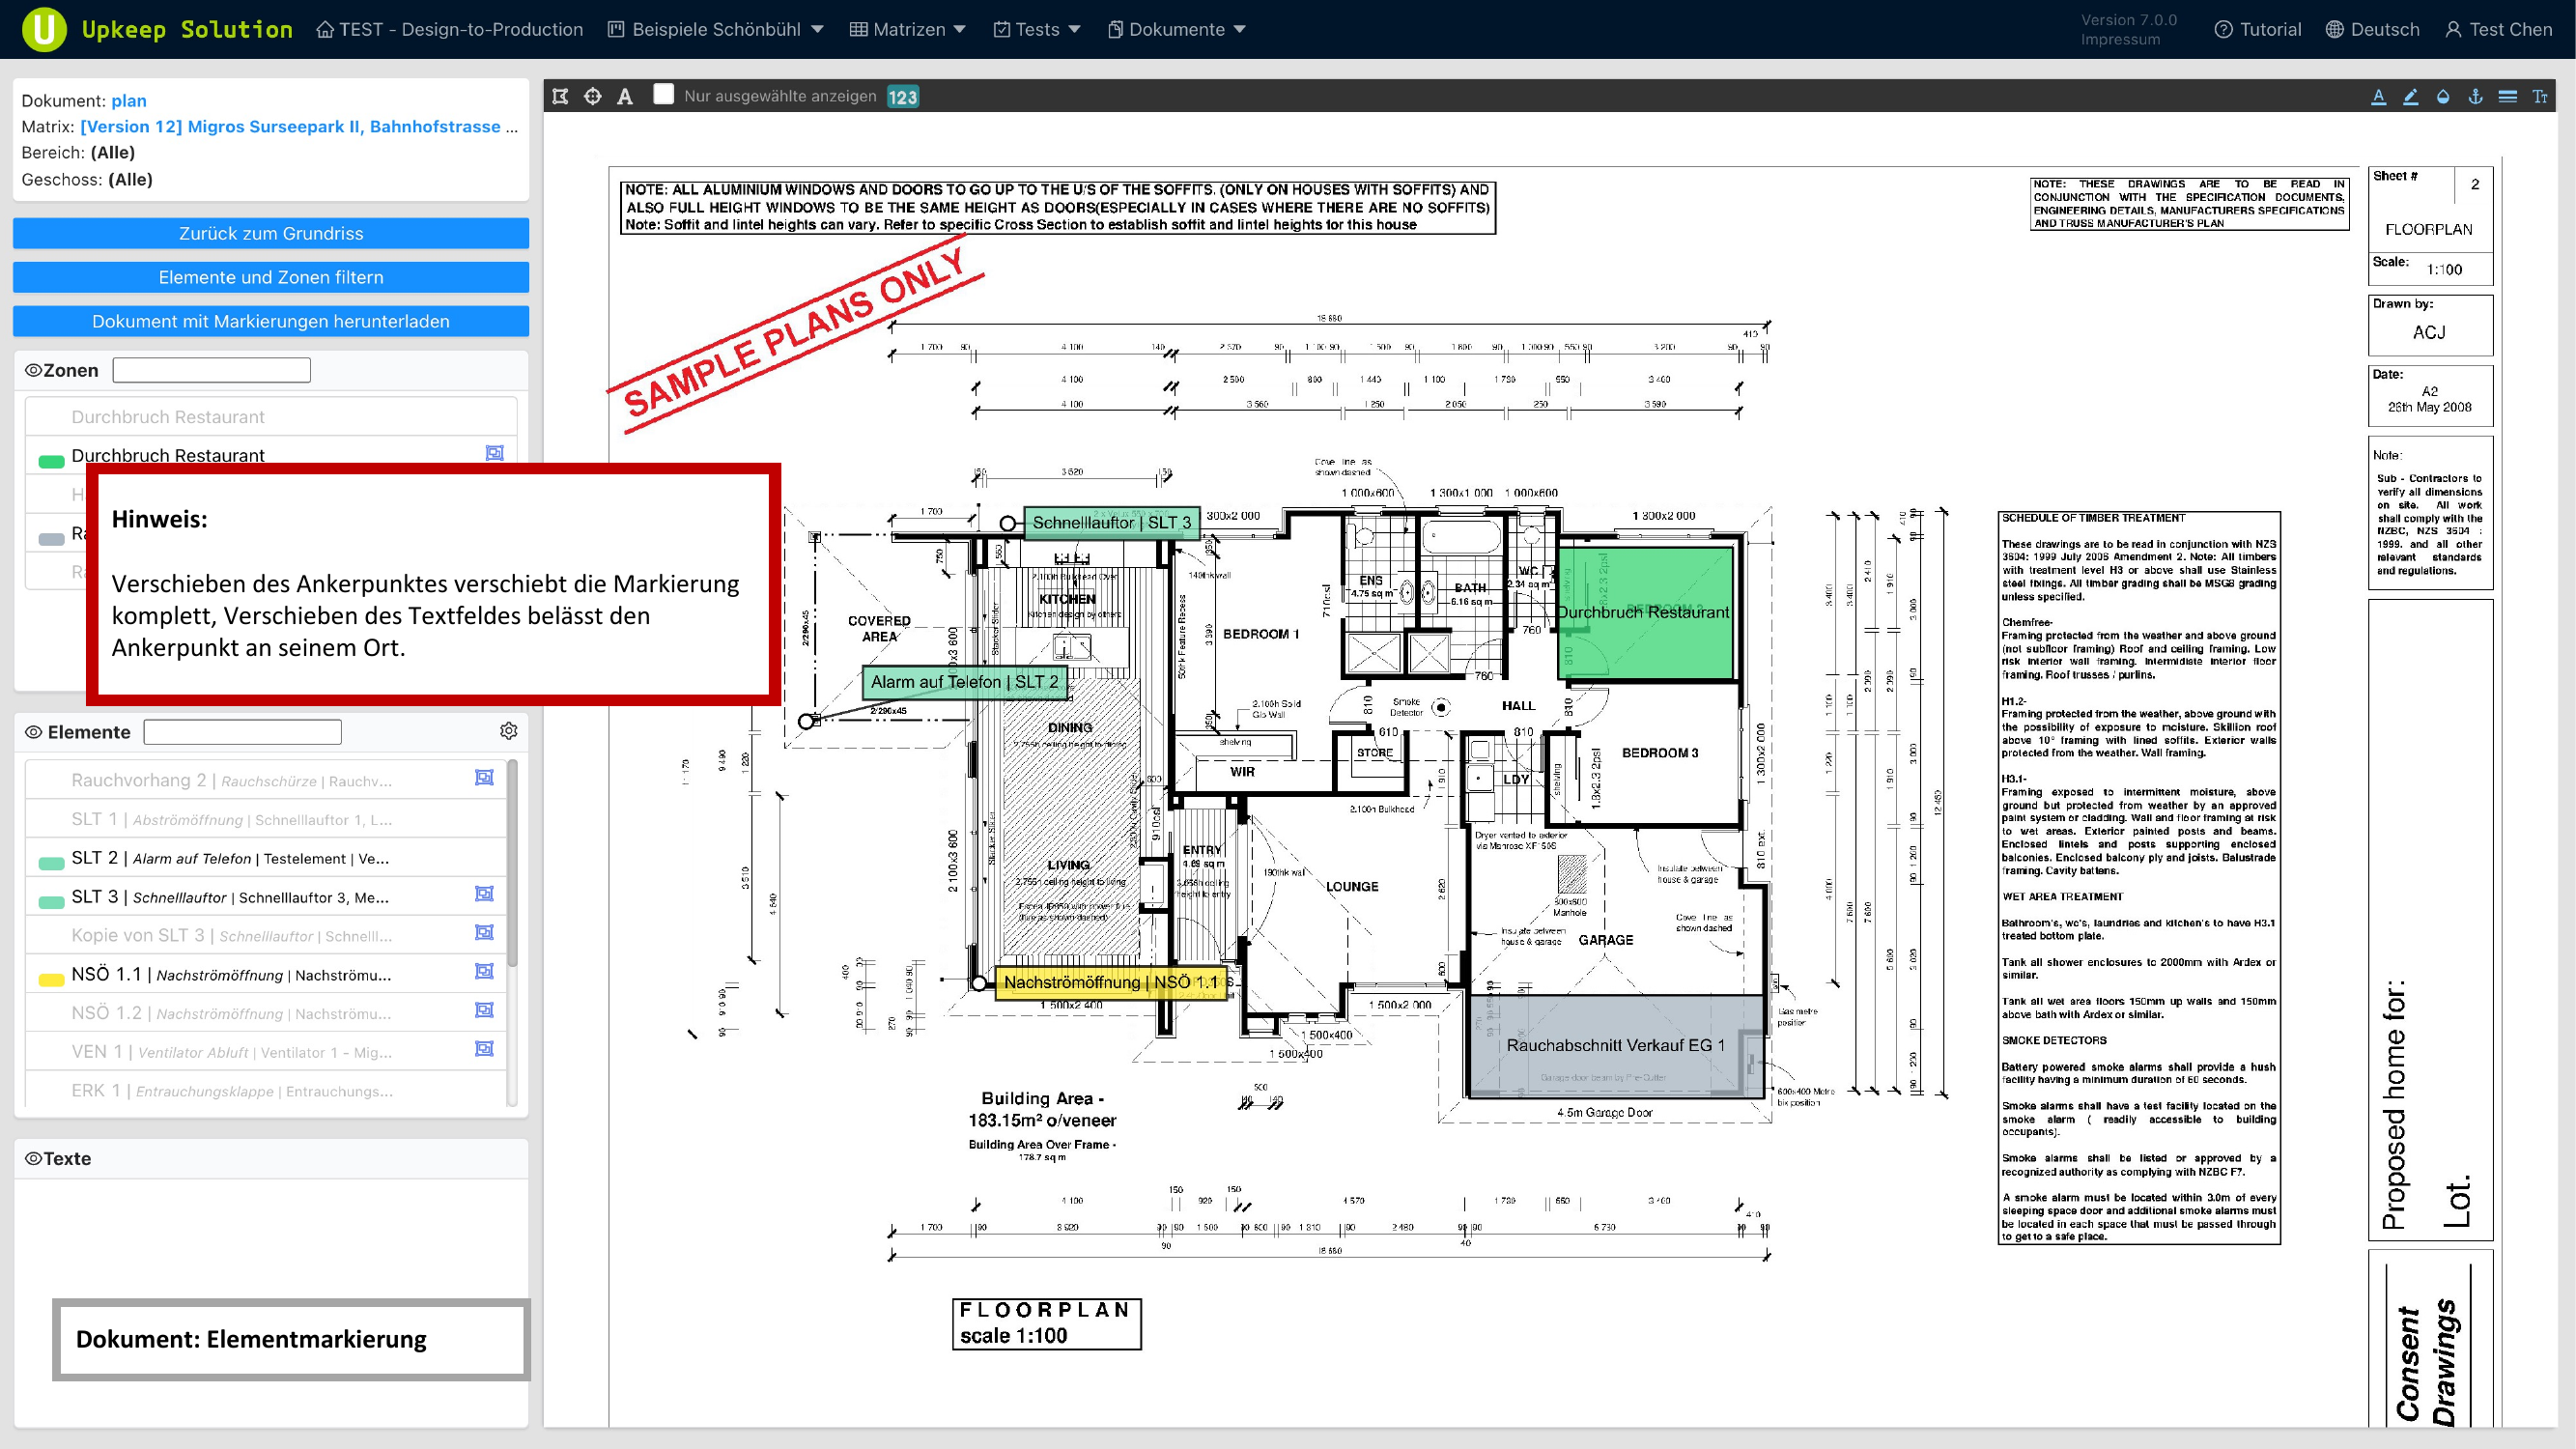
When you move the anchor point, the entire marking moves with it. When you move only the label, the anchor point stays in its position — useful for avoiding text overlaps.
Editing Markings
In editing mode, comprehensive filtering and control options are available.
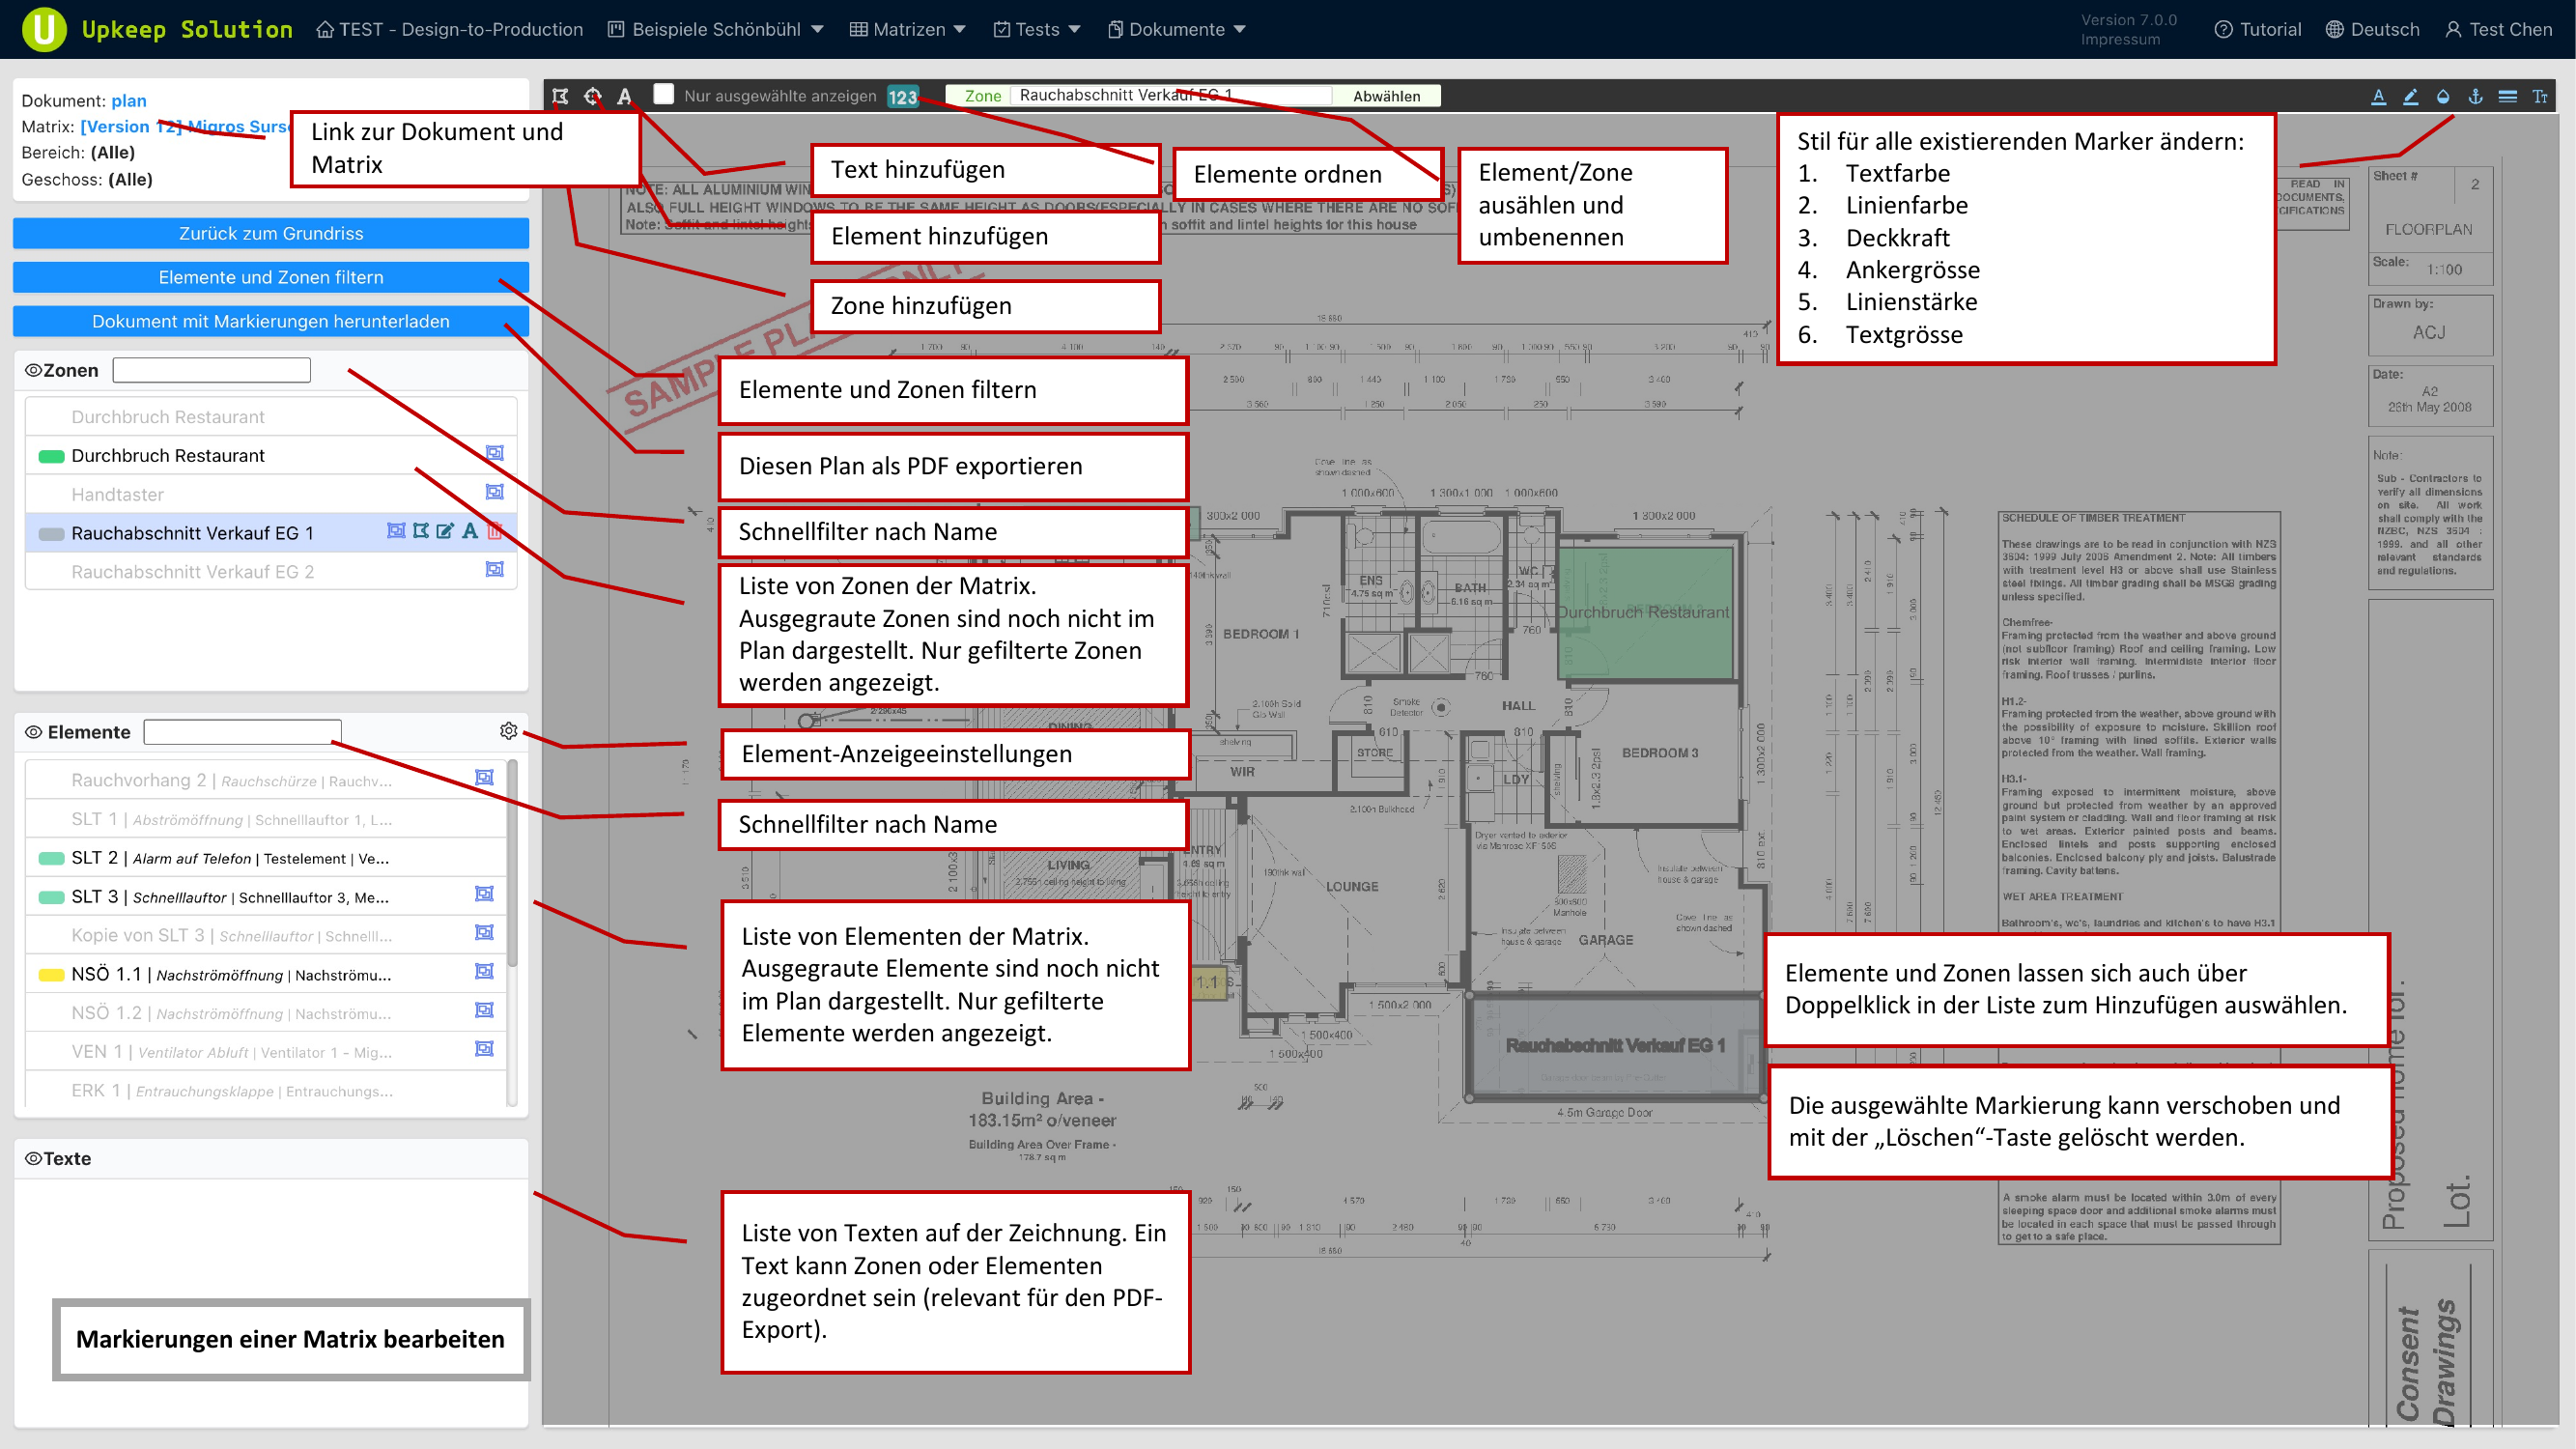
Filtering
Markings can be filtered by the following criteria:
- Testgruppe (Test Group) — Show only markings of a specific test group
- Bereich (Department) — Filter by department
- Geschoss (Floor) — Filter by floor
- Elementkategorie (Element Category) — Show only specific categories
- Standort (Location) — Filter by location name
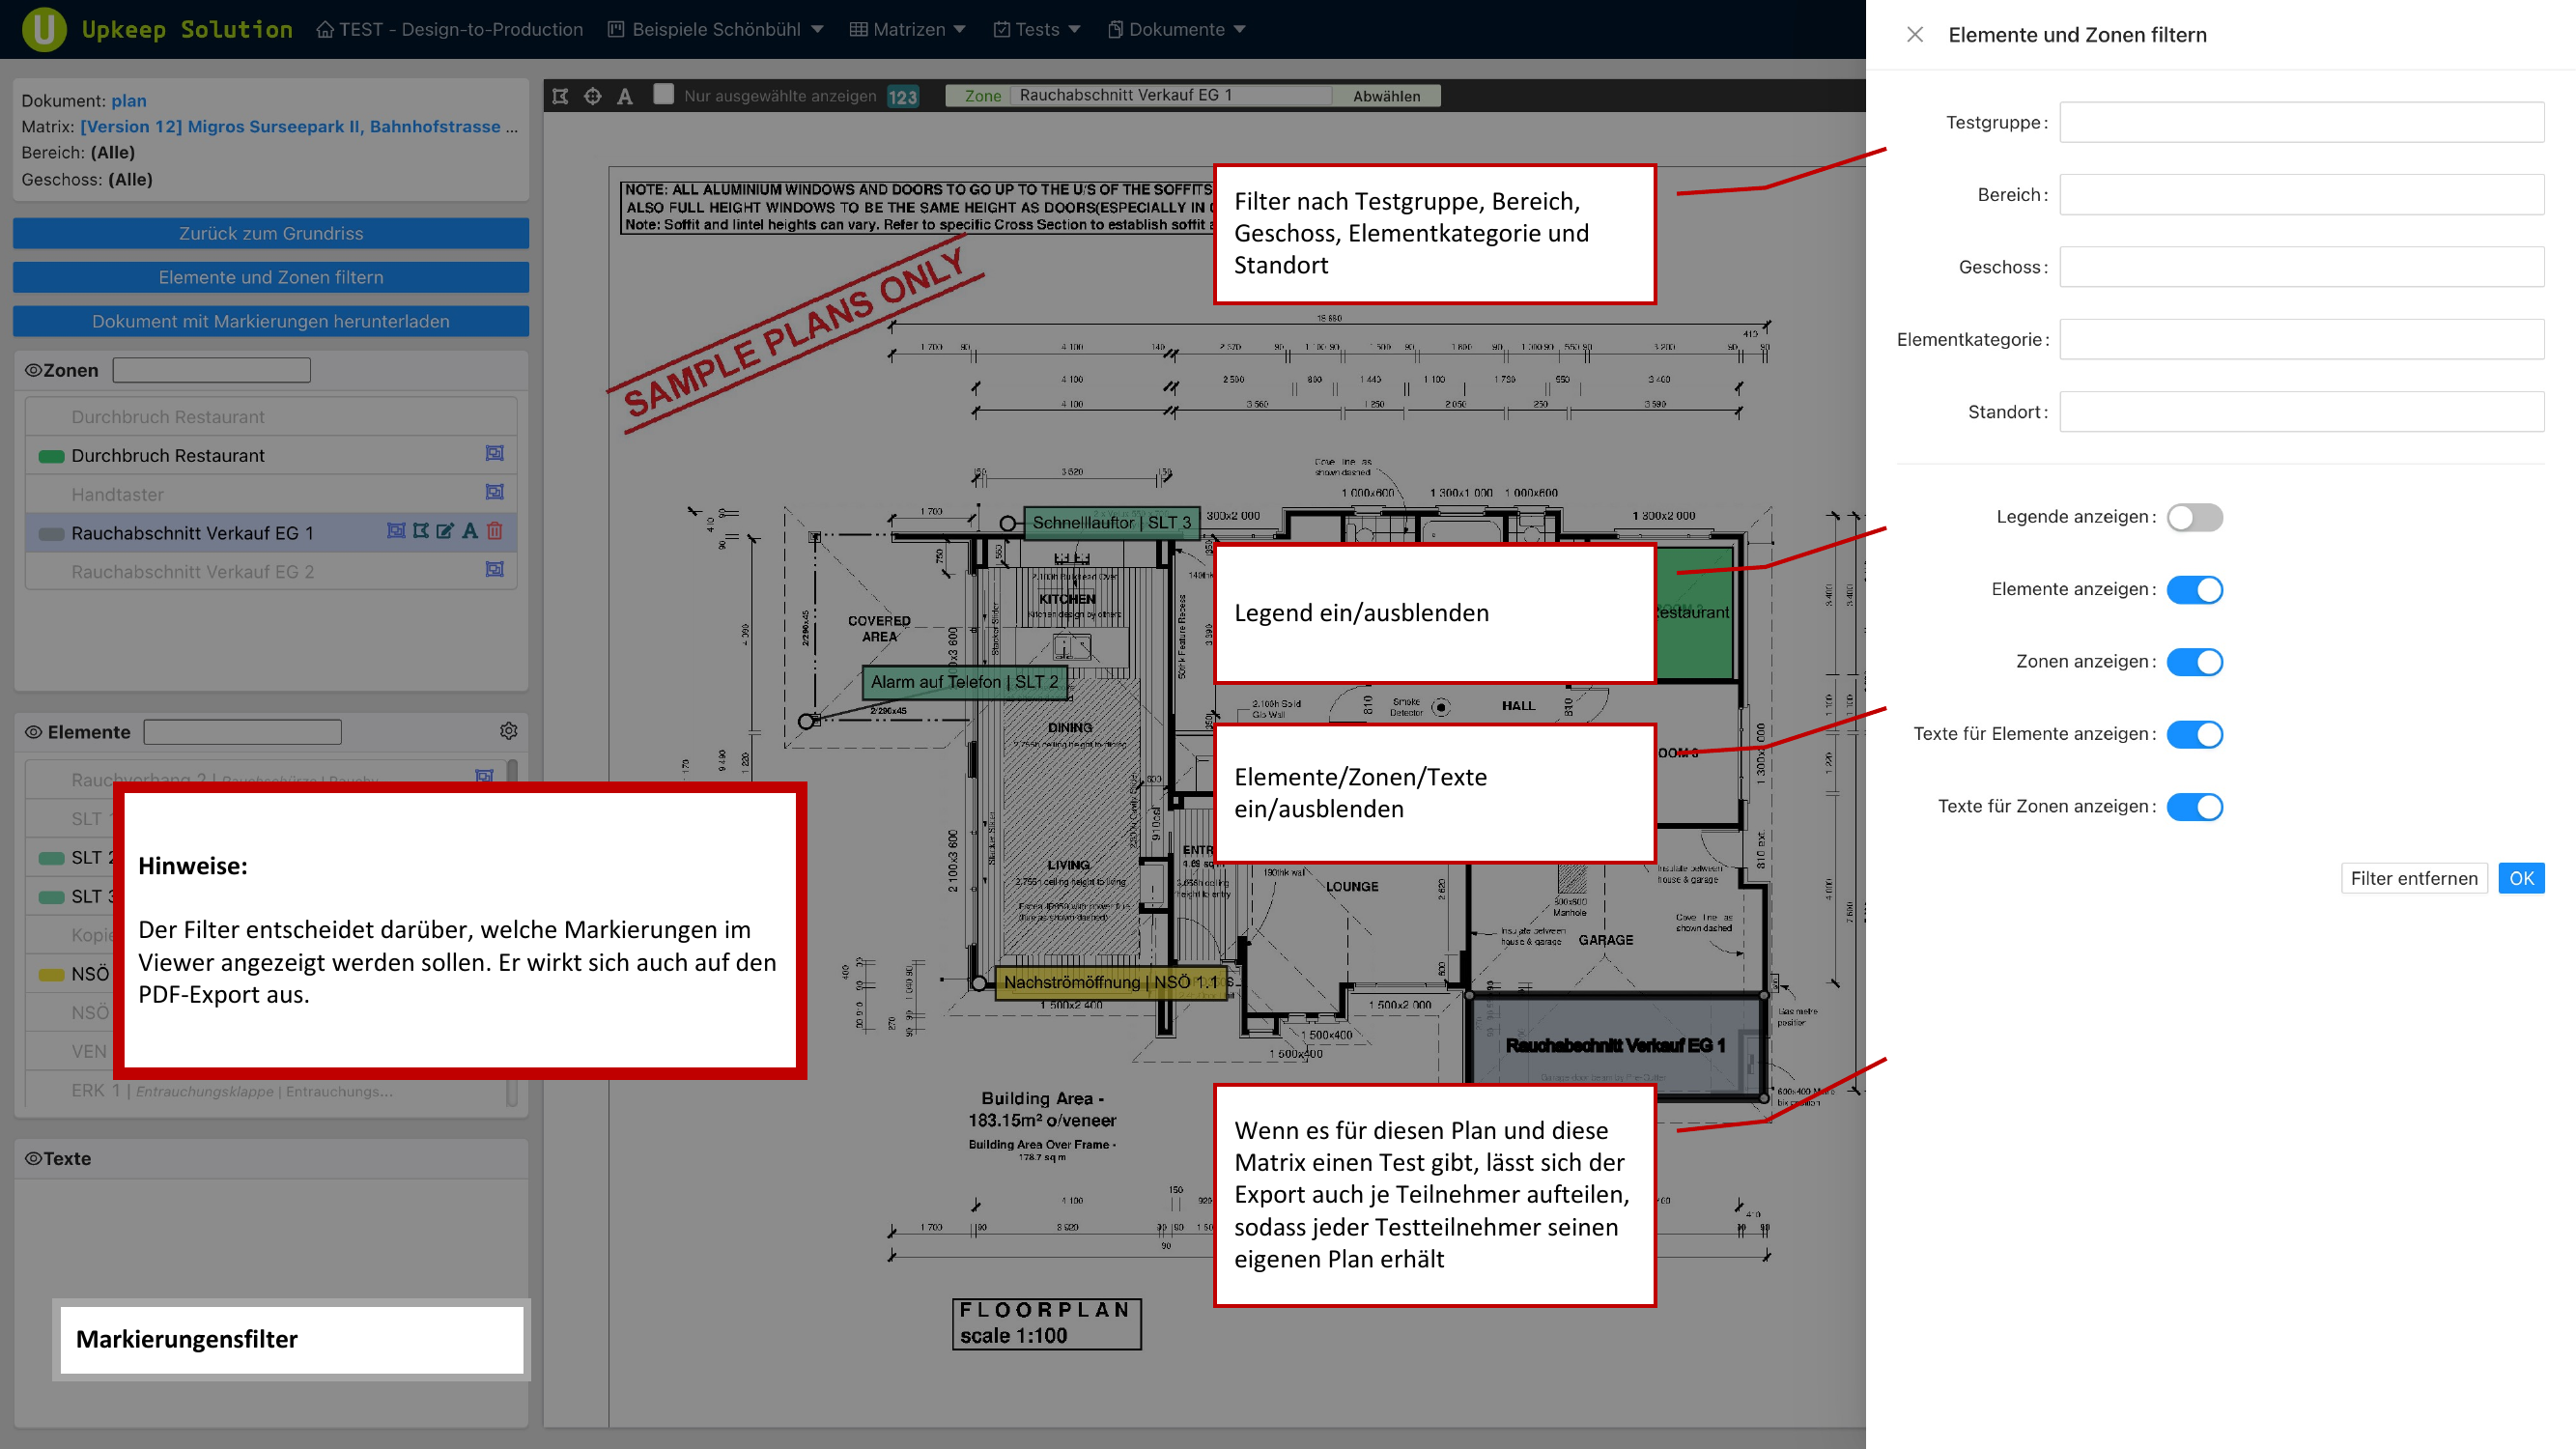
Controlling Visibility
Individual layers can be toggled on and off using switches:
- Legende (Legend) — Display the color assignments
- Elemente (Elements) — Show/hide all element markings
- Zonen (Zones) — Show/hide all zones
- Texte (Texts) — Show/hide labels
The active filters also affect the PDF export. Only the visible markings are exported.
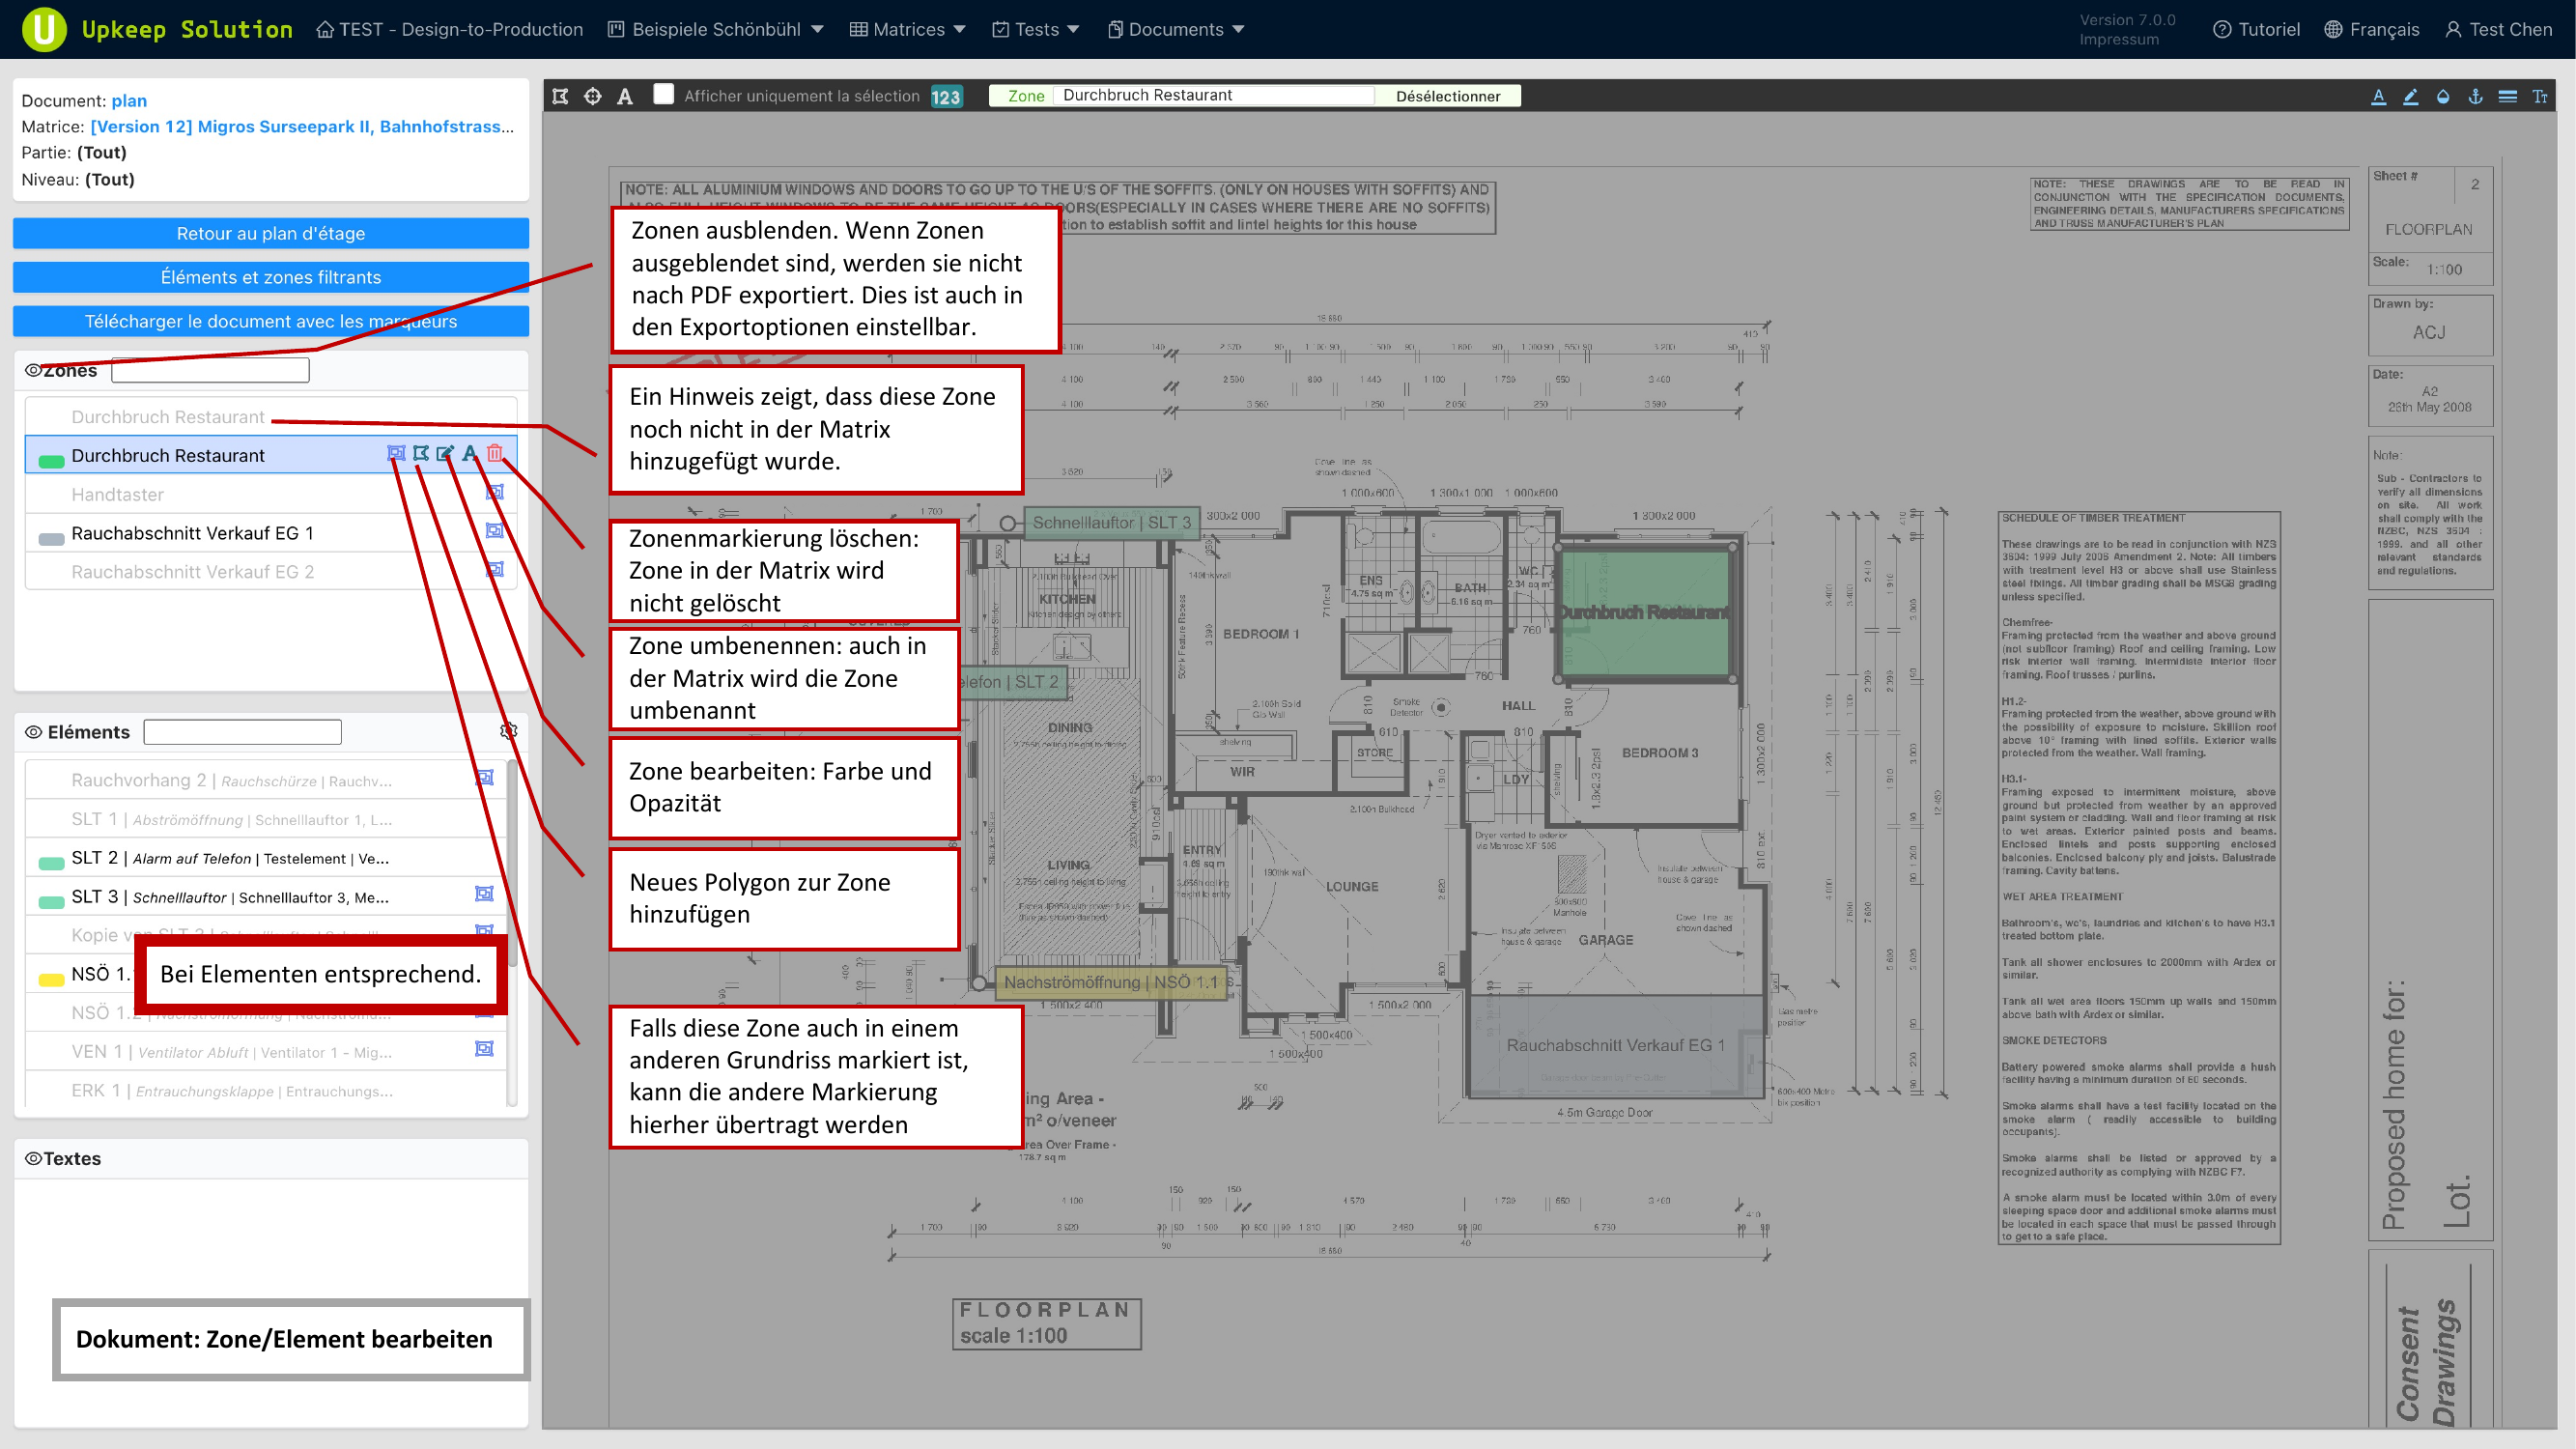
Managing Zones
The following actions are available for existing zones:
- Ausblenden (Hide) — The zone is excluded from the display and the PDF export
- Markierung löschen (Delete Marking) — Removes the zone marking from the plan; the zone in the matrix is preserved
- Umbenennen (Rename) — Changes the zone name both on the plan and in the matrix
- Farbe und Deckkraft bearbeiten (Edit Color and Opacity) — Adjust the appearance of the zone
- Polygon hinzufügen (Add Polygon) — Extend the zone with additional areas
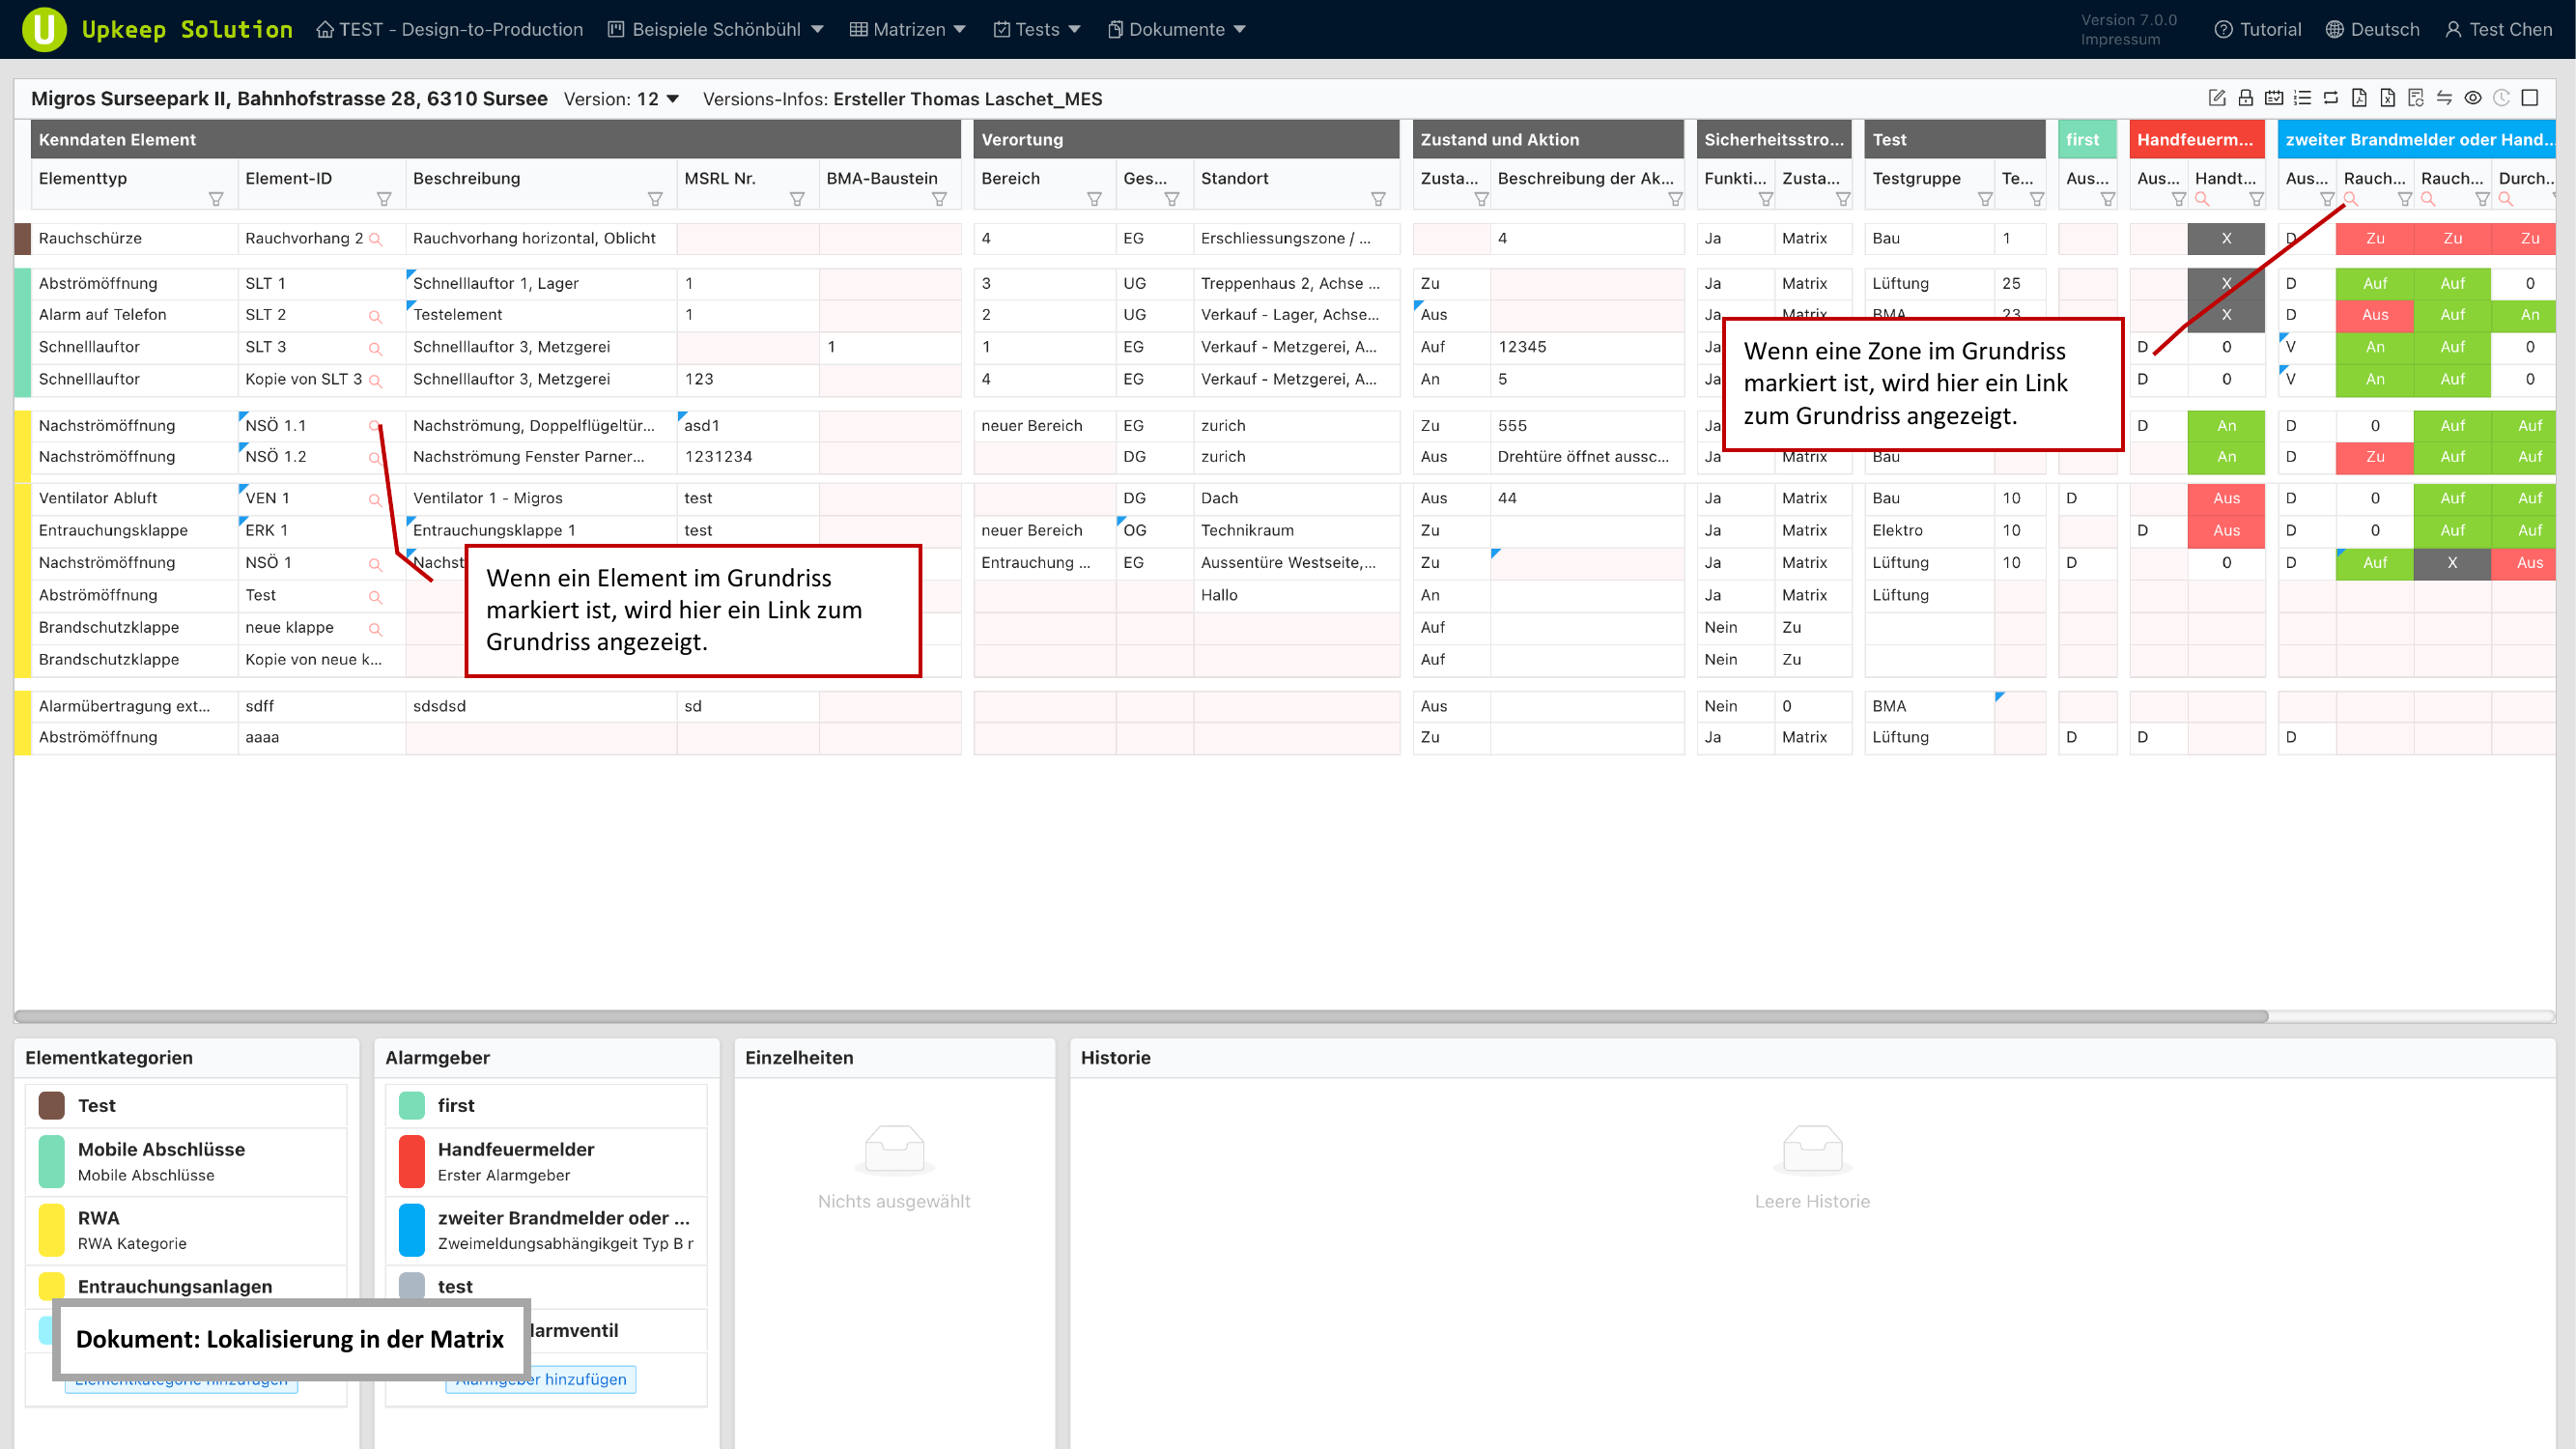
Localization in the Matrix
When an element or zone is marked on a floor plan, a link icon appears in the matrix table. This link takes you directly to the corresponding marking in the Plan Editor.
Plan Export
Plan export creates a PDF file of the floor plan with all visible markings.
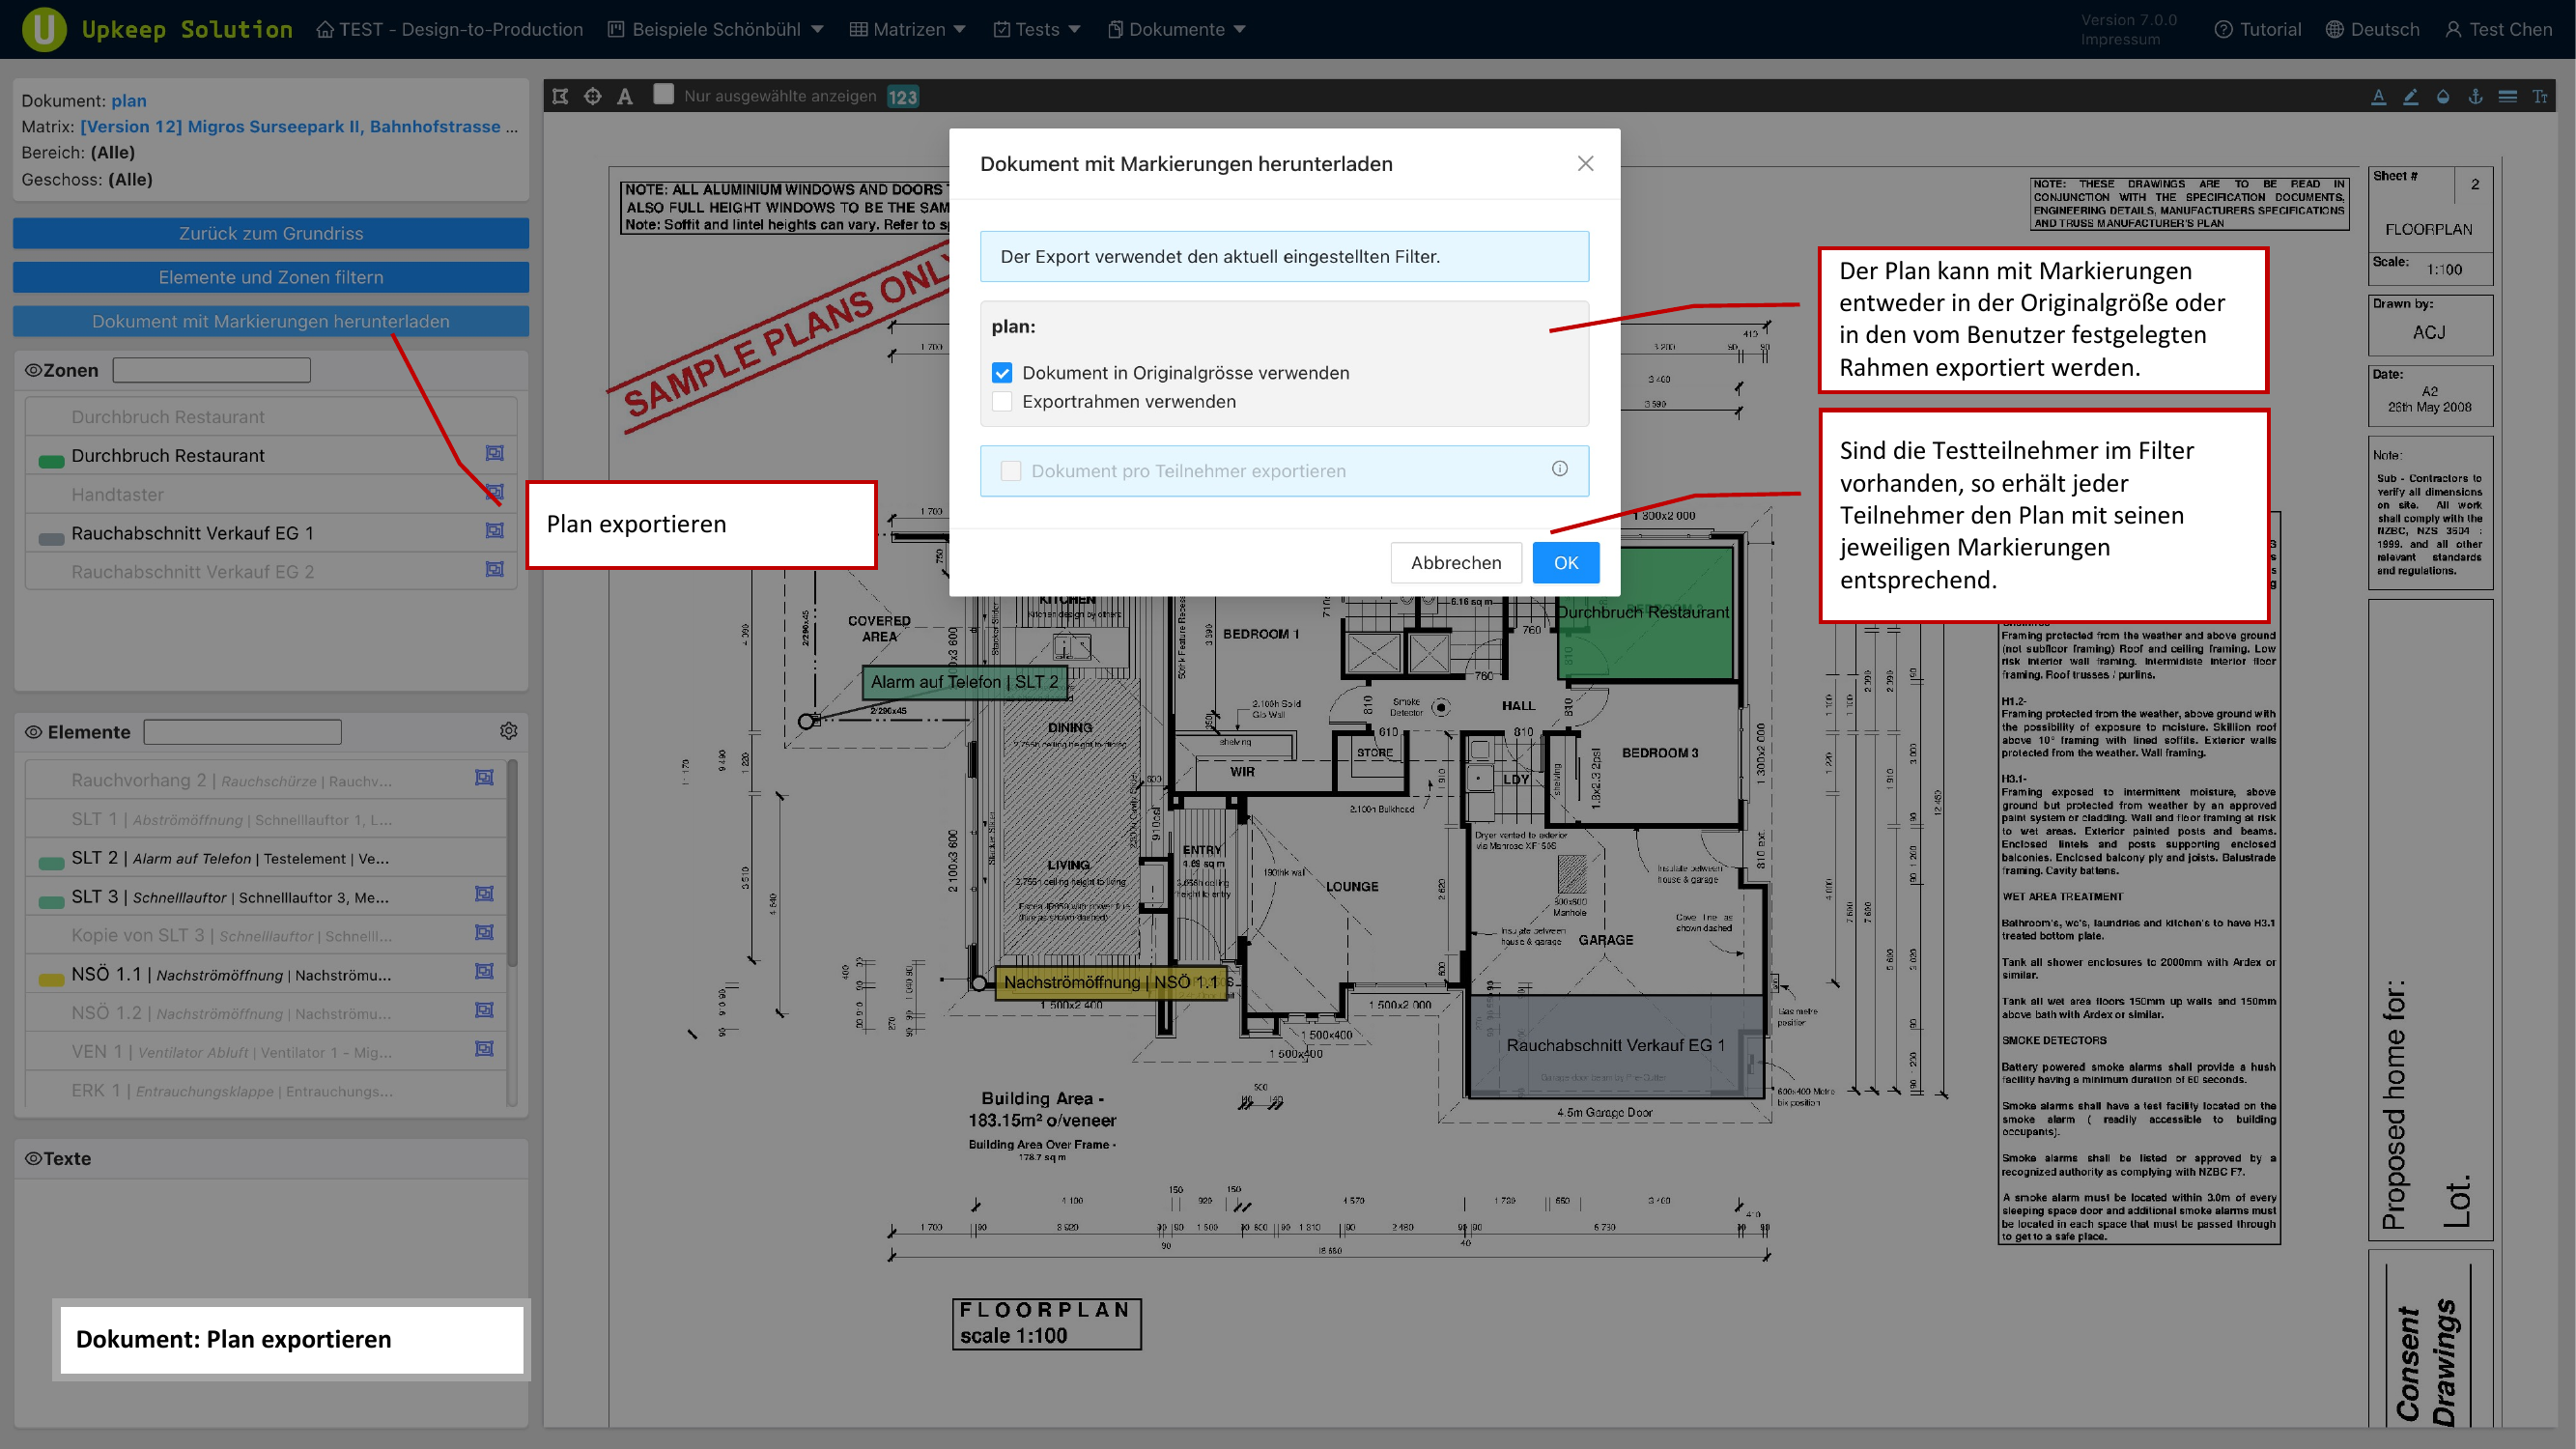
Export options:
- Originalgrösse (Original Size) — The entire plan is exported at its original resolution
- Custom frames — Only the defined export frames are output as individual PDF pages
- Filter consideration — The export includes only the markings that are visible according to the current filter
- Inspection participants — If inspection participants are selected in the filter, a separate plan is generated for each participant
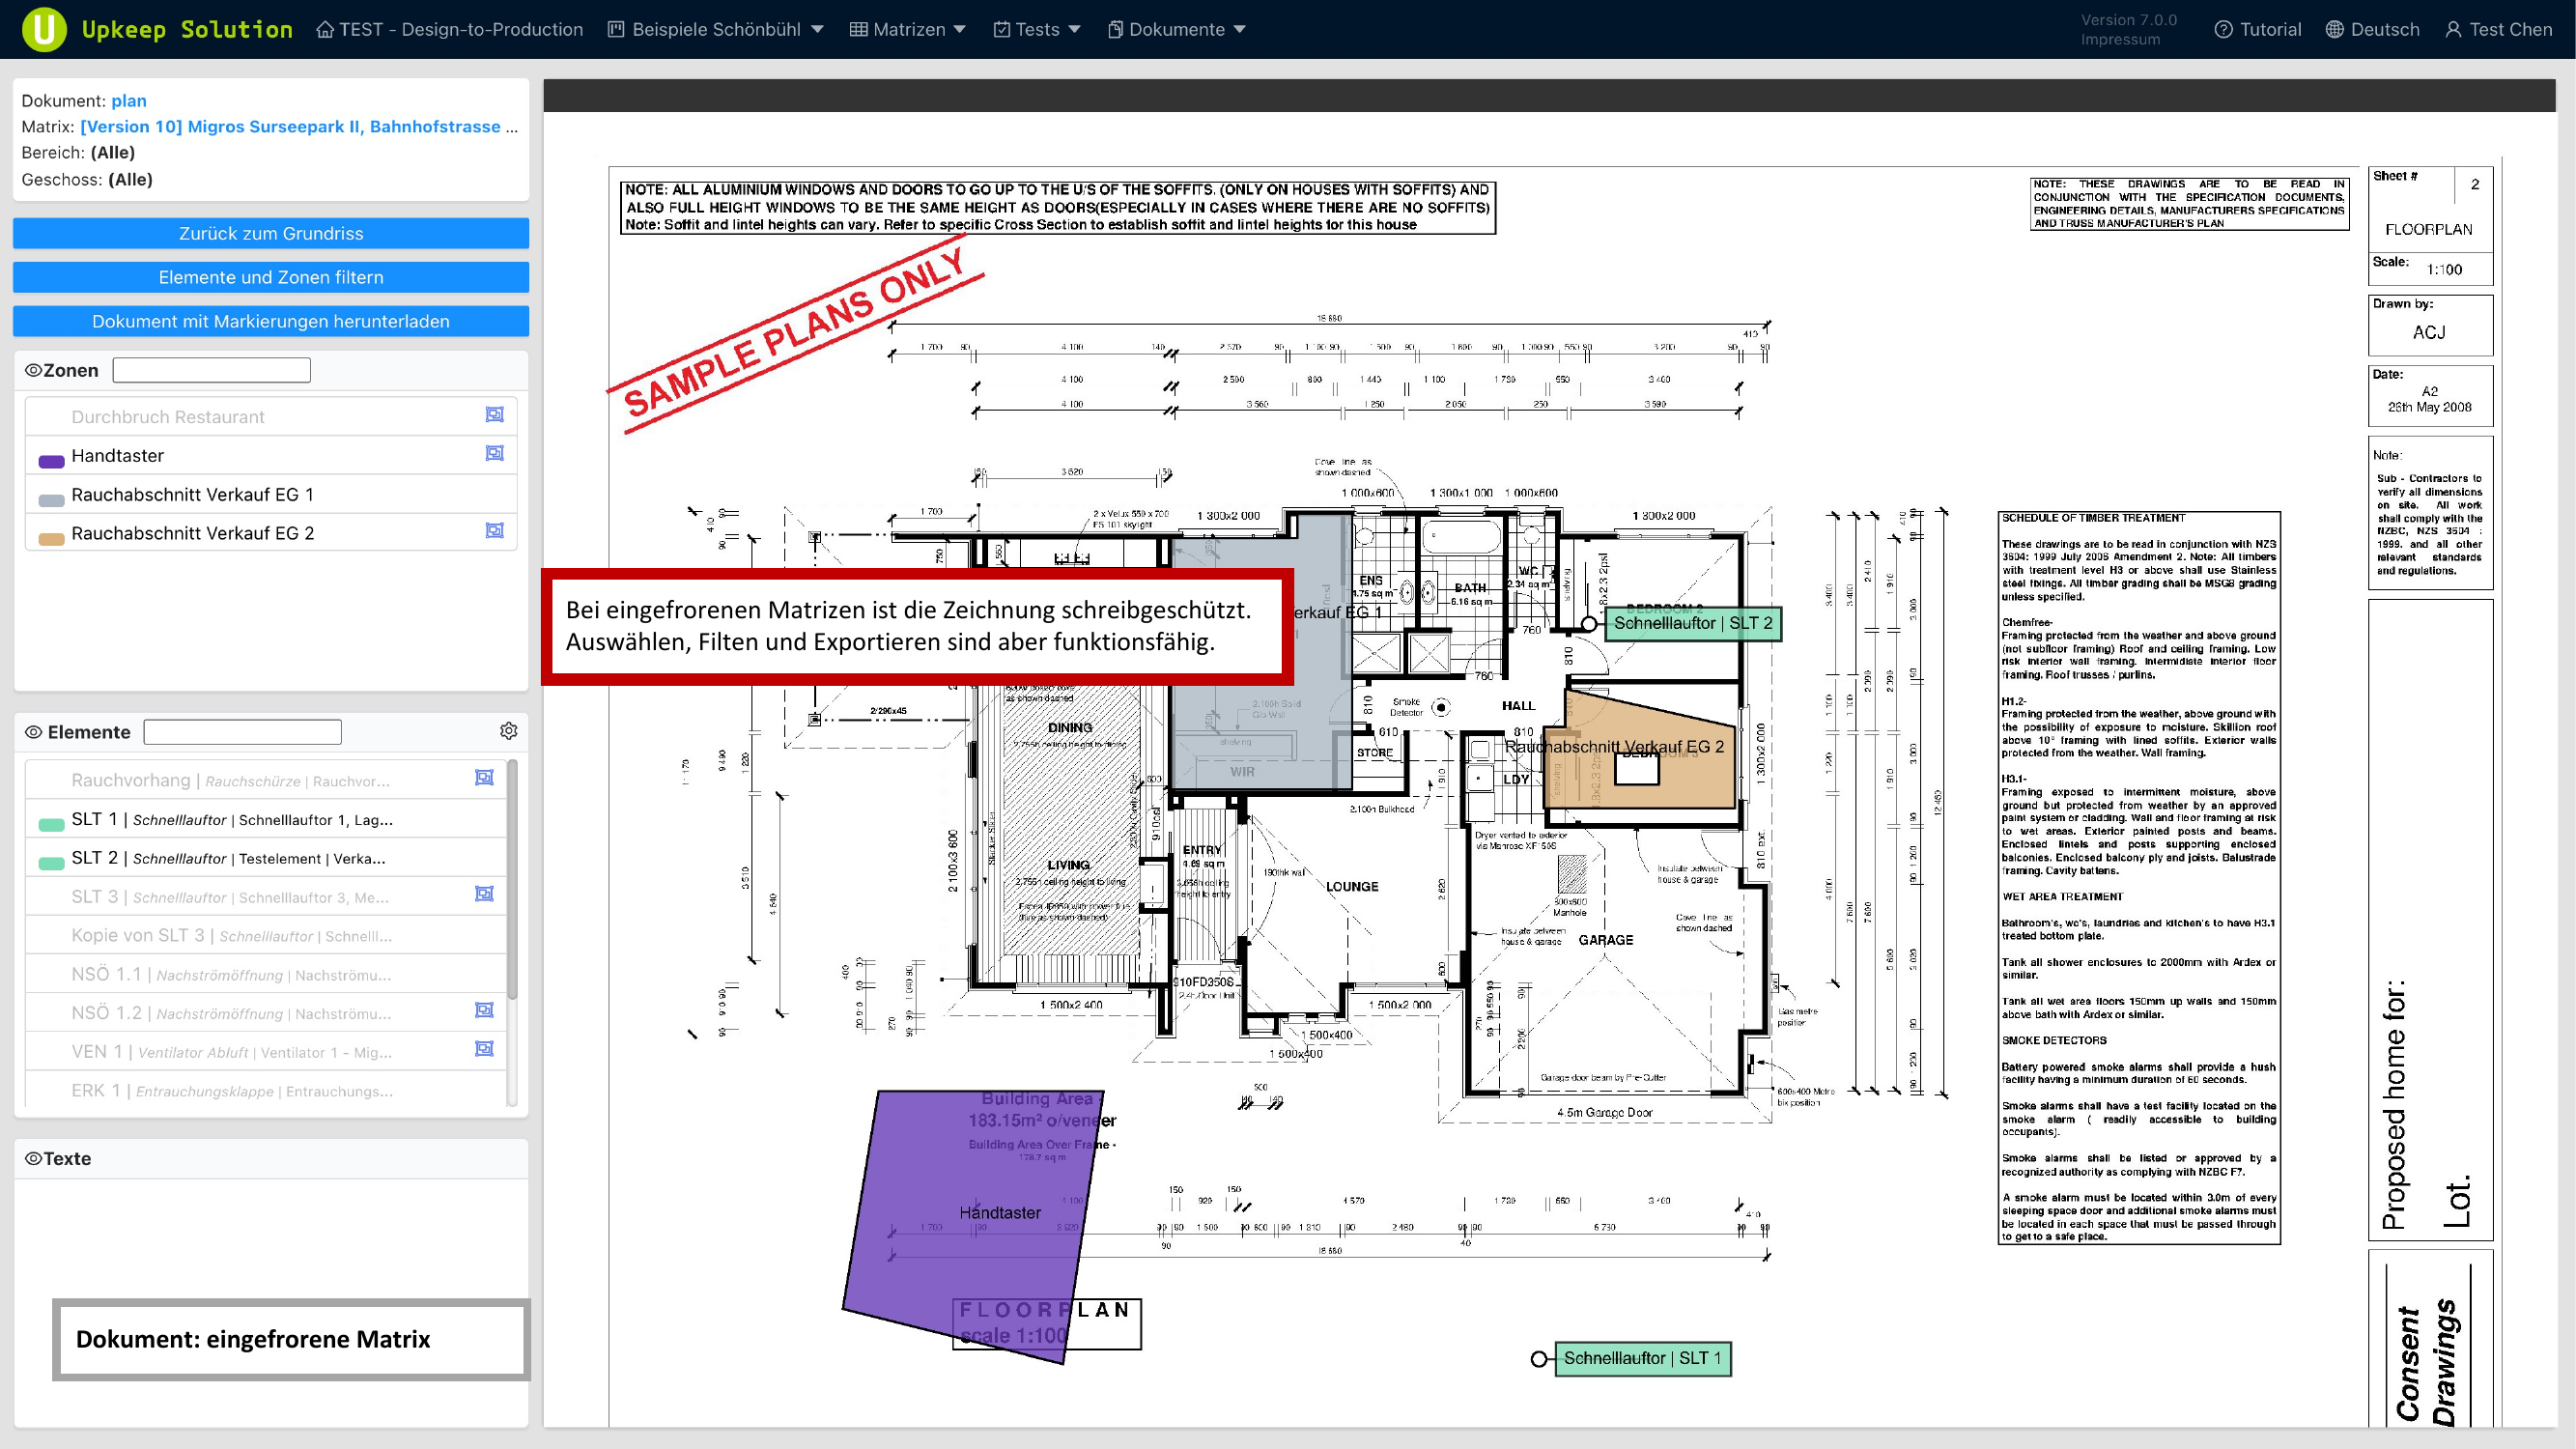
Frozen Matrices
For a frozen matrix, the floor plan is displayed in read-only mode. Editing markings is not possible, but the following functions remain available:
- View markings — All markings of the frozen matrix are displayed
- Filter — All filter functions are available
- Export — The plan can be exported as PDF with the frozen markings