Filters and Views
The desktop app offers powerful filtering and comparison features that allow you to precisely control the display of the matrix table and track changes between versions.
Visibility Filter
The Sichtbarkeitsfilter (Visibility Filter) lets you determine which columns are displayed in the matrix table. Open the filter using the corresponding button in the toolbar.
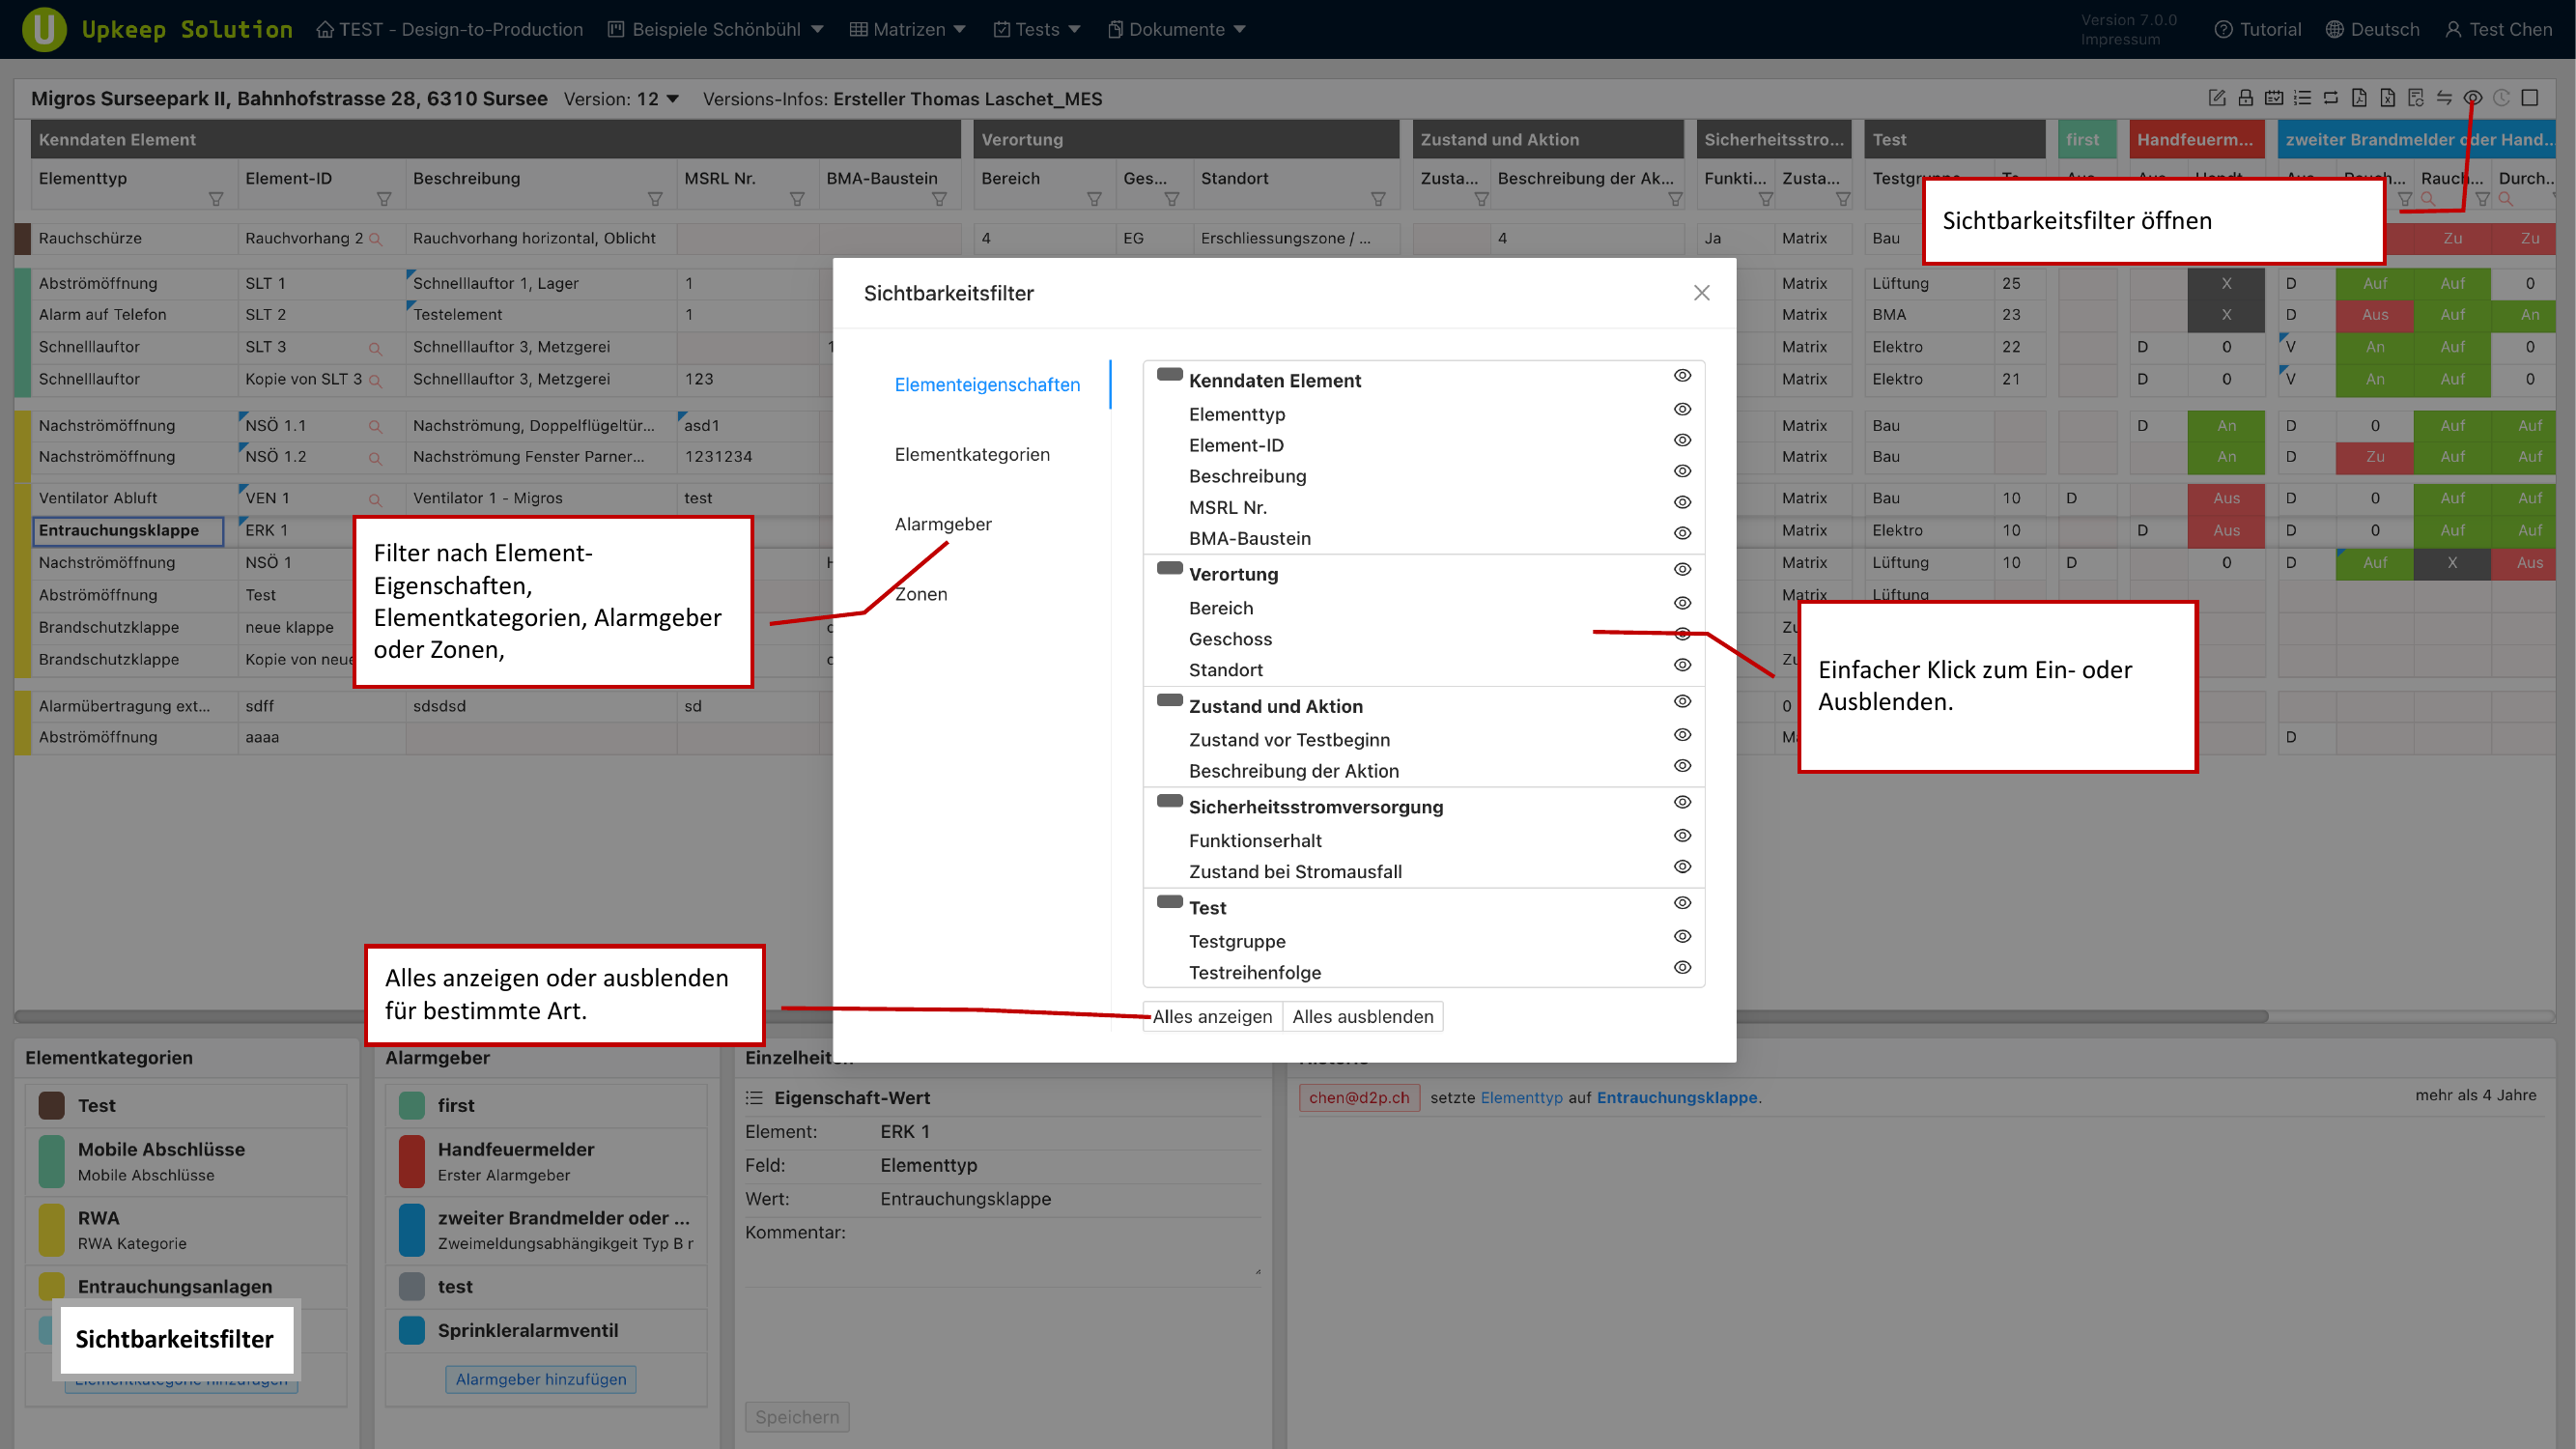
You can control the visibility of the following column groups:
- Element properties — e.g., designation, description, material
- Element categories — show or hide individual categories
- Alarm devices — show or hide specific alarm device columns
- Zones — show or hide zone columns
- Location fields — building, floor, room, etc.
- Inspection fields — inspection status, inspection date, and other test-related columns
Use the Alle anzeigen (Show All) and Alle ausblenden (Hide All) buttons to quickly toggle all columns of a group on or off. This lets you quickly reach a reduced view and selectively show only the columns you need.
Column Filter
The Spaltenfilter (Column Filter) allows you to filter the displayed rows based on column values. For example, you can display only elements of a specific type or with a specific status.
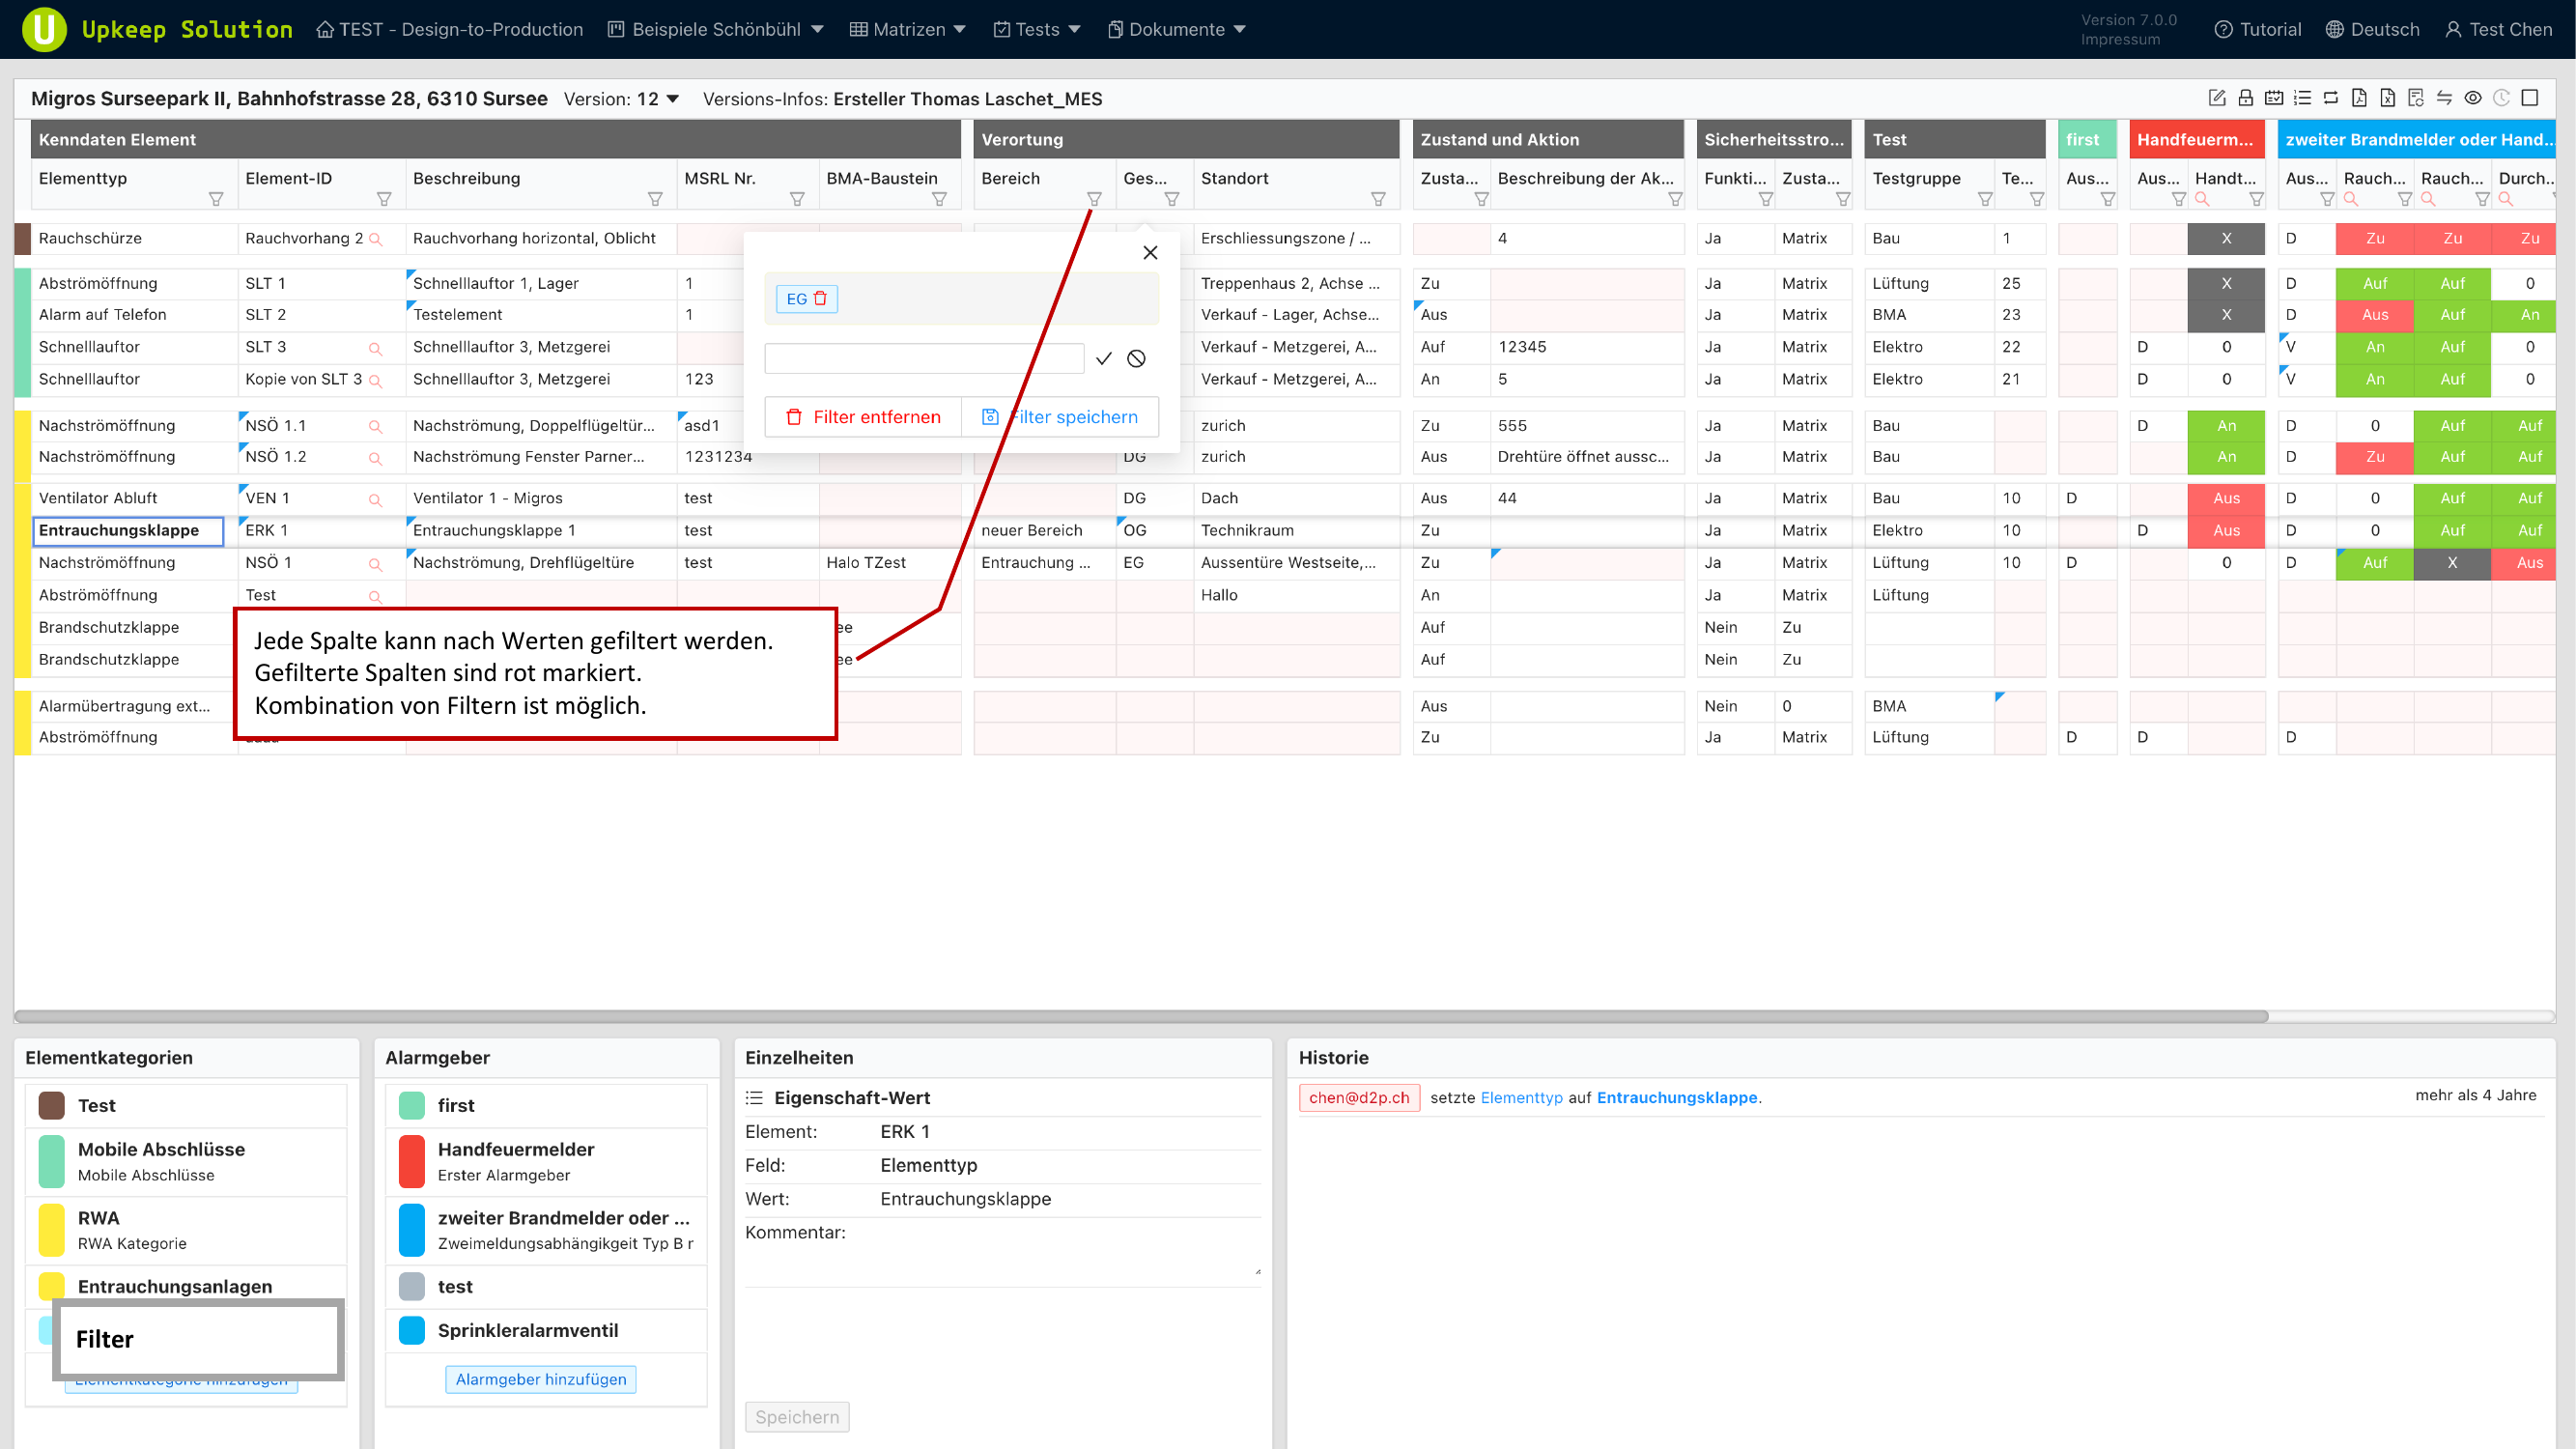
Applying a Filter
- Click the filter icon in the desired column header
- Select the filter value from the displayed list
- Confirm — the table now shows only rows that match the filter criteria
Combining Multiple Filters
You can apply filters on multiple columns simultaneously. The filters are combined — only rows that meet all active filter criteria are displayed.
Columns with an active filter are indicated by a red marker in the column header. This allows you to see at a glance which filters are active.
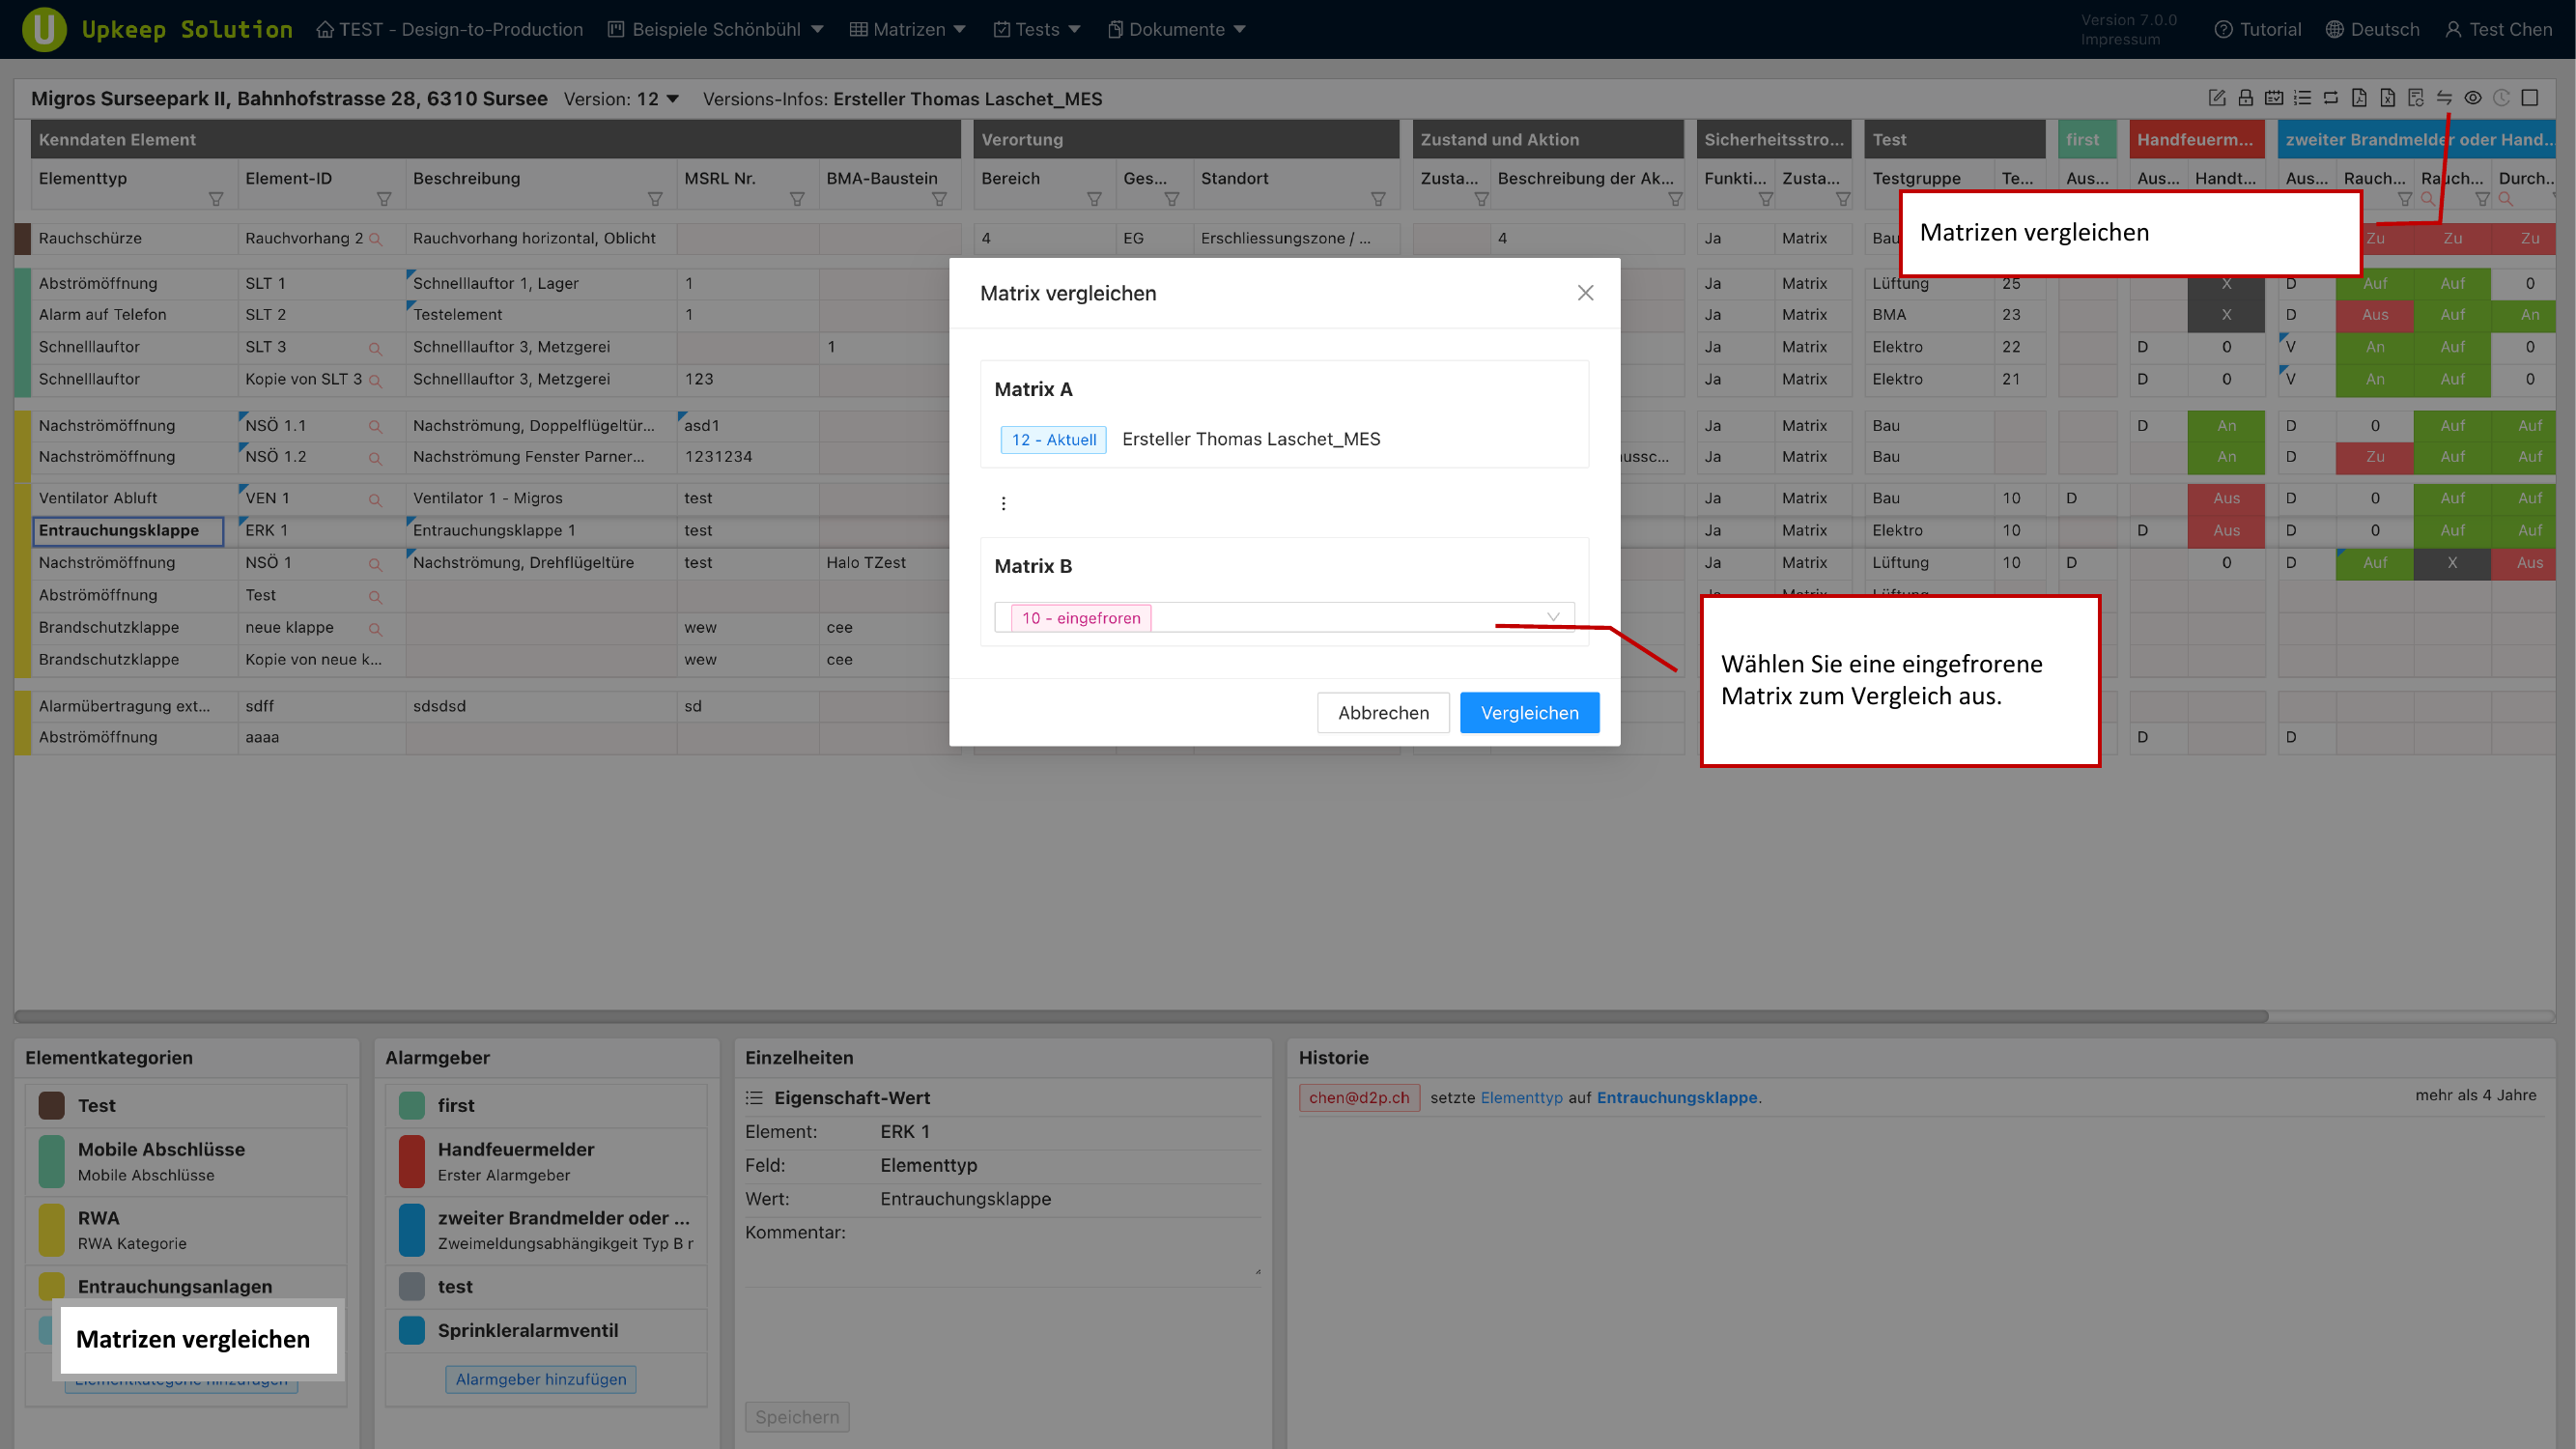
Matrix Comparison
The Vergleichsfunktion (Comparison Feature) allows you to compare the current state of the matrix with a frozen version. This is particularly useful for identifying changes since the last approval or inspection.
Starting a Comparison
- Open the comparison dialog via the toolbar
- Select the frozen version you want to compare against
- Confirm — the matrix is displayed with color highlighting to indicate differences
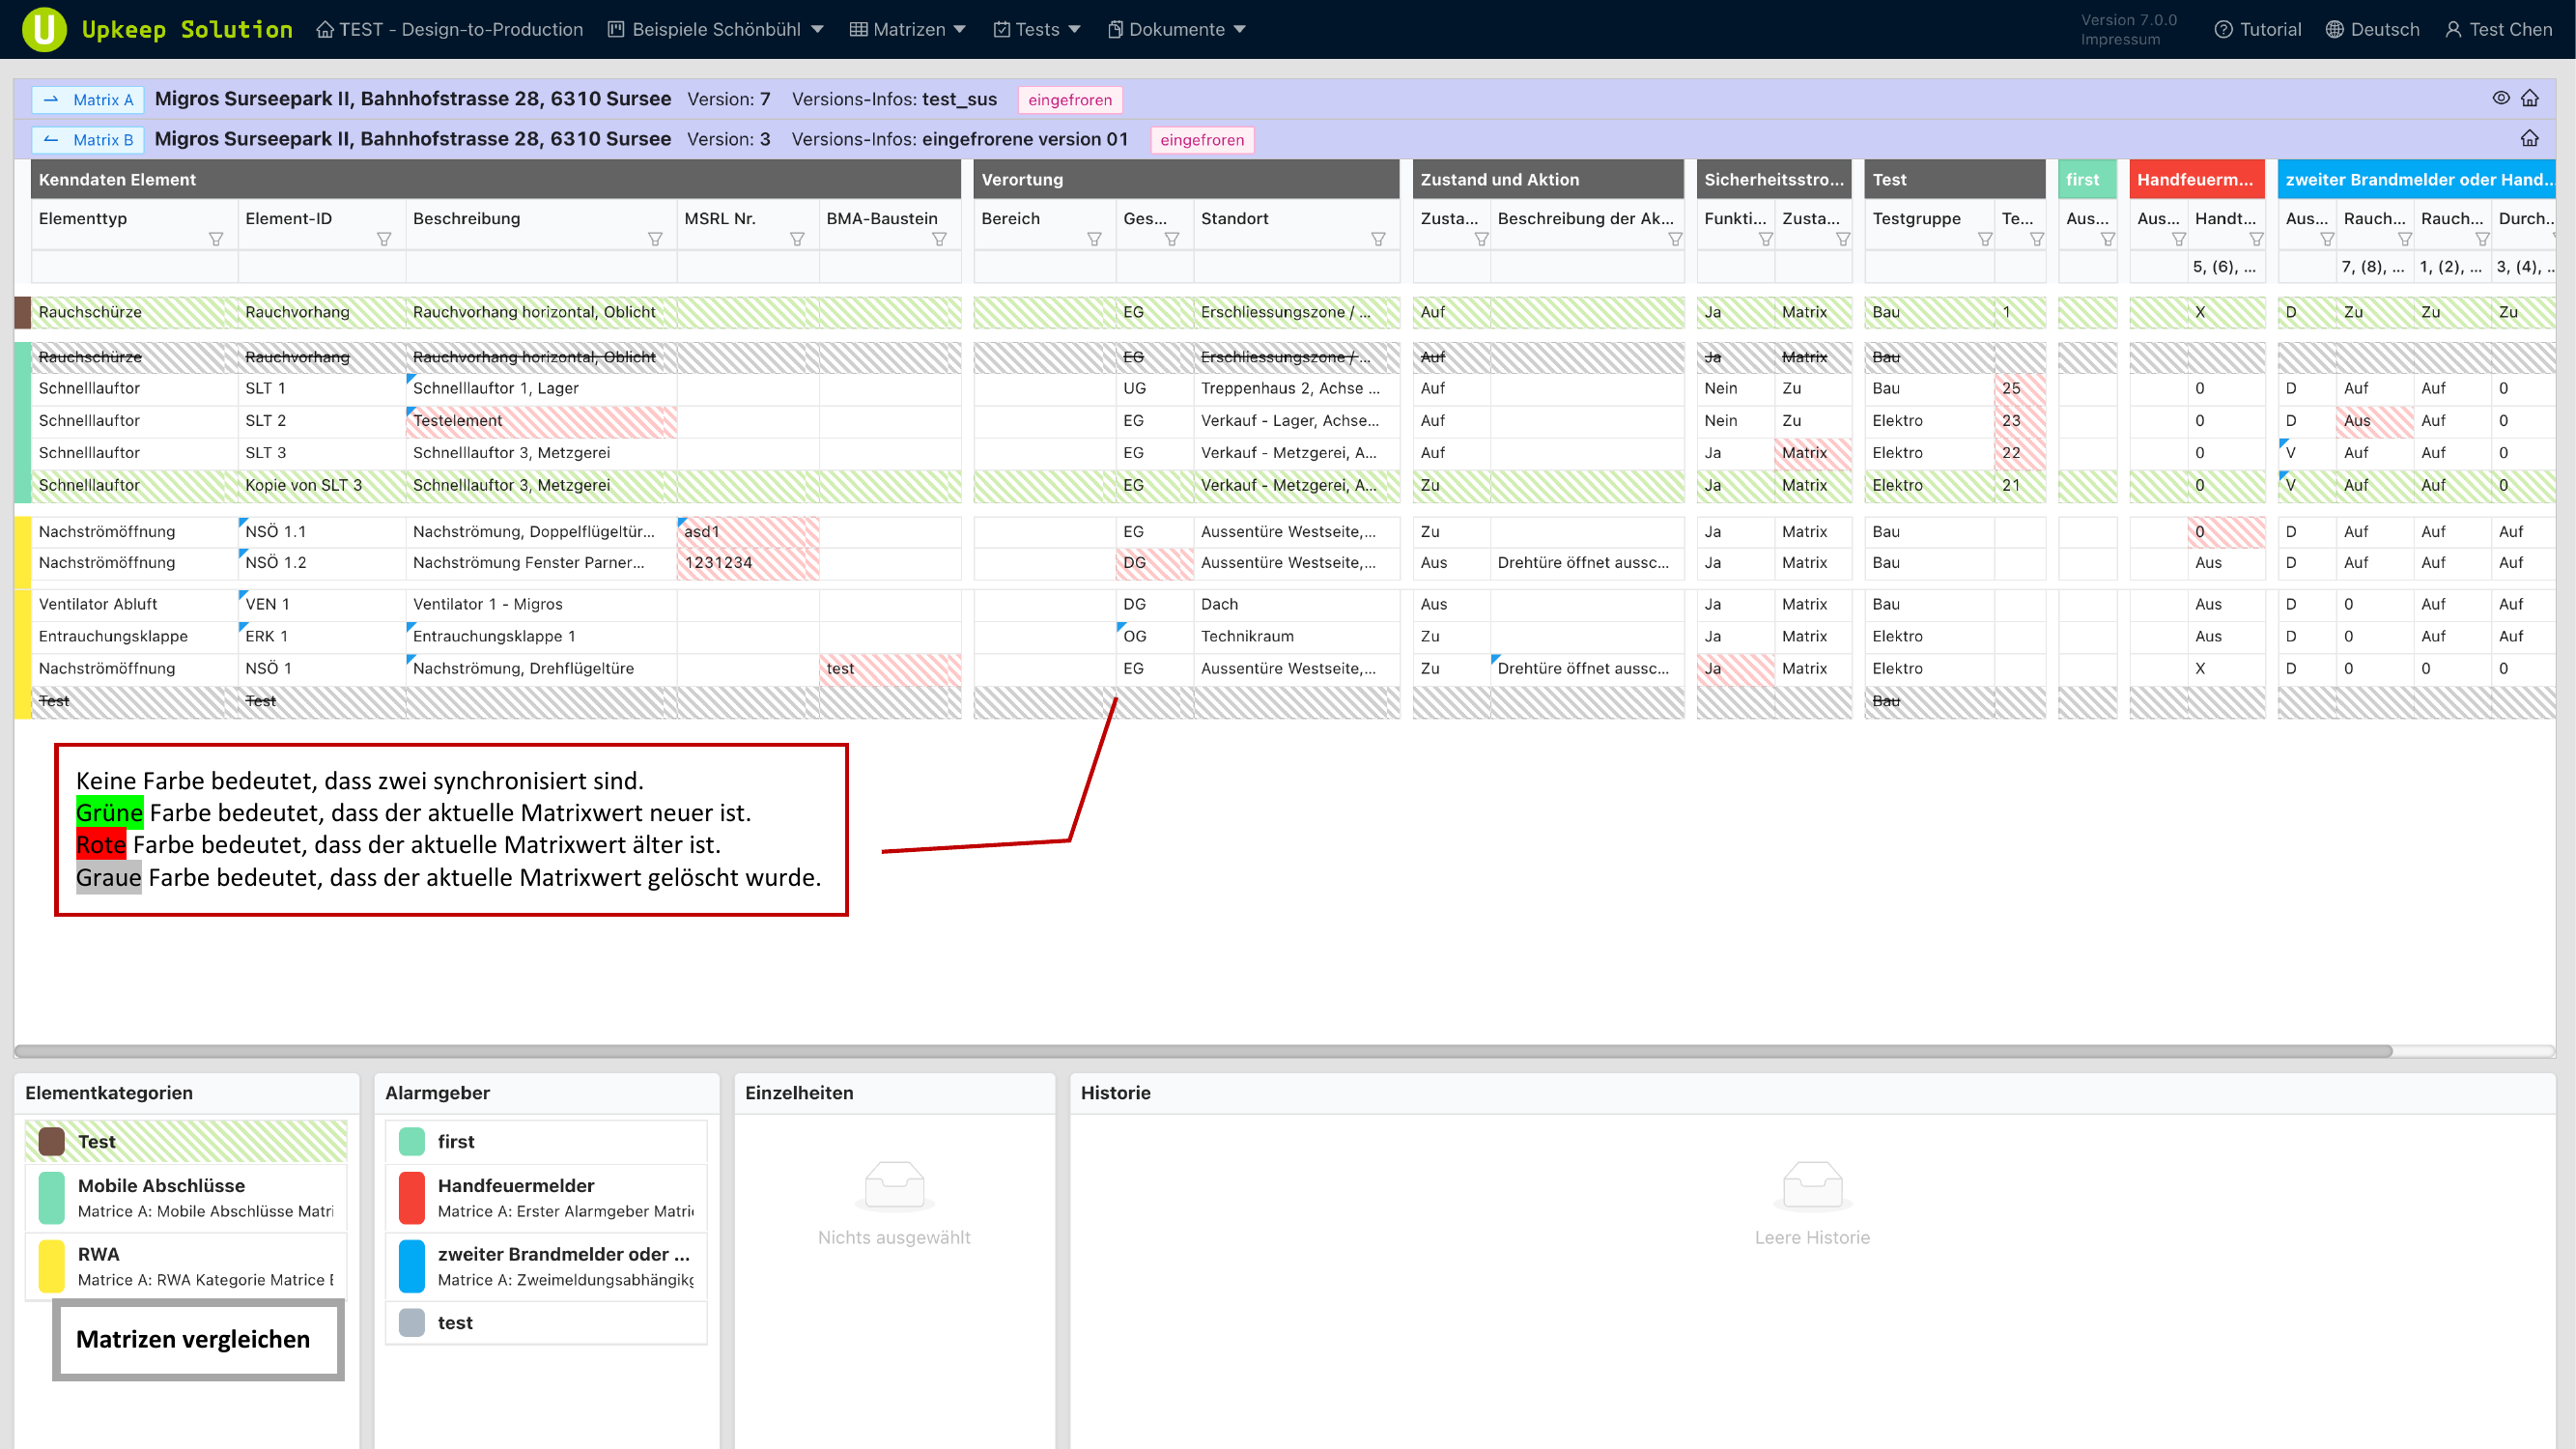
Color Coding
The comparison view uses the following colors to indicate differences:
| Color | Meaning |
|---|---|
| No color | Cell is identical — the current state and the frozen version match |
| Green | The current state is newer than the frozen version |
| Red | The current state is older than the frozen version (value was reverted) |
| Gray | The element has been deleted since the frozen version |
For matrix comparison, at least one frozen version must exist. For information on freezing a matrix, see Matrix Tools.